1/2/97 10:34am (Right) hw_pig.fm5 EPSON Stylus COLOR 400
1/97 EPSON Stylus COLOR 400 - 11
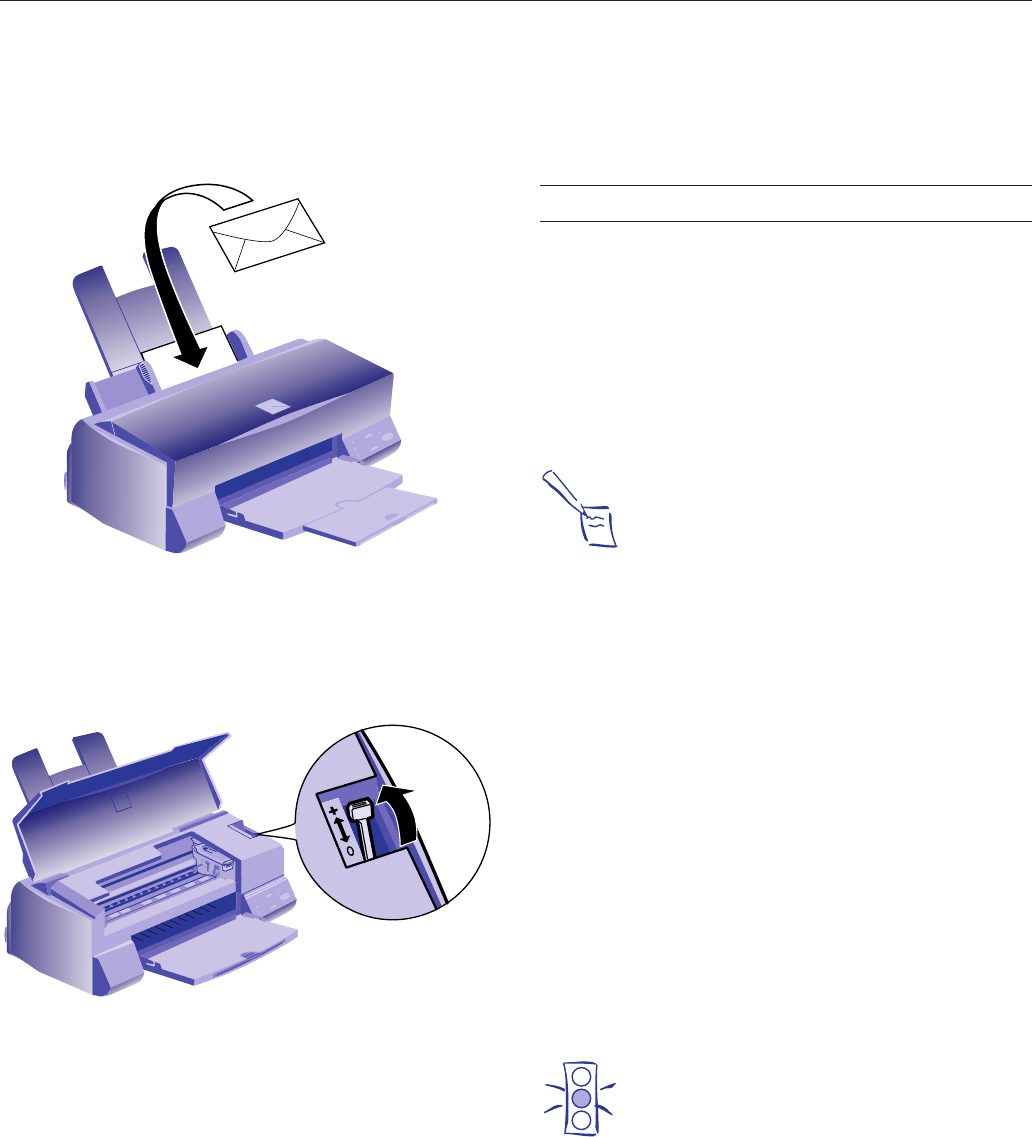
Envelopes
You can load up to 10 envelopes as shown. Select
Plain paper
as your Media Type setting and don’t use the
Fine - 720 dpi
Print Quality setting.
If ink smears when printing on envelopes or other thick
media, set the adjust lever to the + position. To do this, open
the printer cover and position the lever as shown. Then close
the cover and print. (Be sure to return the lever to the 0
position before printing on other media.)
EPSON Photo Quality Index Cards
You can load up to 30 index cards with a support sheet
(packed with the cards) or a sheet of plain paper beneath the
stack. If ink smears on the cards, set the adjust lever to the
+ position, as described above.
EPSON Photo Quality Self Adhesive Sheets
and Iron-On Transfer Paper
You should load these media one sheet at a time. Make sure
your adhesive sheets are fully adhered to their backing sheet
before you load it.
When printing on transfer paper, be sure to invert the image
by selecting a
Flip Horizontal option in your software or the
printer driver. Follow the instructions in the paper package to
iron the image onto a surface.
Printer Care
Cleaning the Print Heads
If your printed image is unexpectedly light or faint, or dots are
missing from the image, you may need to clean the print
heads. This unclogs the nozzles so they can deliver ink
properly.
Cleaning the print heads uses ink, so to conserve ink, clean
them only if print quality declines.
Note:
If a
B black ink out or A color ink out light is flashing or
on, you need to replace an ink cartridge, not clean the
print heads.
There are two ways to clean the print heads: (1) using the
Head Cleaning utility in the printer driver, or (2) using the
printer’s control panel buttons.
Using the Head Cleaning Utility
1. Make sure the printer is turned on and not printing, and the
B black and A color ink out lights are off.
2. Access the printer driver.
3. Click the
Utility tab.
4. Click the
Head Cleaning icon.
5. Follow the instructions on the screen to clean the print
heads. Cleaning takes about two minutes, during which the
printer makes some noise and the
Ppower light flashes. It’s
finished when the
Ppower light stops flashing.
6. Now check if the print heads are clean and reset the cleaning
function by running a nozzle check. Make sure paper is
loaded in the printer, then click
Print nozzle check pattern
on the Head Cleaning utility screen.
Caution:
Never turn off the printer while the
Ppower light is
flashing.
If your print quality has not improved, repeat the steps above.
Using the Control Panel
1. Make sure the printer is turned on and not printing, and that
the
B black and A color ink out lights are off.


