


Page 9For technical questions, please call 1-800-444-3353.Item 47712
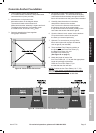
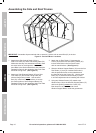
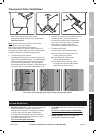
3. Attach a Side Ceiling Plate (36) flat against the
inside of two Corner Studs (1). Make sure that the
gutter on the Side Ceiling Plate is oriented correctly,
see Figure G inset. At this point, the completed
section of the frame will likely need support.
4. Attach the Rear Ceiling Plate (21) to
the inside of the two Corner Studs (1)
that are over the Rear Floor Plate (16).
Point the Rear Ceiling Plate’s flange inward.
(See Figure G.)
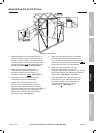
5. Attach the Left and Right Rear Studs (8,9) to
the outside of the Rear Floor Plate (16) and
Rear Ceiling Plate (21). Orient them so that
the ends slope upwards toward the middle
of the greenhouse. (See Figure G.)
Note: The heads of the Bolts (43) fit
into the slot on the back of the Stud,
holding the Bolts in place during assembly.
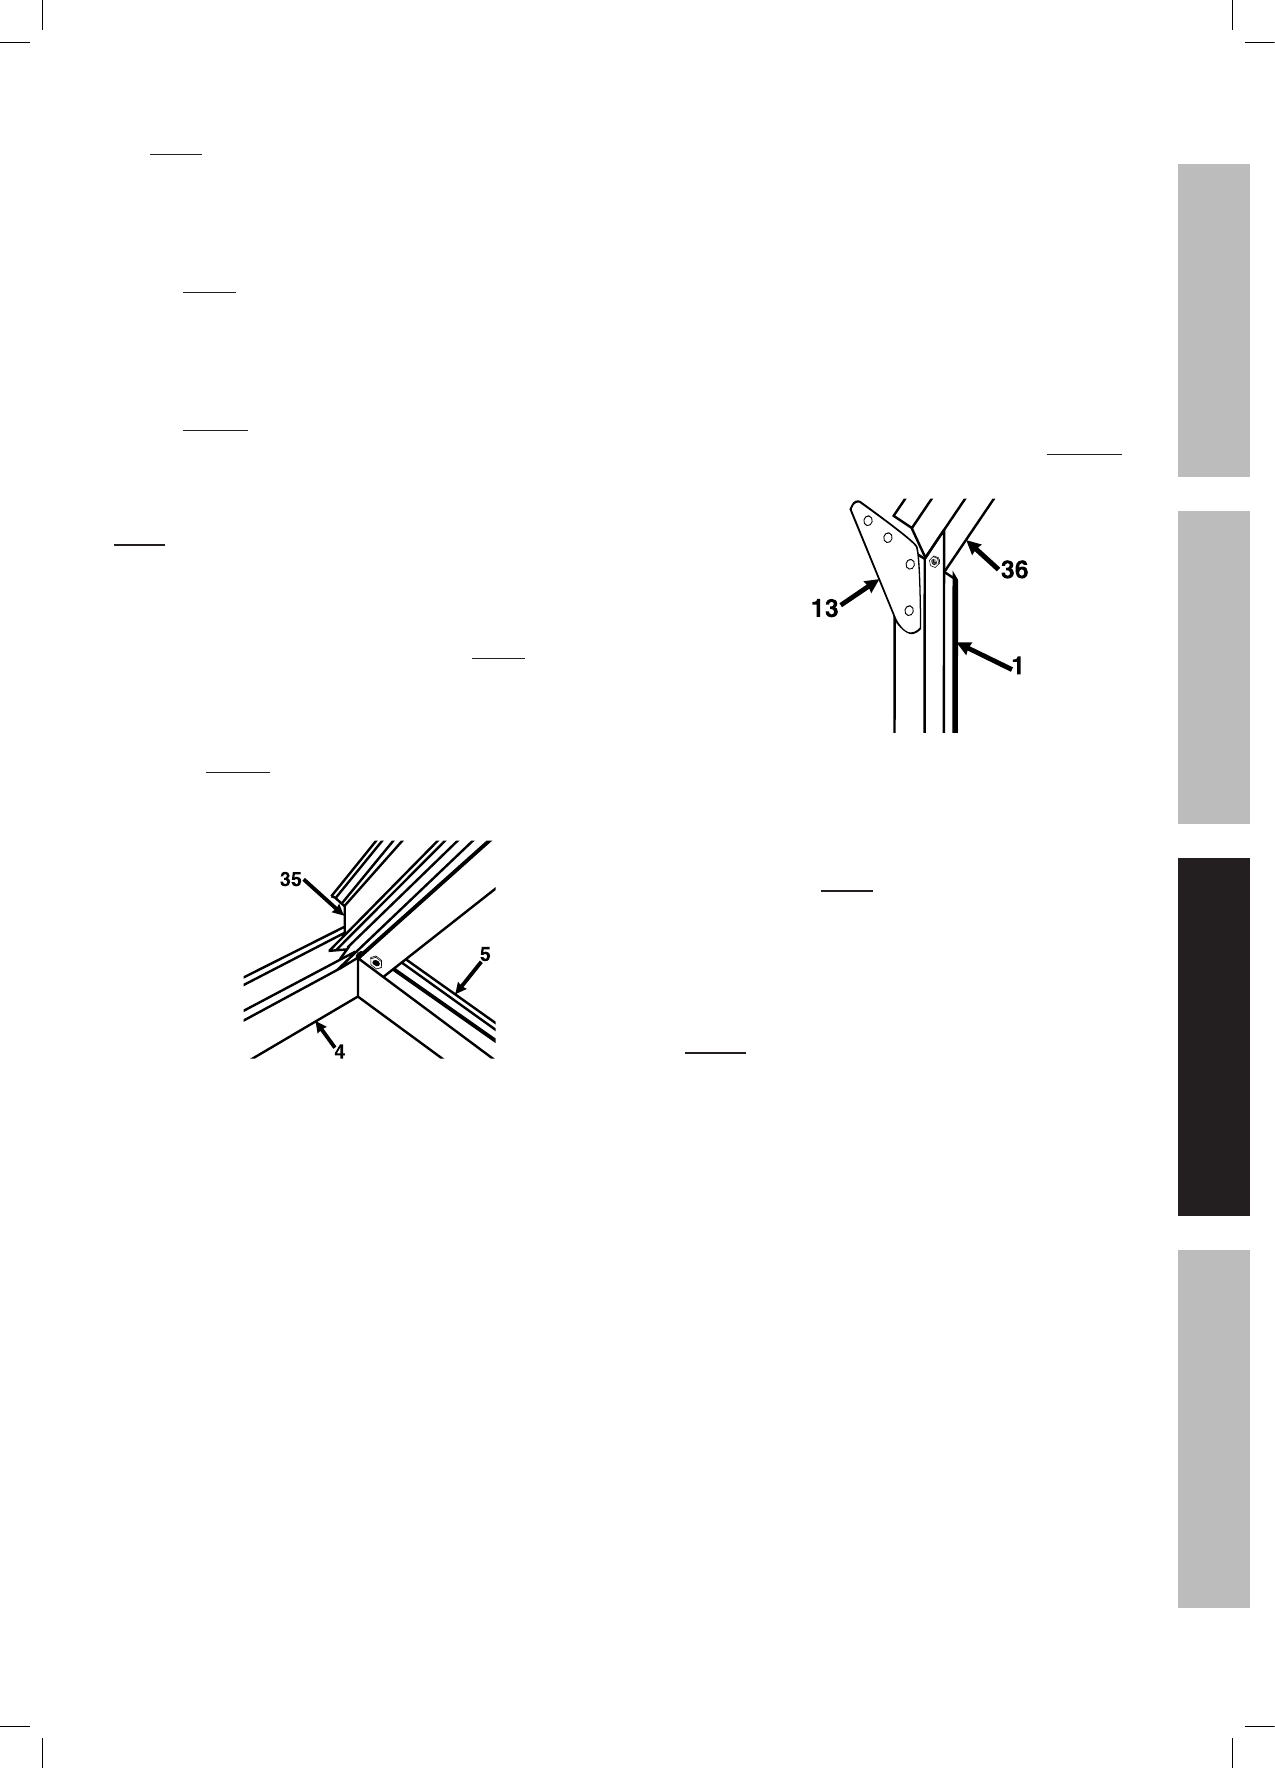
6. Attach the remaining Side Ceiling Plate (36)
along the other side, flat against the inside of the
Corner Studs (1), with the gutter oriented properly.
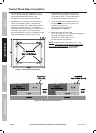
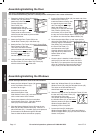
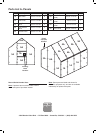
7. At the side of the Greenhouse: Attach the
Rear Right and Rear Left Crown Beams (4,5)
to the outside of the Crown (35) with the angled
edges towards the top. See diagram below,
viewed from under the Crown, facing back.
8. Attach the Front Crown Beams (2,3)
to the Crown (35) in the same fashion
as the Rear Crown Beams.
9. Attach an End Cap (47) onto the outer end
of each Crown Beam (2-5). Cover the gaps
between the Crown Beams (between 2-3 & 4-5)
with a Peak Cap (54) in each.
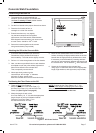
10. Attach a Corner Bracket (13) at the top of
each Corner Stud (1) so that the bracket faces
upwards, see diagram below. At the Studs that the
Rear Ceiling Plate (21) is connected to, the Bolt (43)
holding the Ceiling Plate on will need to be removed
temporarily while the Bracket is installed between
the Rear Ceiling Plate and the Corner Stud.
11. With two assistants, lift the Crown Assembly
and place the Crown Beams (2-5) on
top of the Corner Brackets (13).
12. Attach the remaining Side Ceiling Plate (36)
flat against the inside of two Corner Studs (1).
Once again, verify that the gutter on the Side Ceiling
Plate is oriented correctly, see Figure C inset.
At this point, the unit should be more stable.
13. Place the Gutter Caps (48) onto the ends of the
Side Ceiling Plates (36) oriented with a gap in the
bottom to allow water to drain out of the gutters.
SAFETYFRAMEMAINTENANCE FOUNDATION