SP 1 SAW CE— OPERATION AND PARTS MANUAL — REV. #3 (06/09/08) — PAGE 17
MQ STREET PRO 1 CE SAW — PREPARATION/PRE-INSPECTION
PREPARATION / PRE-INSPECTION
1. Read and fully understand this manual,
the safety intructions in particular, and
the engine manufacturer's manual
supplied with the saw.
2. Select the correct blade for each application. Refer to the
Blades and Blade Placement sections on pages 17 through
19 for further information.
3. Check blade for wear or damage.
Handle all blades with care and
ALWAYS replace a damaged blade.
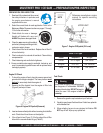
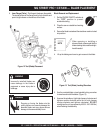
Figure 6. Engine Oil Dipstick (Removal)
4. Clean the
saw,
removing dirt and dust,
particularly the engine cooling air inlet,
carburetor and air cleaner.
5. Check the air filter for dirt and dust. Replace the air filter if it
is found to be dirty.
6. Check carburetor for external dirt and dust. Clean with dry
compressed air.
7. Check fastening nuts and bolts for tightness.
8. Ensure a suitable water supply is available, hooked up, and
used. (connected via garden hose or with an optional water
tank supply system).
Engine Oil Check
1. To check the engine oil level, place the saw on secure level
ground with the engine stopped. The frame platform
must
be level
to accurately check the engine oil.
2. Remove the filler dipstick from the engine oil filler hole
(Figure 6) and wipe it clean.
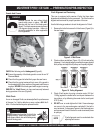
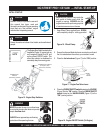
Figure 7. Engine Oil Dipstick (Oil Level)
Motor fuels are highly flammable and can
be dangerous if mishandled. DO NOT
smoke while refueling. DO NOT attempt to
refuel the saw if the engine is
hot!
or
running
.
Warning
1. Remove the gasoline cap located on top of fuel tank.
2. Visually inspect to see if fuel level is low. If fuel is low, replenish
with unleaded fuel.
3. When refueling, be sure to use a strainer for filtration. DO
NOT top-off fuel. Wipe up any spilled fuel.
NOTE
Reference manufacturer engine
manual for specific servicing
instructions.
3. Insert and remove the dipstick without screwing it into the filler
neck. Check the oil level shown on the dipstick.
4. If the oil level is low (Figure 7), fill to the edge of the oil filler
hole with the recommended oil type (Table 3).
epyTliO.3elbaT
nosaeS erutarepmeT epyTliO
remmuS rehgiHroC°52 03-W01EAS
llaF/gnirpS C°01~C°52 02/03-W01EAS
retniW rewoLroC°0 01-W01EAS
UPPER LIMIT
LOWER LIMIT
Fuel Check


