


9sectiOn 2 — asseMbly & set-up 9sectiOn 2 — asseMbly & set-up
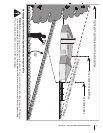
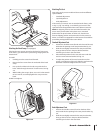
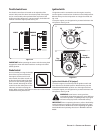
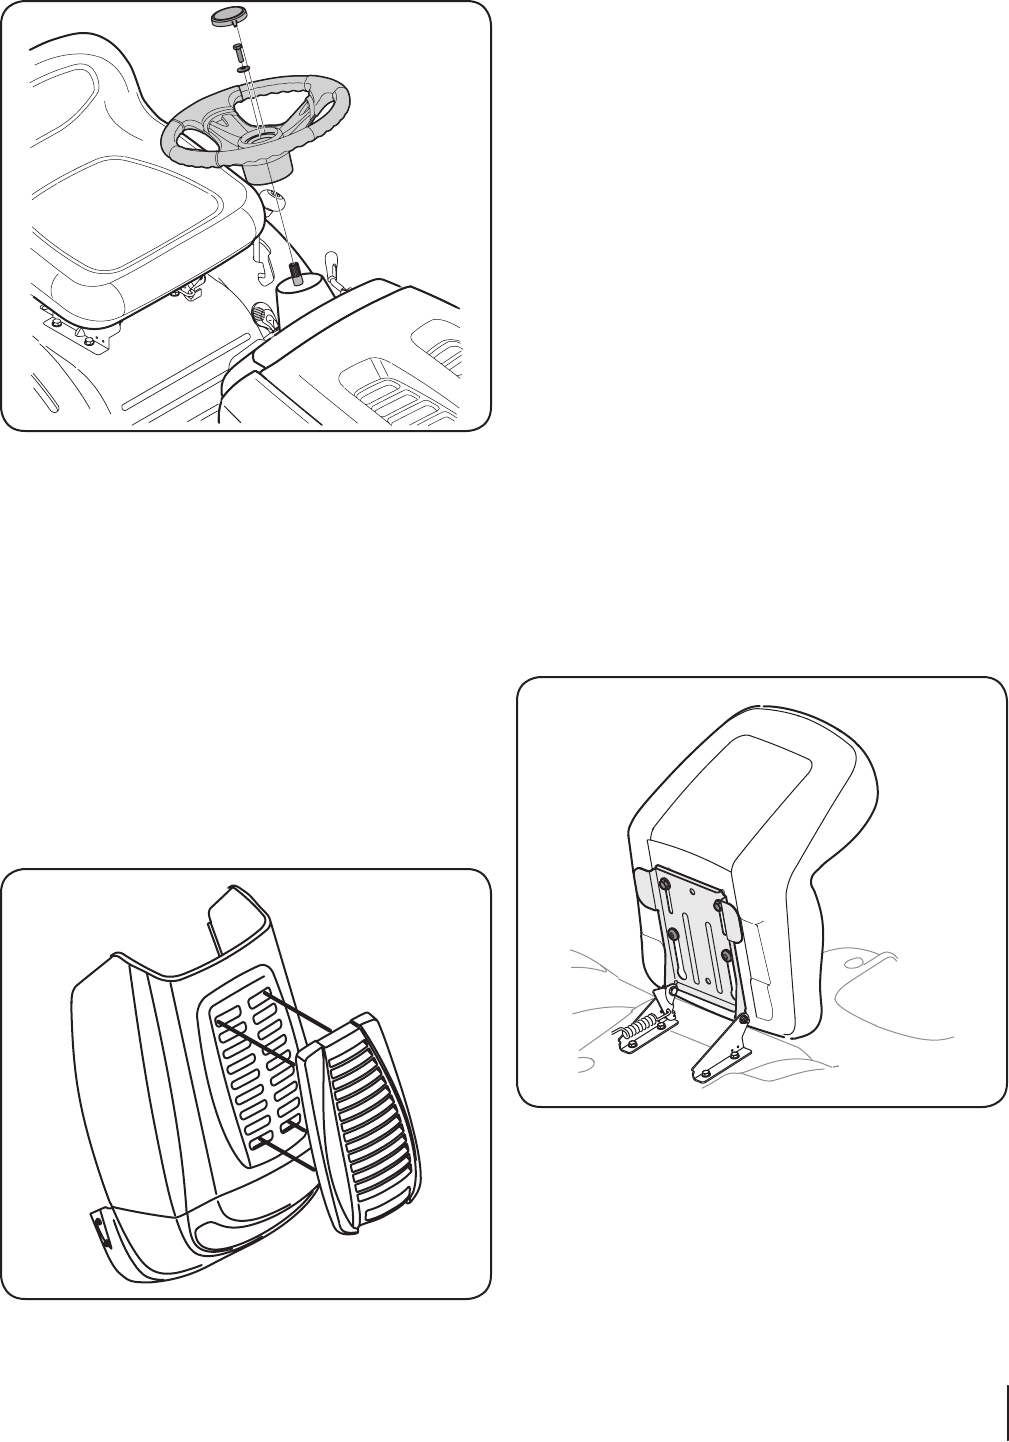
Attaching the Hood Scoop (If so equipped)
If the hood scoop was not secured to the hood of your tractor
at the factory, you will find it in a plastic bag, hanging from the
throttle lever.
To install:
Carefully pivot the tractor hood forward.
Remove the four screws from the underside of the hood
scoop.
Line up the four holes in the hood scoop with the four
holes visible through the tractor’s hood louvres. See Fig.
3-4.
While holding the scoop in place, use a 3/8” socket wrench
(or box wrench) to carefully tighten the scoop onto the
hood.
Do NOT overtighten.
1.
2.
3.
4.
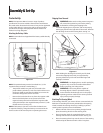
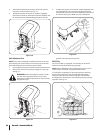
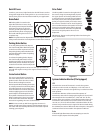
Attaching The Seat
Seat styles vary by tractor model and there are three different
styles available:
Standard Adjustment
Quick Adjustment
Knob Adjustment
If the seat for your tractor was not attached at the factory, refer
to Fig. 3-5, Fig. 3-6, and Fig. 3-7 to identify your tractor’s seat
style and follow the applicable instructions below to attach it.
NOTE: For shipping reasons, seats are either fastened to the
tractor seat’s pivot bracket with a plastic tie, or mounted
backward to the pivot bracket. In either case, free the seat
from its shipping position and remove the two hex screws (or
knobs, on models so equipped) from the bottom of seat before
proceeding with applicable instructions below.
Standard Adjustment Seat
Position the shoulder screws (found on the base of the seat)
inside the slot openings in the seat pivot bracket. Fig. 3-5.
Slide the seat slightly rearward in the seat pivot bracket,
lining up the rear slots in the pivot bracket with the
remaining two holes in the seat’s base.
Select desired position for the seat, and secure with the
two hex screws removed earlier. See Fig. 3-5.
To adjust the position of the seat, loosen the two hex
screws on the bottom of the seat. Slide the seat forward or
backward as desired. Retighten the two screws.
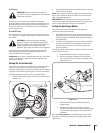
Knob Adjustment Seat
Position the shoulder screws (found on the base of the
seat) inside the slot openings in the seat pivot bracket. Fig.
3-6.
Slide the seat slightly rearward in the seat pivot bracket,
lining up the rear slots in the pivot bracket with the
remaining two holes in the seat’s base.
•
•
•
1.
2.
3.
4.
1.
2.
Figure 3-3
Figure 3-5
Figure 3-4