


NOTE: The only assembly required for your trimmer is to
install the debris shield and the assist handle.
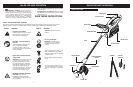
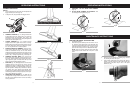
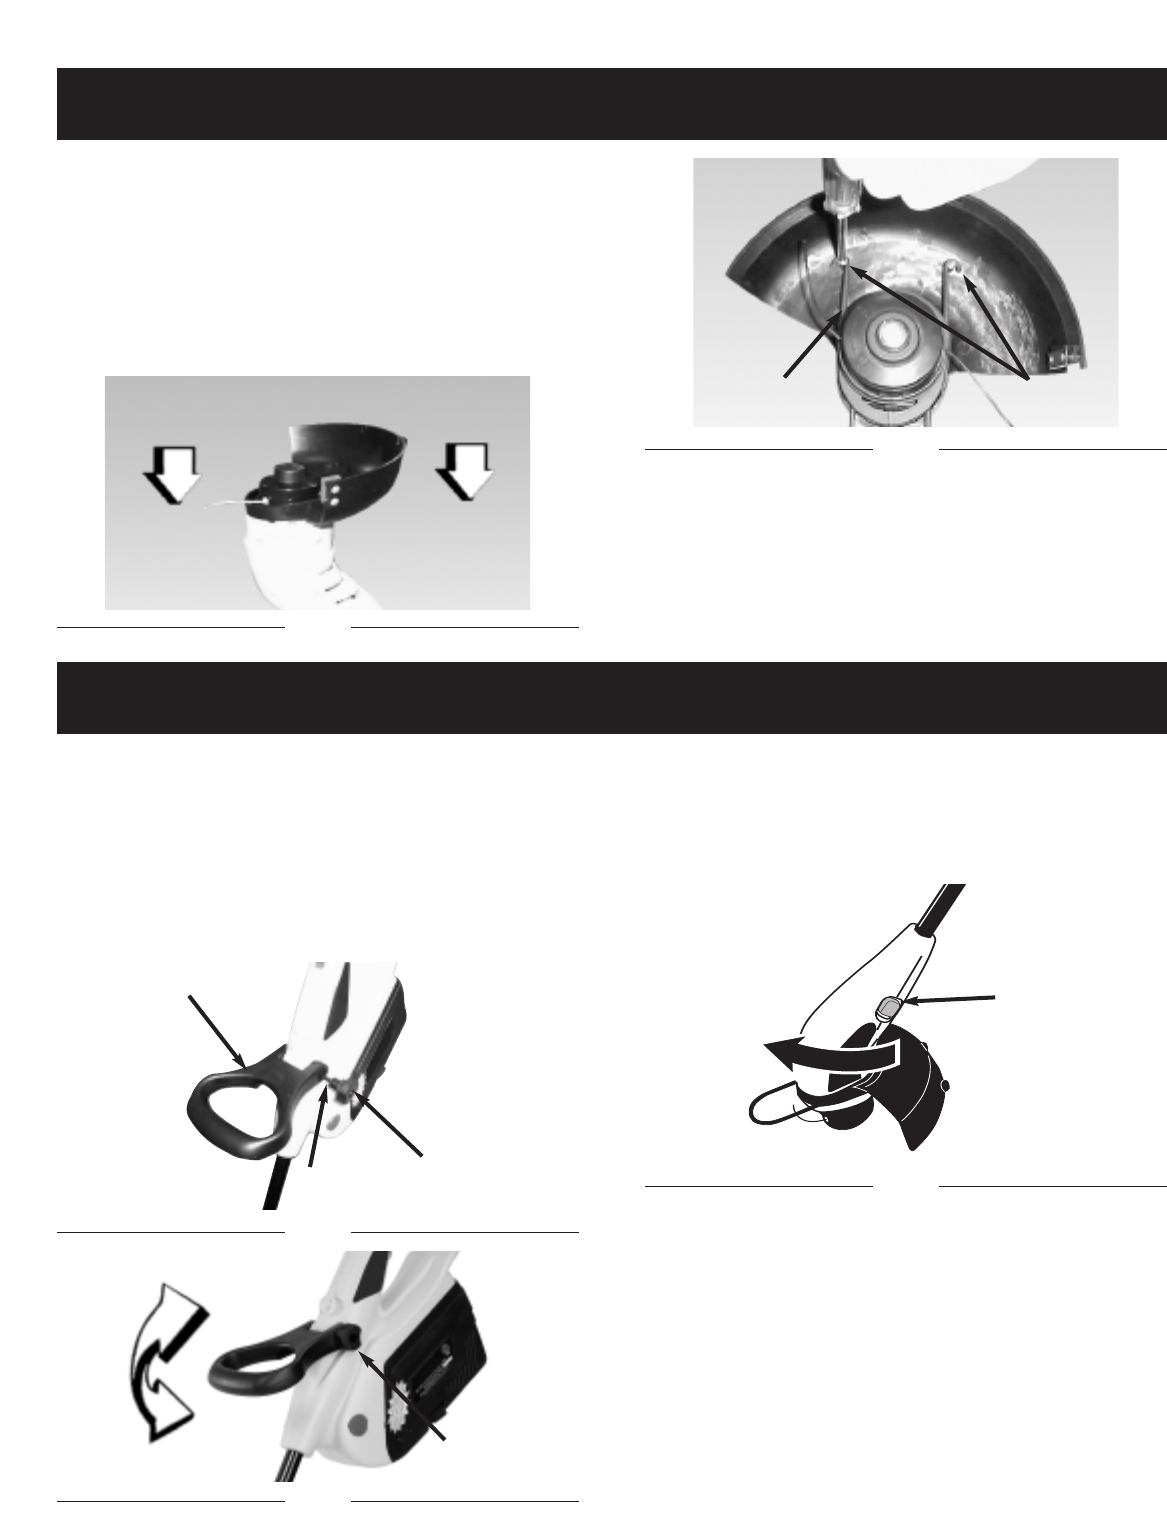
DEBRIS SHIELD INSTALLATION
1. Position the motor housing with string head carrier
facing up. (Fig. 1)
2. Slide debris shield over motor housing.
3. Fit the Edge guide (A) on the front part of the guard.
Secure it at the rear with two screws (B). (Fig. 2)
8
7
ASSEMBLY INSTRUCTIONS
Fig. 1
ADJUSTMENT INSTRUCTIONS
CHARGING BATTERY
T
o recharge battery first plug the battery charger jack into
the connector. Then plug the battery charger into the elec-
trical outlet. The indicator light will remain lit (red color).
(Fig. 7)
The battery will be fully charged after 16 hours. The green
light wil be on when the battery is fully charged. Do not
over charge the battery or it may be damaged and void
factory warranty.
STARTING
1. Before starting the grass-trimmer for the first time,
check that the nylon line touch or pass over the line-
cutting blade. If they ar
e not long enough, pr
ess the
bump knob and, at the same time, pull the nylon line.
(Fig. 8).
2. Connect the correct extension cord to the string trim-
mer power cord per the instructions in Section 5-1
Connect the cor
d.
3.
Make sur
e the length of grass trimmer and position of
assist handle is most applicable before use, adjust
the length of grass trimmer by pressing the shaft
adjustment button, adjust the height of assist handle
by loosening the adjustment knob.
4. Take a secure hold of the grass trimmer and, without
letting it touch the grass to be cut, push up the safe-
ty switch, then press the trigger on the upper hand-
grip. Let the grass trimmer run for a few seconds and
“bump” the stringhead against the lawn. Nylon line
will automatically release. The cut-off blade in the
debris shield will trim off excess line.
5.
To switch off the string trimmer let go of the switch.
These operations should be repeated a few times before
starting work to make sure that everything is functioning
properly and to familiarize yourself with the grass trimmer.
Start off slowly, when you have gained experience, you will
be able to use the grass trimmer to its full potential.
A short or worn line
cuts less efficiently
so, to improve its operation on subsequent
occasions, bump the stringhead lightly on the
ground while the trimmer is running.(Fig. 9)
CAUTION:
Fig. 8
Fig. 9
B
Fig. 2
B
A
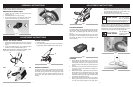
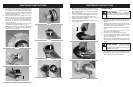
ADJUST THE ASSIST HANDLE
1. Assemble the assist handle (A) to the unit, insert the
bolt (B) to the handle adjustment knob (C) and tighten.
(Fig. 3)
2. Loosen the adjustment knob (C) to adjust the assist
handle to the most suitable position. (Fig. 4)
NOTE: The assist handle is ratcheted for variable operat-
ing positions. Adjust to a comfortable position.
EDGING CONVERSION
1. Grip shaft firmly.
2. Push shaft locking button (A) forward, and rotate cut-
ting assembly until an audible click is heard. (Fig. 5)
BATTERY CHARGING
To charge the battery pack it must first be removed from
the trimmer
. T
o remove the battery pack. Put the trimmer
horizontally on the gr
ound at first. Then grasp both sides
of the battery pack and depress the battery clip (A) as
shown Fig 6. Now gently pull the batter
y pack from the
housing.
ADJUSTMENT INSTRUCTIONS
Fig. 3
A
B
C
C
Fig. 6
A
Fig. 7
The stringhead will
continue to rotate for
a few seconds even after switching off.
CAUTION:
Fig. 5
Fig. 4
A