6. The telescope now slews to the second alignment star. AutoStar displays “Center
Brightest Star: Press ENTER” displays. Use the Arrow keys to center the alignment
star in the eyepiece. When the second alignment star is centered, press “ENTER”.
7. “Alignment successful” displays. If “Alignment Unsuccessful” displays, perform the
procedure over again.
Observe a Star using the Automatic Tracking Feature
Now that your telescope has been aligned, you are able to track celestial objects.
In this example, the AutoStar II Arrow keys are used to find a star, and then Auto
Star II’s tracking capability automatically keeps the star centered in your
telescope’s eyepiece.
1. When Automatic Alignment is completed (as described in the previous section),
“Select: Object” displays on AutoStar II.
2. Select a bright star from one of the Object menus. You may choose any
unobstructed, bright star for the purposes of this example. Use the viewfinder
(Pg. 7, Fig. 1, 22) to help line up on the star. Use AutoStar II’s Arrow keys to
center the star in the eyepiece. The tracking motors will then keep the star you
have chosen in the center of the eyepiece.
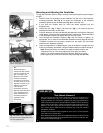
GoTo Saturn
This exercise demonstrates how to select a celestial object, the planet Saturn, for
viewing from AutoStar II’s Solar System library. Objects in the eyepiece should
maintain their position even though the Earth is rotating beneath the stars. In other
words, the telescope tracks the chosen objects.
Note: Saturn is not visible the entire year; you may need to choose
another object from any of AutoStar II’s many object libraries; however,
the procedure, as described below, remains the same.
1 After the telescope is aligned, press Number key “5”.
2. “Solar System: Mercury” displays. Keep pressing the Scroll Down key until “Solar
System: Saturn” displays.
3. Press ENTER. “Calculating” displays. Then “Saturn” and a set of coordinates
displays. Note that Saturn’s (and other planets’) coordinates change throughout
the year.
4. Press GO TO. “Saturn: Slewing...” displays and the telescope slews until it finds
Saturn. You may need to use the Arrow keys to center Saturn precisely in the
eyepiece. AutoStar II then automatically moves the telescope so that it “tracks”
Saturn (or whatever other object you may have chosen);
i.e.,
Saturn remains
centered in the eyepiece.
Using the Guided Tour
The Guided Tour feature is an easy and fun method of exploring AutoStar II’s GoTo
capabilities. This example demonstrates using “Tonight’s Best” Guided Tour.
1. After observing Saturn, keep pressing MODE until “Select Item: Object”
displays again.
2. Press the Scroll Down key twice. “Select Item: Guided Tour” displays.
3. Press ENTER. “Guided Tour: Tonight’s Best” displays. Press ENTER.
Note: If you wish to try out other Guided Tours, press the Scroll Down key
to scroll through other tour choices. When the tour you wish to select
displays, press ENTER.
4. “Tonight’s Best: Searching...” displays. After calculating, “Tonight’s Best:
Jupiter” displays.
Note: Different objects may be displayed on a tour list on any given night.
Press ENTER to display information about the object. Press GO TO to move the
telescope to the object.
Important Note:
While performing the
automatic tracking
procedure, only use the
Arrow keys to move the
telescope. Once the
telescope has been
aligned, do not loosen the
telescope locks (Pg. 7,
Fig. 1, 12 and 17), or
move the base manually,
or alignment will be lost.
Tip:
To manually enter the
R.A. and Dec.
coordinates of an object:
Press and hold MODE for
two seconds or more. The
R.A. and Dec. coordinates
display. Press GO TO.
“Object Position” and a set
of coordinates displays.
Then enter the R.A. and
Dec. coordinates of any
celestial object using
Number keys. As soon as
the coordinates are
entered, AutoStar II slews
the telescope to the
coordinates. Note that the
telescope must be
initialized for this
procedure to operate
properly.
Tip:
The GO TO key also
allows you to perform a
“spiral search”. A spiral
search is useful when the
telescope slews to an
object, but that object is
not visible in the eyepiece
after the telescope
finishes its search. (This
sometimes occurs during
an alignment procedure.)
Press GO TO when the
telescope stops slewing.
The telescope begins to
move in a spiral pattern
at a very slow speed
around the search area.
Look through the
eyepiece and when the
object does become
visible, press MODE to
stop the spiral search.
Then use the Arrow keys
to center the object.
- 21 -


