


20
Two other methods of alignment are available to the observer: Two-Star and One-Star. These
methods are included in case the observer prefers to pick out his or her own alignment stars.
Two-Star Alt/Az Alignment
Two-Star Alignment requires some knowledge of the night sky. Two-Star Alignment is identical
to Easy: Align (see
EASY (TWO-STAR) ALIGN, page 18), except Autostar displays a database of
bright stars and two stars are chosen by the observer from this database for alignment. It is
recommended that you choose stars with which you are familiar from this database when first
trying out this method or the One-Star Alignment method.
One-Star Alt/Az Alignment
One-Star Alignment also requires some knowledge of the night sky. One-Star Alignment is
identical to Easy: Align (see
EASY (TWO-STAR) ALIGN, page 18), except Autostar displays a
database of bright stars and one star is chosen by the observer from this database for
alignment.
IMPORTANT NOTE: The accuracy of One-Star Alt/Az Alignment, unlike the Two-
Star Alignment procedures, depends on how well the observer levels the telescope
and how close to North the telescope is pointed when setting the Home Position
(Fig. 16). Because the Two-Star Alignment methods use two stars to align upon,
they are more precise than One-Star Alignment.
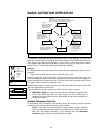
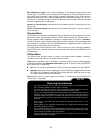
Go To Saturn
After performing the Easy Align procedure, the motor drive begins operating and the telescope
is aligned for a night of viewing. Objects in the eyepiece should maintain their position even
though the Earth is rotating beneath the stars.
IMPORTANT NOTE
: Once aligned, only use GO TO or the Arrow keys to move the
telescope. Do not loosen the telescope locks (9 and 16, Fig. 1a), or move the base
manually, or alignment will be lost.
This exercise shows how to select a celestial object (Saturn) for viewing from Autostar’s database.
NOTE: Saturn is not visible all the time and you may need to choose another object
from Autostar's Object database; however, the procedure, as described below,
remains the same; just choose a different object in step #3.
1 After the telescope is aligned, “Select Item: Object” displays. Press ENTER.
2. “Object: Solar System” displays. Press ENTER.
3. “Solar System: Mercury” displays. Keep pressing the Scroll Down key until “Solar System:
Saturn” displays.
4. Press ENTER. “Calculating” displays. Then “Saturn” and a set of coordinates displays.
Note that Saturn’s (and other planets’) coordinates change throughout the year.
5. Press GO TO. “Saturn: Slewing...” displays and the telescope slews until it finds Saturn.
You may need to use the Arrow keys to center Saturn precisely in the eyepiece. Autostar
then automatically moves the telescope so that it "tracks" Saturn (or whatever other object
you may have chosen); i.e., Saturn remains centered in the eyepiece.
Take a Guided Tour
This example demonstrates using “Tonight’s Best” Guided Tour.
1. After observing Saturn, press MODE twice so that “Select Item: Object” displays again.
2. Press the Scroll Down key twice. “Select Item: Guided Tour” displays.
3. Press ENTER. “Guided Tour: Tonight’s Best” displays. Press ENTER.
NOTE: If you wish to try out other Guided Tours, press the Scroll Down key to scroll
through other tour choices. When the tour you wish to select displays, press
ENTER.
4. “Tonight’s Best: Searching...” displays. After calculating, “Tonight’s Best: Jupiter” displays.
NOTE: Different objects may be displayed on a tour list on any given night.
Press ENTER to display information about the object. Press GO TO to move the telescope
to the object.
5. Press MODE to return to the Tour list. Press the Scroll keys to scroll through the list. Press
ENTER when you find the next object you wish to observe.
6. Press and hold down MODE for two seconds to exit the Guided Tour menu.
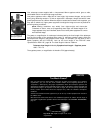
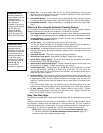
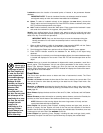
Fig. 18: One of the
most beautiful
celestial sights,
Saturn.