


12
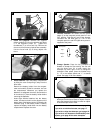
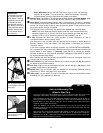
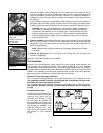
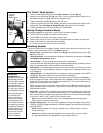
Remove the battery holder (2, Fig. 9) from the compartment and carefully lift the 9v
connector (3, Fig. 9) out from the compartment. Take care not to accidentally detach the
wires of the battery connector from the base. Whenever you replace the batteries, to
safeguard the wires, disconnect the 9v connector from the battery holder before removing
the batteries.
. Insert eight AA-size batteries into the battery holder, oriented as shown on the diagram on
the battery slots of the battery holder. Connect the 9v connector plug to the battery holder.
Carefully replace the battery holder back into the battery compartment. Replace the cover.
CAUTION: Use care to install batteries as indicated by the battery compartment.
Follow battery manufacturer's precautions. Do not install batteries backwards or
mix new and used batteries. Do not mix battery types. If these precautions are not
followed, batteries may explode, catch fire, or leak. Improperly installed batteries
void your Meade warranty. Always remove the batteries if they are not to be used
for a long period of time.
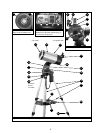
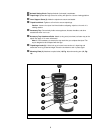
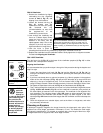
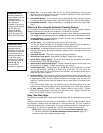
14. Connect Autostar: Be certain that the power switch on the computer control panel (C, Fig.
1b) is in the OFF position. Plug the coil cord of the Autostar Controller into the HBX port
(A, Fig. 1b). Turn on the power switch; the red LED lights when power is supplied to the
panel. Also see Fig. 10.
NOTE: Autostar does not require batteries; the telescope’s batteries supply power
to Autostar.
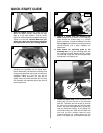
15. Remove the dust cover: Pull out the dust cover (11, Fig. 1a) from the optical tube
assembly (10, Fig. 1a).
Assembly of the basic telescope is now complete.
The Viewfinder
Because the main telescope has a fairly narrow field of view, locating objects directly in the
main telescope can sometimes be difficult. The viewfinder (6, Fig. 1a) is a small, wide-field
telescope with crosshairs that permits you to more easily locate objects. When the viewfinder
and optical tube are aligned to each other, both point to the same position in the sky. An object
located in the viewfinder is therefore also positioned within the field of the main telescope.
Before aligning the viewfinder to the optical tube, focus the viewfinder.
DSX-90 8 x 21mm Erect-Image Viewfinder:
The 8 x 21mm Erect-Image Viewfinder has 8-power magnification and an aperture of 21mm.
This viewfinder presents a correctly oriented image both up-and-down and left-to-right.
DSX-125EC 8 x 25mm Right-Angle Viewfinder:
The 8 x 25mm Right-Angle Viewfinder has 8-power magnification and an aperture of 25mm.
This viewfinder presents a correctly oriented image up-and-down, but is reversed left-
for-right.
Focusing the Viewfinder
The DSX model viewfinders are pre-
focused at the factory. Individual eye
variations may require that the
viewfinder be re-focused. To check
the focus, point the viewfinder at a
distant terrestrial (land) object such
as a telephone pole or light pole and
look through the viewfinder. If the
viewfinder image is not in sharp
focus, follow the procedure below
that applies to your telescope
model.
Fig. 9: Insert eight AA-size
batteries inside the battery
compartment:
(1) Battery compartment
(2) Battery holder
(3) 9v connector
1
2
3
Fig. 10: Connect Autostar to
the HBX port.
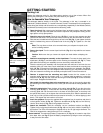
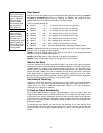
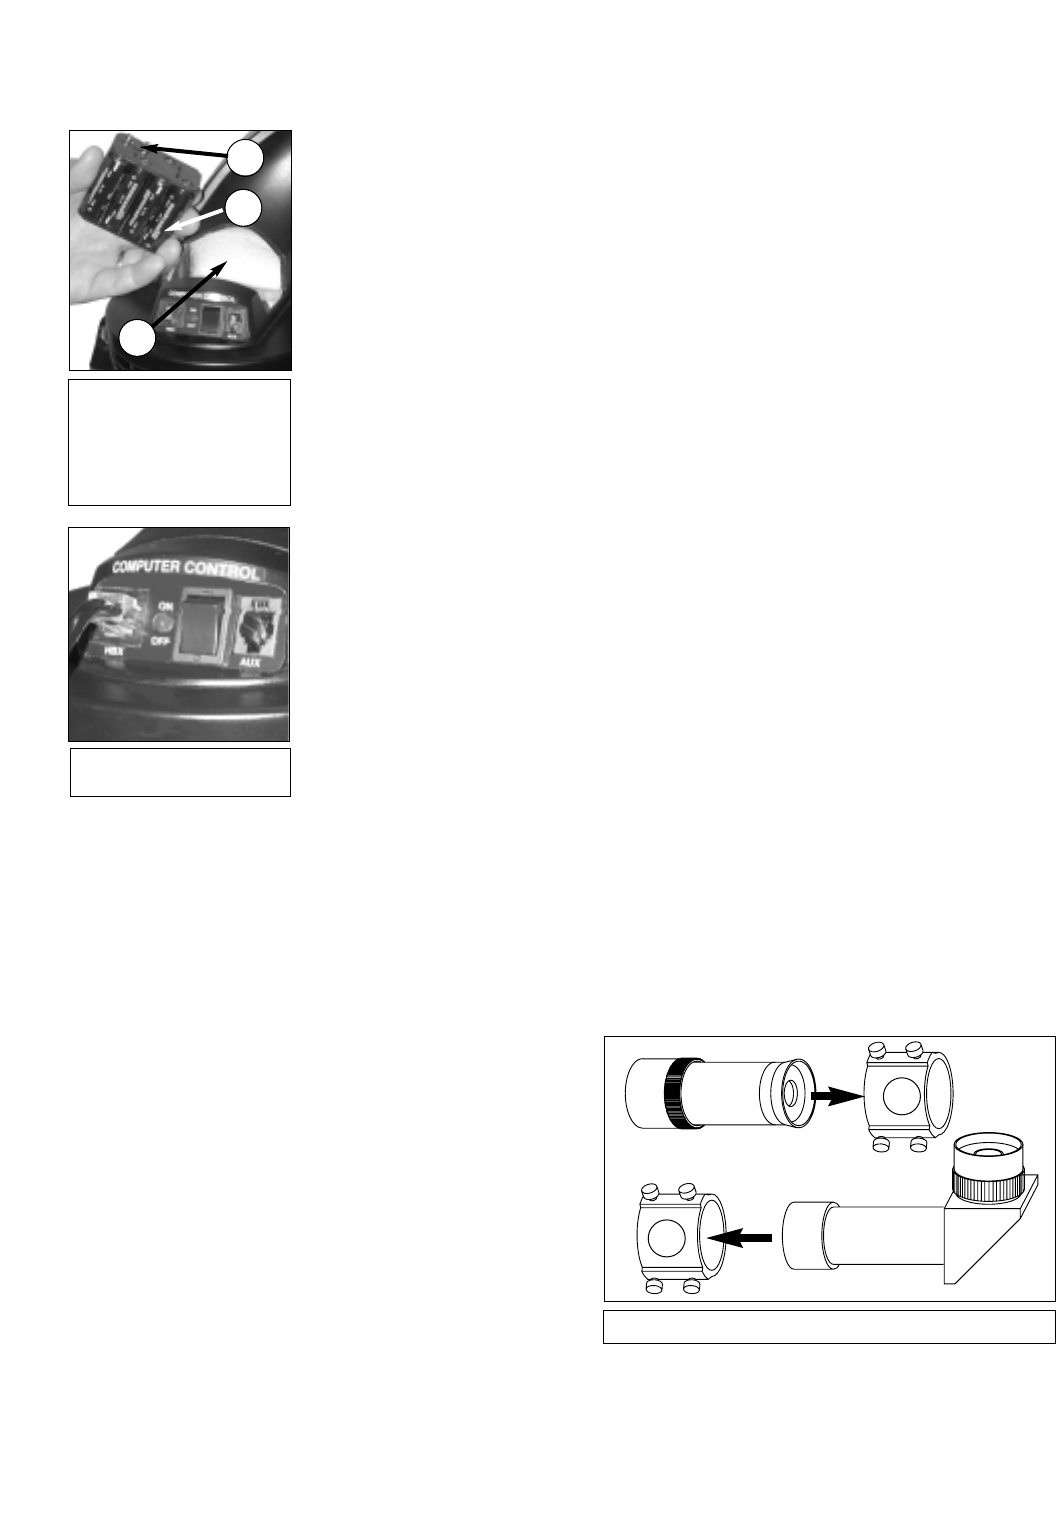
Fig. 11:Viewfinder Installation.
DSX-90 Viewfinder
DSX-125 Right-Angle Viewfinder
1
2