


page 11
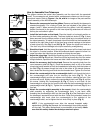
NEVER point the telescope directly at or near the Sun at any time!
Observing the Sun, even for the smallest fraction of a second, will
result in instant and irreversible eye damage, as well as physical
damage to the telescope itself.
5.
Check this alignment on a celestial object, such as a bright star or the Moon, and
make any necessary refinements, using the method outlined above in steps 3 and 4.
With this alignment performed, objects first located in the wide-field viewfinder will also
be centered in the main telescope’s field of view. You are now ready to make your first
observations with your telescope.
NOTE: The viewfinder and telescope present an upside-down image.
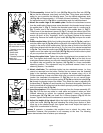
LESSON 4: Observing by Moving the Telescope Manually
This method describes how to make observations by manually moving the telescope.
After the telescope is assembled and balanced as described previously, you are ready
to begin manual observations. View easy-to-find terrestrial objects such as street
signs or traffic lights to become accustomed to the functions and operations of the tele-
scope. For the best results during observations, follow the suggestions below:
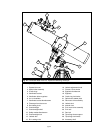
• When you wish to locate an object to observe, first loosen the telescope’s R.A.
lock (26, Fig. 2b) and Dec lock (27, Fig. 2b). The telescope can now turn freely on
its axes. Also unlock the Azimuth lock (24, Fig. 2b). Unlock each axis separately
and practice moving your telescope. Then practice with two or more unlocked
axes at the same time. It is very important to practice this step to understand
how your telescope moves, as the movement of an equatorial mount is not
intuitive.
• Use the aligned viewfinder to sight-in on the object you wish to observe. When the
object is centered in the viewfinder’s crosshairs, re-tighten the R.A. and Dec locks.
• A telescope’s eyepiece magnifies the image formed by the telescope’s main
optics. Each eyepiece has a focal length, expressed in millimeters, or “mm.” The
smaller the focal length, the higher the magnification. For example, an eyepiece
with a focal length of 4mm has a higher magnification than an eyepiece with a
focal length of 25mm. See "APPENDIX A," page 38 for more information.
Low-power magnification eyepieces offer a wide field of view, bright, high-contrast
images, and relief of eye strain during long observing sessions. To observe an object
with a telescope, always start with a low power eyepiece such as the H 25mm
supplied with the 4504. When the object is centered and focused in the eyepiece,
switch to a higher power eyepiece to enlarge the image as much as practical for
prevailing viewing conditions.
NOTE: Viewing conditions vary widely from night-to-night and site-to-site.
Turbulence in the air, even on an apparently clear night, can distort images.
If an image appears fuzzy and ill-defined, back off to a low-power eyepiece
for a more well-resolved image.
• The Barlow lens included with your telescope triples the eyepiece magnification.
See "APPENDIX A," page 38 for more information.
• Once centered, an object can be focused by turning one of the knobs of the
focusing mechanism (17, Fig. 2b). Notice that when observing astronomical
objects, the field of view begins to slowly drift across the eyepiece field. This
motion is caused by the rotation of the Earth on its axis. Objects appear to move
through the field more rapidly at higher powers. See "APPENDIX B," page 39, for
detailed information. Lesson 6 will explain how you can counteract the drift in the
field of view.
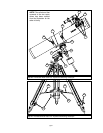
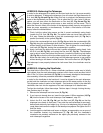
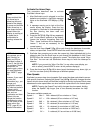
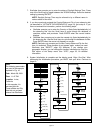
IMPORTANT
NOTE:
Whenever you
move your tele-
scope, either man-
ually or with
Starfinder, position
the levers of the
R.A. and Dec locks
so that they point
upwards (see Fig.
10). An incorrectly
positioned lever
may strike and
damage another
piece of the tele-
scope assembly
while the telescope
is moving.
Point
lever
upwards
Fig. 10: Correctly
positioned lever.