


16
RTR10 & RTR15 Series Rotary Tillers 311-431M
5/05/06
Land Pride
Section 3: Adjustments
Table of Contents
Section 3: Adjustments
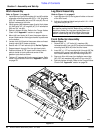
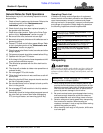
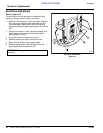
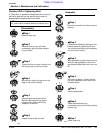
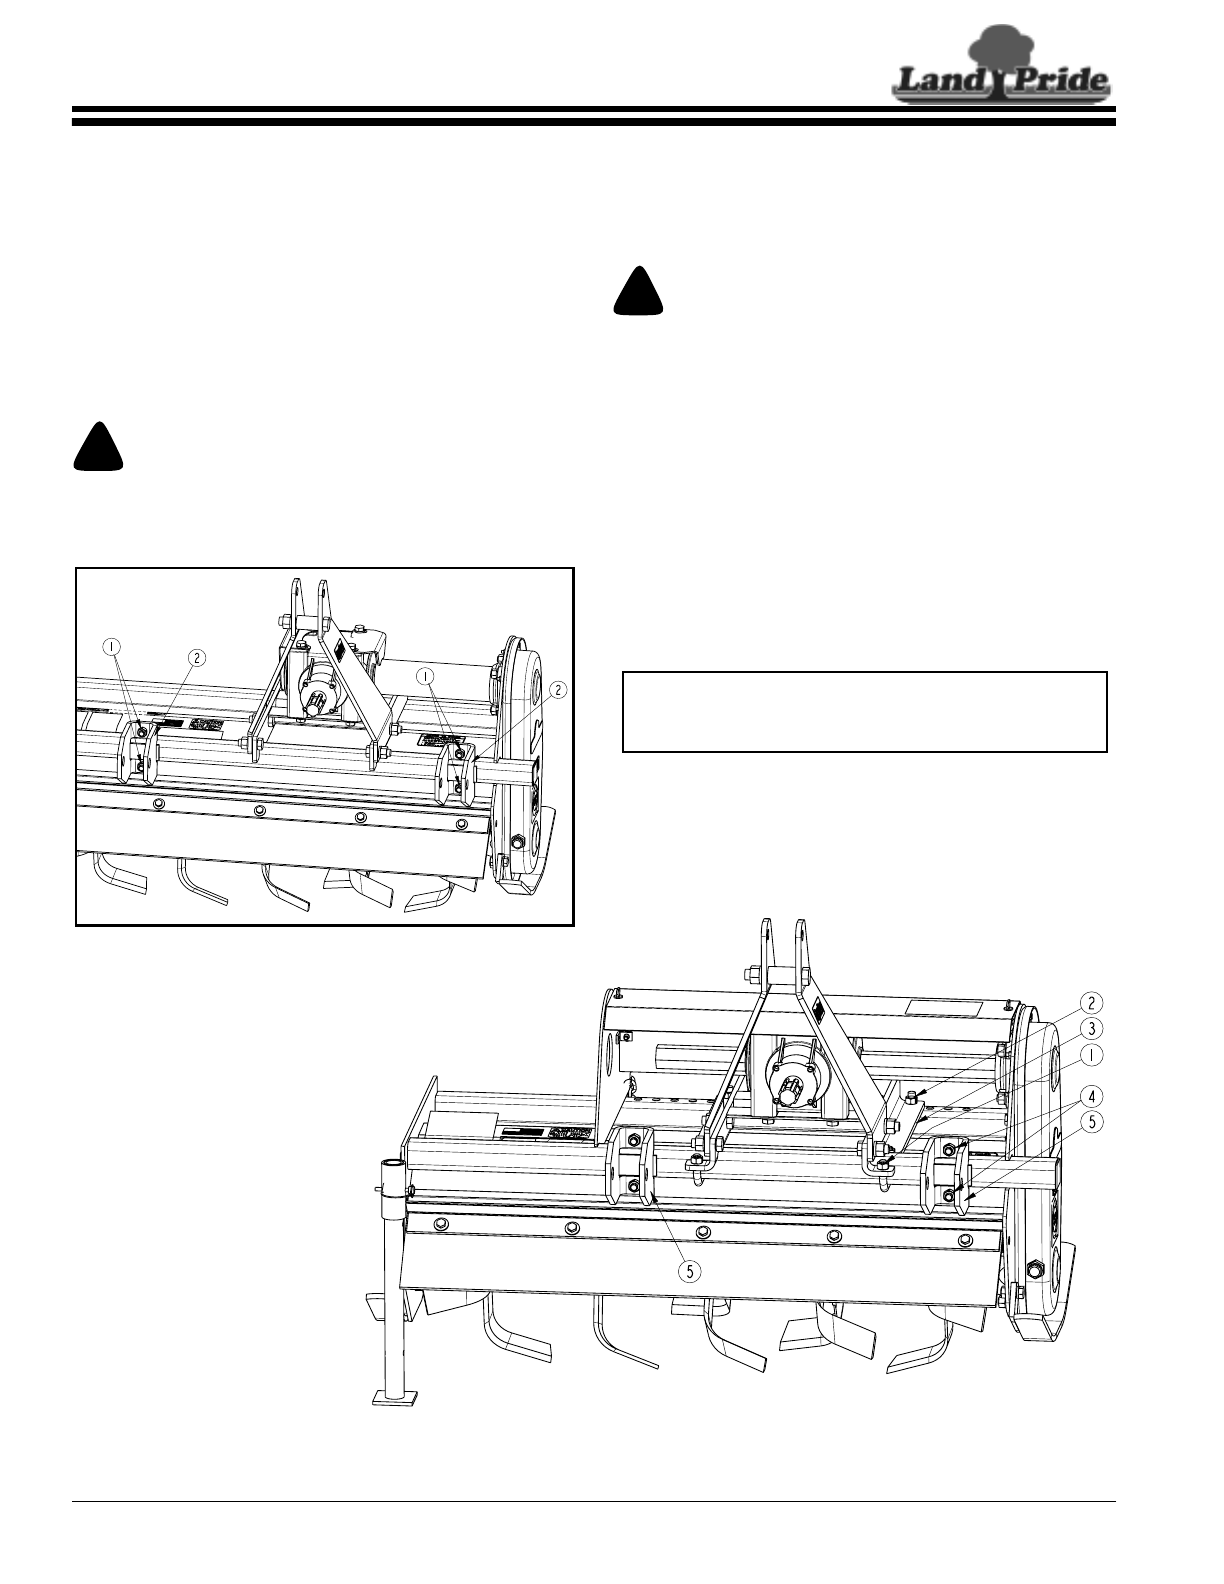
RTR15 Tiller Hitch Sideshift
Refer to Figure 3-2:
The three point and gearbox can be sideshifted to the left
of tiller center for various working conditions.
!
CAUTION
After sideshifting check to see that the PTO shaft clears all
shields on the tiller, tractor and the tiller hitch. If not, decrease
the sideshift until clearance is obtained.
1. Loosen the two u-bolts (#1) which hold the top
hitch and gearbox frame (#3) to the front tube.
2. Remove the two bolts (#2) which hold the top
hitch and gearbox frame (#3) to the rear of the tiller.
3. Loosen the two u-bolts (#4) which hold the two lower
hitch clevises (#5) to the front tube.
4. Slide the top hitch and gearbox assembly (#3) to the
desired location.
5. Re-center the lower hitch clevises (#5) with respect to
the gearbox.
6. Retighten all bolts and nuts referring to the Torque
Values Chart in the “Appendix” section on page 29.
NOTE: For maximum sideshift, the left lower hitch
clevis can be located on the left hand side of the left
end plate.
RTR15 Tiller Hitch Sideshift
Figure 3-2
22255
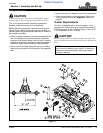
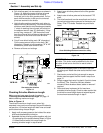
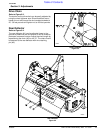
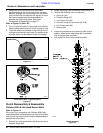
RTR10 Tiller Hitch Offset
Refer to Figure 3-1:
By shifting the lower hitch clevises (21) to the side, a
limited amount of offset can be obtained.
1. Loosen the two u-bolts (#1) which hold the two lower
hitch clevises (#2) to the front tube.
2. Slide the two lower hitch clevises (#2) to the desired
location.
3. Retighten all bolts and nuts referring to the Torque
Values Chart in the “Appendix” section on page 29.
!
CAUTION
After offsetting check to see that the PTO shaft clears all shields
on the tiller, tractor and the tiller hitch. If not, decrease the
offset until clearance is obtained.
RTR10 Tiller Hitch Offset
Figure 3-1
22249