


SERVICE
24 Service
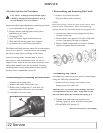
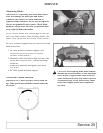
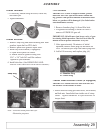
• Removing and Installing Driveline-Shear Bolt
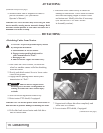
1. Disconnect driveline shield chain.
2. Bend back driveline shield cone.
3. Remove shear bolt and lock nut.
4. Push driveline onto input shaft toward gearbox
and remove snap ring.
5. Pull driveline from gearbox shaft.
6. Replace or repair as necessary.
7. Install in reverse order of removal.
• Replacing Driveline Shear Bolt
IMPORTANT: Avoid shear bolt failure at start up
by
engaging the PTO slowly at low engine rpm.
If shear bolt fails:
1. Bend back driveline shield cone.
2. If necessary remove sheared bolt with hammer
and punch and realign holes in yoke and shaft.
3. Replace with 1/2” x 3” Gr 2 bolt and lock nut.
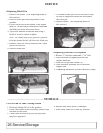
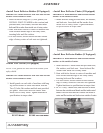
• Removing and Installing Tailwheel Support
CAUTION: When removing and installing
tailwheel support, it will be necessary to support
the cutter. Before servicing cutter, refer to
PRACTICE SAFE SERVICE PROCEDURES
at the beginning of this section.
1. Remove 1/2” lock nut, washers and 1/2” x 4”
bolt (A).
2. Remove tailwheel support.
3. Install tailwheel support in reverse order.
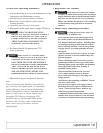
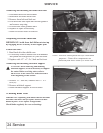
• Checking Blade Wear
IMPORTANT: Operating with blades that are not
alike
will cause vibration. Always replace worn or broken
blades in pairs. Never replace a single blade.
Check blades regularly for wear or breakage.
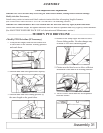
NOTE: Driveline shield pulled back for illustration
purposes. Cutter drive components are
protected from shock loads by a shear bolt.
A
Snap Ring
!