


Service - 21
SERVICE
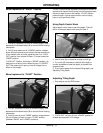
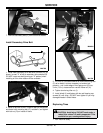
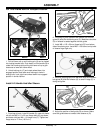
2. Raise tiller as high as it will go if still on tractor.
NOTE: For ease in replacing tines, you can remove
tiller from the tractor and turn it completely upside
down. Put down protective tarp or carpet to protect
paint finish.
3. Put tiller in TRANSPORT position. (See Transporting
Tiller in OPERATING section.)
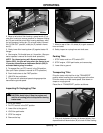
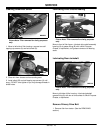
4. Safely put jack stand or blocks under tiller (tiller removed
or still on tractor).
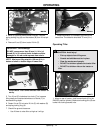
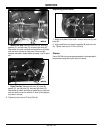
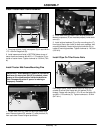
NOTE: Make sure you install the new tines and
hardware EXACTLY as the old tines and hardware were
positioned. Use the pictures to help you install tines
correctly. Properly installed tines have a step-up
pattern from left-to-right.
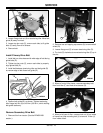
Each cluster of tines MUST have two left tines (D) and
two right tines (E):
• Alternate left and right tines in each cluster.
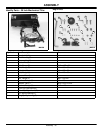
• AboltwithNOSPACERisanM10x35bolt.
• A bolt with ONE SPACER is an M10 x 45 bolt.
• AboltwithTWOSPACERSisanM10x60bolt.
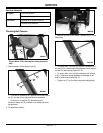
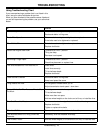
5. Replace tines:
• Left Set: Remove lock nuts (A), bolts (B), spacers
(C), two left tines (D), and two right tines (E). Remember
to install new bolts so heads are to left side and new
lock nuts are to right side. A total of two spacers are
used in this set.
M96313
M96311
M96317
E
A
B
C
D