21English
Guide Bar Maintenance
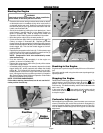
Every day of use, reverse the guide bar on the saw to distribute
the wear for maximum bar life. The bar should be cleaned every
day of use and checked for wear and damage.
Feathering or burring of the bar rails is a normal process of bar
wear. Such faults should be smoothed with a file or stone as
soon as they occur.
A bar with any of the following faults should be replaced.
• Wear inside the bar rails which permits the chain to lay over
sideways.
• Bent guide bar.
• Cracked or broken rails.
• Spread rails.
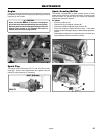
In addition, guide bars with a sprocket at their tip must be
lubricated periodically with a grease syringe to extend the guide
bar life.
Turn the guide bar and check that the lubrication holes and chain
groove are free from impurities.
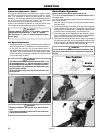
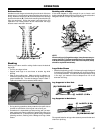
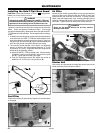
Use a Flat File and a Depth Gauge Jointer to lower
all gauges uniformly.
P) FLAT FILE
Q) DEPTH GAUGE JOINTER
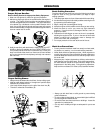
Depth gauge jointers available in .020" to .035" (0.5mm to
0.9mm). After lowering each depth gauge, restore original
shape by rounding the front (R). Be careful not to damage
adjoining drive links with the edge of the file.
P
Q
R
MAINTENANCE
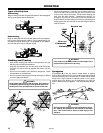
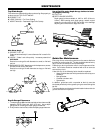
Top Plate Angle
File holders are marked with guide marks to align file properly to
produce correct TOP PLATE ANGLE.
G) CORRECT- 30
o
H) LESS THAN 30° - For Cross Cutting.
I) MORE THAN 30°- Feathered Edge Dulls Quickly.
H
I
G
Side Plate Angle
J) CORRECT- 85
o -
90
o
Produced automatically if correct diameter file is used in file
holder.
K) “HOOK”- “Grabs” and dulls quickly. Increases potential of
KICKBACK.
Results from using a file with diameter too small, or file held
too low.
L) BACKWARD SLOPE- Needs too much feed pressure, causes
excessive wear to bar and chain.
Results from using a file with diameter too large, or file held
too high.
K
L
J
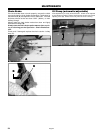
Depth Gauge Clearance
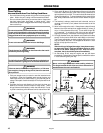
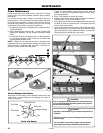
1. The depth gauge (M) should be maintained at a clearance (N)
between .025 (0.6 mm) and .030" (0.75 mm). Use a depth
gauge tool for checking the depth gauge clearances.
2. Every time the chain is filed, check the depth gauge clearance.
M
N


