


ENGLISH
17
Jacuzzi Whirlpool Bath K339000X 3/06
Installation
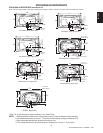
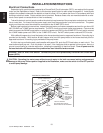
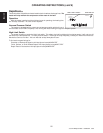
Note that the motor/pump protrudes beyond the bath rim a maxi-
mum distance of 1" (25,4 mm). Care should be used when lowering
the tub into cutout to prevent injury to installer(s), finished surfaces,
or tub and components.
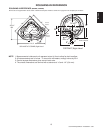
Clearance must be provided for installers. See page 16 for
recommended clearances surrounding tub. Damage to shell,
plumbing, wiring, lighting, and other components because of
failure to observe minimum clearances are not the responsibility
of Jacuzzi Whirlpool Bath.
All deck finish work must be completed before installation. Use the Cutout Template provided. Flooring surface inside
the cutout to deck height must not exceed height specification for tub.
Cover all finished surfaces to protect from damage during tub installation.
Turn OFF power supply to dedicated GFCI protected circuits.
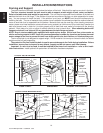
Begin Installation
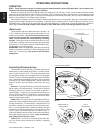
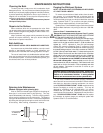
Optionally, use a washable marker to scribe a reference line 1" (25,4 mm) out-
side the cutout edge on the deck surface. This may assist in final alignment of the
tub.
Install any trim kits, faucets, or other tub components before installing.
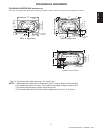
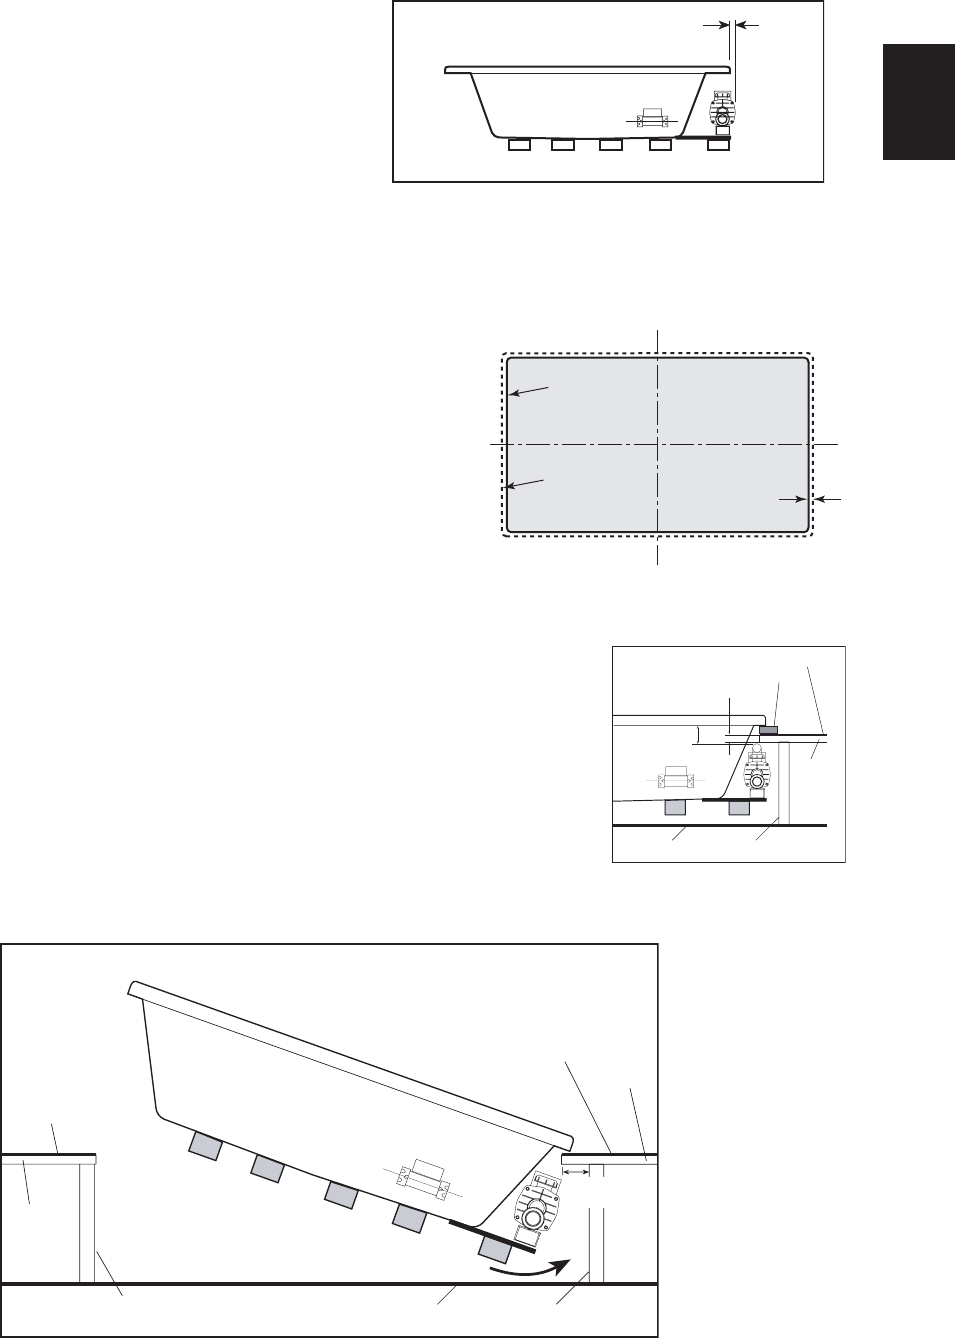
To install unit insert the motor/pump end first when lowering the tub into the
cutout opening as shown in the bottom illustration. Do not use plumbing fixtures or
plumbing lines to lower unit. The clearance under the substrate is required for air
flow circulation requirements.
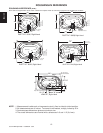
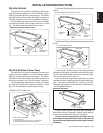
Place a piece of scrap lumber under each corner as a temporary support for the tub rim. Inspect all fittings, plumbing, and
control lines after inserting to insure components are not damaged, disconnected, or contacting the finish surface substrate or
support members.
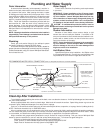
Connect flex water supply lines to faucet.
Plug power cords into GFCI outlet.
Remove fingers, hands, and all other items from under the rim edge before lowering the tub.
Slightly lift one tub end and remove the scrap lumber. Gently lower the tub rim until it contacts the
deck surface. Slightly lift the remaining tub end and remove the scrap lumber. Gently lower the
tub rim until it contacts the deck surface.
If you created the optional reference lines, align the tub over the cutout.
Connect drain line.
Turn ON the power supply to the dedicated GFCI protected circuits.
Check for leaks and check system operation.
(Motor)
(Heater)
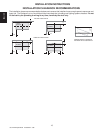
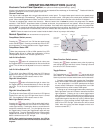
See END/SIDE VIEW in
Specification pages for
this dimension.
TUB
CUTOUT
1/2"
REFERENCE
LINE
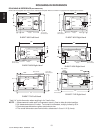
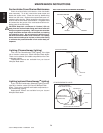
SUPPORT
SUBFLOOR
SUBSTRATE
FINISHED SURFACE
SCRAP LUMBER
APPROX. 2-1/2"
2 " MAX
THICKNESS
SUPPORT
MEMBER
SUBFLOOR
SUBSTRATE
TYP MIN. 1-1/2"
CLEARANCE**
TILE OR FINISHED
SURFACE
SUBSTRATE
TILE OR
FINISHED
SURFACE
SUPPORT
MEMBER
** MIN CLEARANCE - DUETTA 3"-3½"
INSTALLATION INSTRUCTIONS