


Remain alert for unusual noises, they could be signaling a
problem. Visually inspect the machine for any abnormal
wear or damage. A good time to detect potential problems
is while performing scheduled maintenance service.
Correcting the problem as quickly as possible is the best
insurance.
WARNING: Keep your machine clean, remove
any deposits of trash and clippings, which can
cause engine fires and hydraulic overheating as
well as excessive belt wear.
Clear away heavy build-up of grease, oil and dirt,
especially in the engine and hydraulic reservoir area; minute
dust particles are abrasive to close-tolerance engine and
hydraulic assemblies.
Some repairs require the assistance of a trained service
mechanic and should not be attempted by unskilled
personnel. Consult your Hustler service center when
assistance is needed.
Torque values
Particular attention must be given to tightening the drive
wheel lug and wheel motor nuts. Failure to correctly torque
these items may result in the loss of a wheel, which can
cause serious damage. Torque values given below are in foot
pounds.
Wheel (lug) nuts .............................65-75 ft.-lbs.
Wheel motor nut .........................425-450 ft.-lbs.
It is recommended that these be checked after the first 2
hours of operation, initially and every 50 hours following
removal for repair or replacement.
For engine torque values, see engine owner’s manual.
Tires
It is important for level mowing that the tires have the
same amount of air pressure. The recommended pressures
are:
Drive Wheels........................................14-18 psi
Tail Wheels...........................................14-18 psi
If the machine has Hustler Range Wings or a Hi-Lift
BAC-VAC then the tire pressure should be increased to:
Drive Wheels........................................20-22 psi
Tail Wheels ..........................................20-22 psi
Solid fill tires are not recommended for Hustler turf
equipment. On any machine, with a failure due to solid
filled tires, the warranty claim will be denied.
Hour meter
To recognize when your machine needs servicing, check
the hour meter and the maintenance schedule. The hour
meter shows the number of hours the engine has run and the
maintenance schedule lists the service intervals.
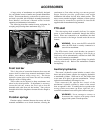
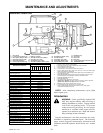
Lubrication
There are seven grease fittings on the tractor which
require regular servicing. Use a good grade SAE multi-
purpose grease and wipe accumulated dirt from fitting
before attaching grease gun. Refer to the diagram for
location and frequency.
Steering linkage
There are two types of steering adjustments that are
discussed in this section.
1. Neutral adjustment in the neutral lock position.
2. The rotational resistance spring and linkage connecting
the two pump levers, located near the pump.
Prior to making either of these adjustments, visually
inspect the urethane grommets at the hydraulic pump end of
the steering control levers (or linkage straps) and ball joints
at front at least once a month or every 200 hours of
operation, whichever occurs first. These grommets and ball
joints must be replaced if lost or worn.
WARNING: Failure to maintain these
grommets and ball joints will affect steering.
Visually inspect steering shock absorbers every 500 hours
for damage or wearing. If excessive oil leakage is evident,
then replace that shock absorber.
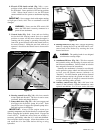
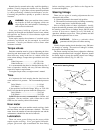
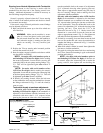
The tractor steering has been factory adjusted to eliminate
creeping when the neutral lock is engaged. However, should
the tractor begin to creep, the steering control lever linkage
can be adjusted as follows (Fig. 5-1 and 5-2):
728444 Rev. 11/02
5-2
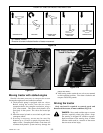
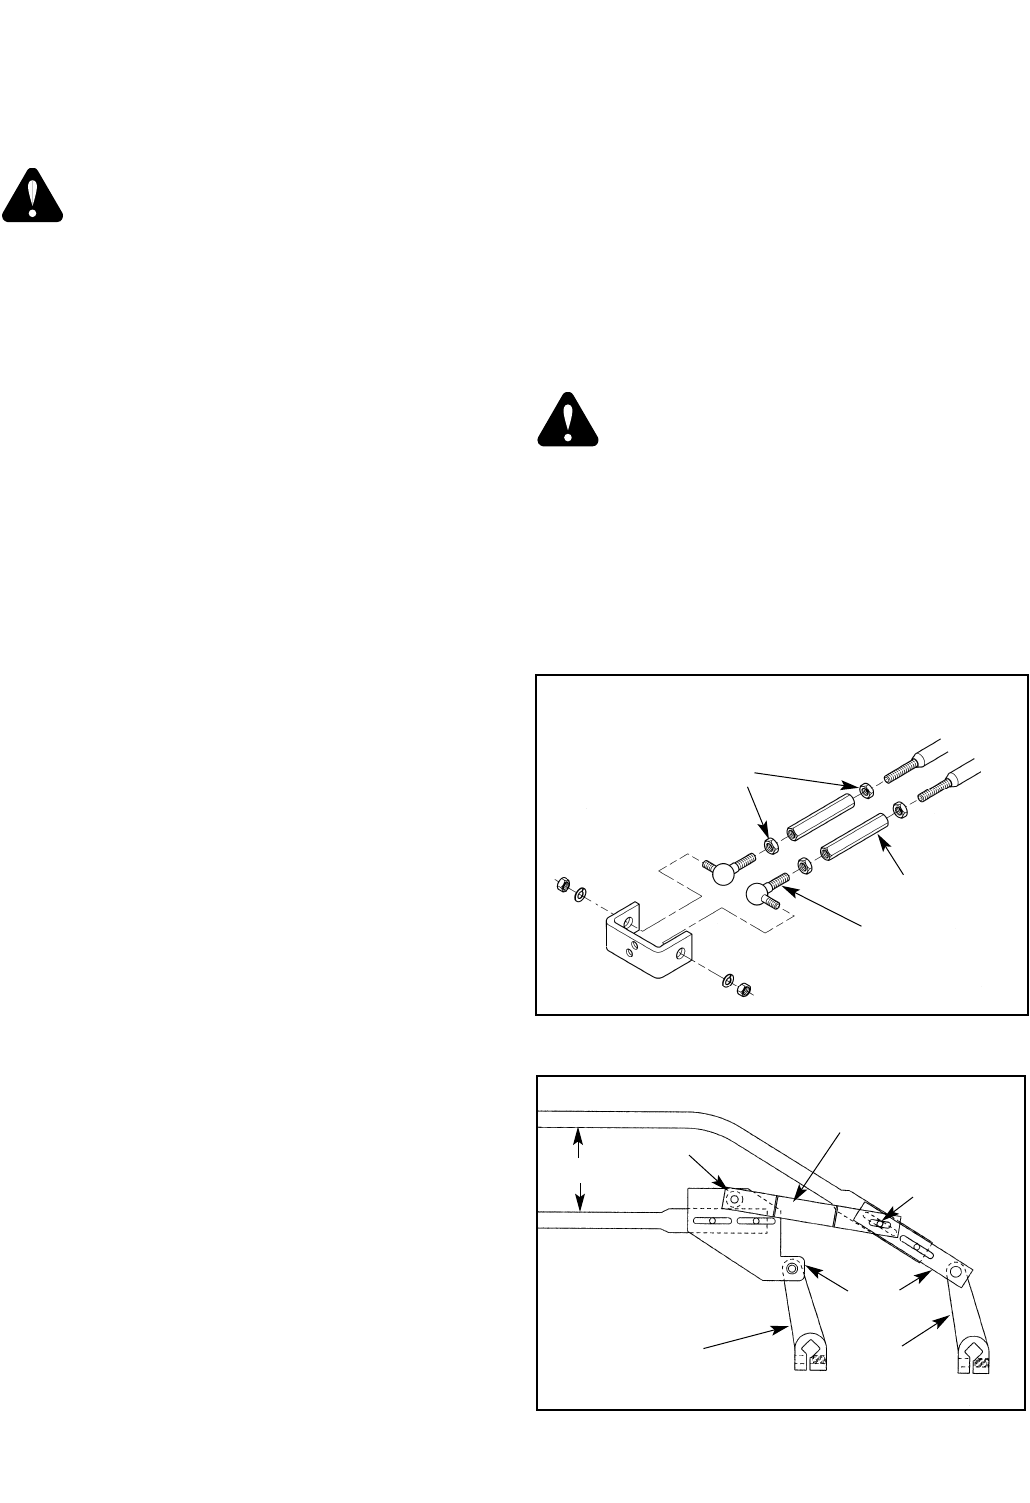
Figure 5-2
Loosen this bolt
before making
neutral
adjustments &
to bring spring
to vertical
position when in
neutral
Connecting
link
Front pump arm
Rear pump
mount
Neutralizer
spring
Linkage rod
Linkage
straps
Rear steering linkage adjustment
Figure 5-1
Lock nut
Turnbuckle
Ball joint
Front end of steering linkage