


19
MAINTENANCE
Maintenance schedule
Below you will find some general mainte-
nance instructions.
Daily maintenance
S Check throttle trigger and throttle trigger
lockout function.
S Check that the stop switch works
correctly.
S Check that there are no fuel leaks from
the engine, tank or fuel lines.
S Check that the blade does not rotate
when the engine is idling.
S Clean the outside of the machine.
S Check that the blade guard i s not dam-
aged or cracked.
S Replace the blade guard if it is exposed to
impact or is cracked.
S A non--balanced blade induces heavy
vibrations that may damage the machine.
S Check that nuts and screws are tight.
S Check that the screws that hold the bevel
gear are tight.
S Check that the locking nut is tight.
Weekly maintenance
S Check the starter and starter cord.
S Clean the carburetor area.
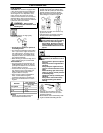
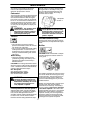
S Clean the outside of the spark plug. Re-
move it and check the electrode gap. Ad-
just the gap to 0.024s (0.6 mm), or
replace the spark plug. Use resistor spark
plug Champion RCJ--6Y or equivalent.
S Clean the cooling fins on the cylinder and
check that the air intake near the starter
is not blocked.
S Check that the bevel gear is filled with
grease up to 3/4 full. Use special grease.
S Clean the air filter.
Monthly maintenance
S Clean the fuel tank.
S Clean the outside of the carburetor and
the space around it.
S Clean the fan and the area around it.
S Check fuel lines for cracks or other dam-
age. Change if necessary.
S Change the fuel filter in fuel tank.
S Check the clutch, clutch springs and the
clutch drum for wear. Replace if neces-
sary.
S Check electrical wires and connections.
S Replace the spark plug. Use resistor
spark plug Champion RCJ--6Y or equiva-
lent.
S Change the air filter.
The grease in the be
v
el gear does not nor-
mally need to be changed except if repairs
are carried out.
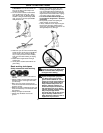
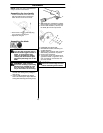
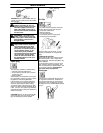
Adjusting the edger’s cutting
depth
The cutting depth should be adjusted before
starting work.
WARNING: Never attempt to ad-
just the cut depth when the engine
is running. Always release the
throttle trigger, wait until the blade
stops turning, move the ON/OFF
switch to the OFF position, and
disconnect spark plug before mak-
ing adjustments.
A
1 . Loosen the depth adjustment knob (A).
2. Slide the wheel to the desired position.
S Raising the wheel will increase the cut-
ting depth.
S Lowering the wheel will decrease the
cutting depth.
3. Tighten the depth adjustment knob se-
curely.
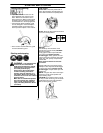
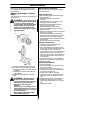
WARNING: Always keep the
engine on the right hand side of
your body. Always wear protective
glasses, long pants and heavy--
duty shoes when using the
machine.
Observe your surrondings, ensure
people and animals do not come in
the immediate vicinity or can be hit
by thrown objects.
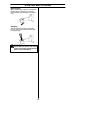
When edging, apply full throttle
before entering the soil.