


WORKING TECHNIQUES
28 – English
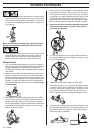
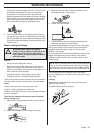
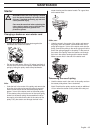
Felling
Felling is done using three cuts. First you make the
directional cuts, which consist of the top cut and the bottom
cut, then you finish with the felling cut. By placing these cuts
correctly you can control the felling direction very accurately.
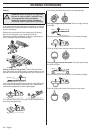
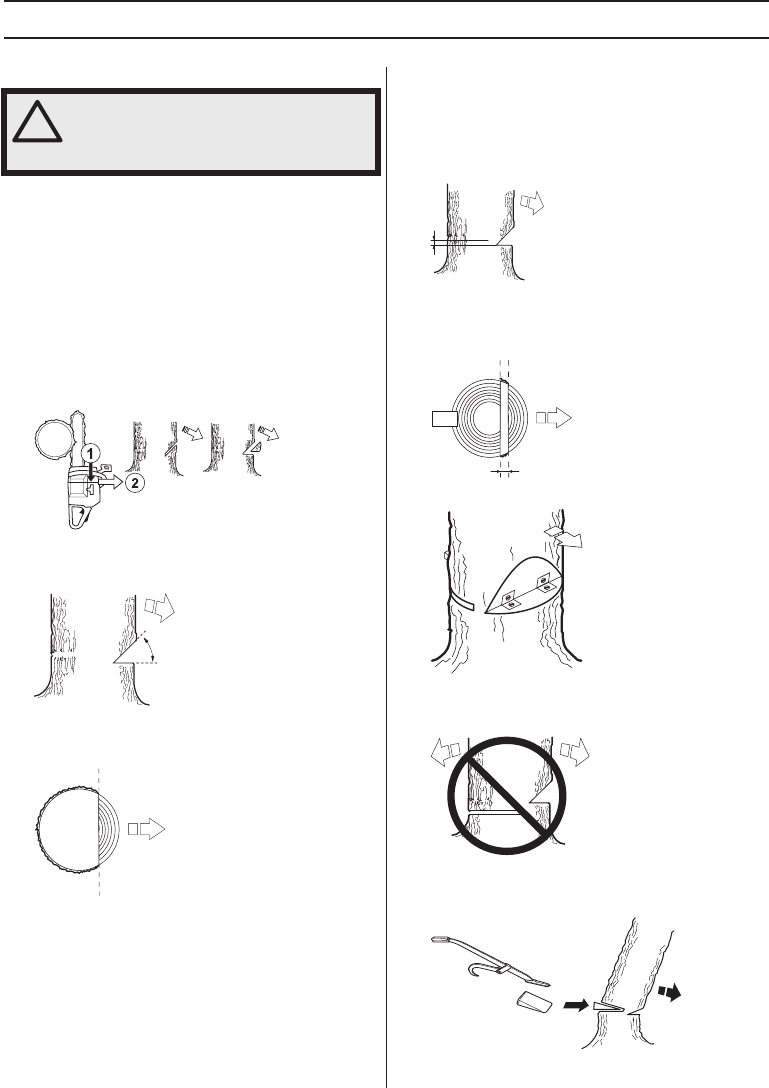
Directional cuts
To make the directional cut you begin with the top cut. Aim
using to the saw’s felling direction mark (1) toward a goal
further forward in the terrain, where you would like the tree to
fall (2). Stand on the right-hand side of the tree, behind the
saw, and cut with a pull stroke.
Next make the bottom cut so that it finishes exactly at the end
of the top cut.
The directional cuts should run 1/4 of the diameter through
the tr
unk and the angle between the top cut and bottom cut
should be 45
°.
The line where the two cuts meet is called the directional cut
line.
This line should be perfectly horizontal and at right
angles (90
°) to the chosen felling direction.
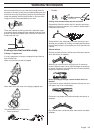
Felling cut
The felling cut is made from the opposite side of the tree and
it must be perfectly horizontal. Stand on the left side of the
tree and cut on the pull stroke.
Make the felling cut about 1.5-2 inches (3-5 cm) above the
bottom directional cut.
Finish the felling cut parallel with the directional cut line so
that the distance betw
een them is at least 1/10 of the tr
unk
diameter. The uncut section of the trunk is called the felling
hinge.
The felling hinge controls the direction that the tree falls in.
All control over the felling direction is lost if the felling hinge
is too narro
w or non-e
xistent, or if the directional cuts and
felling cut are badly placed.
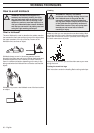
When the felling cut and directional cut are complete the tree
should start to f
all by itself or with the aid of a felling wedge
or breaking bar.
!
WARNING! Unless you have special
training we advise you not to fell trees with
a diameter larger than the bar length of your
saw!