13
HUSKY 1550
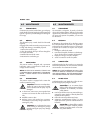
5.0 OPERATING INSTRUCTIONS
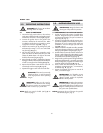
WARNING: Risk of Injury. Do not direct
discharge stream at anyone.
WARNING: Make sure the wand is
pointed in a safe direction when starting
the pressure washer. Do not point at face
or feet as serious injury could result.
5.1 START-UP PROCEDURE
1.
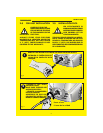
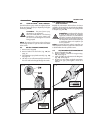
Connect the high pressure hose to the machine
outlet. Ensure that the threads are aligned properly
and that the connection is secure (Fig.3-page 6).
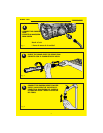
2. Connect the garden hose to the garden hose
connector attached to the machine inlet. Make
sure that the garden hose is connected to a water
supply that is turned on (Fig.4+6 - page 7).
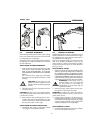
3. Insert the lance into the gun by pushing firmly and
simultaneously twisting a ¼ of a turn until locked
into place (Fig.5
-page 7
).
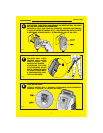
4. Plug the GFCI into the power receptacle. Firmly
press and release the TEST button then press and
release the RESET button. The light on the GFCI
should be illuminated (Fig.7
-page 8
).
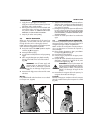
5. Ensure that the gun safety is unlocked and squeeze
the trigger until the air has escaped and a steady flow
of water is coming from the nozzle (Fig.8
-page 8
).
6. Depress the ON button. Note that the motor will
momentarily start then stop (Fig.9
-page 8
).
7. Squeeze the trigger to start motor and water flow.
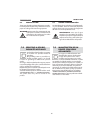
NOTE: Make sure wand is locked. (see fig.5) As
shown on page 7.
WARNING
WARNING: If the wand is not securely
locked into place, it could be ejected
under high pressure when operating
the gun.
WARNING
WARNING
IMPORTANTE: Si el lanzador no está
bien bloqueado en su sede, cuando se
utiliza la pistola, podría ser expulsada
debido a la alta presión.
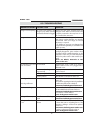
5.0 INSTRUCCIONES DE USO
IMPORTANTE: Riesgo de daños. NO
descarguen el flujo sobre las personas.
5.1 PROCEDIMIENTO DE PUESTA EN MARCHA
1. Conecte el tubo de alta presión a la salida de la
máquina. Asegúrese de que los conductos están
correctamente alineados y de que la conexión es
segura (Fig.3 - pág. 6).
2. Conecte la manguera del jardín al conector corre-
spondiente acoplado a la entrada de la máquina.
Asegúrese de que la manguera del jardín está
conectada a una toma de agua que esté activa
(Fig.4+6 - pág. 7).
3. Introduzca la lanza en la pistola. Para ello, presiónela
con firmeza al tiempo que la gira un cuarto de vuelta
hasta que queda fijada en su lugar (Fig.5 - pág. 7).
4. Enchufe el GFCI a la toma de corriente. Presione con
firmeza y suelte el botón de prueba (TEST). A conti-
nuación, pulse y suelte el botón de reinicio (RESET).
Se encenderá la luz del GFCI (Fig.7-pág. 8).
5. Asegúrese de que el dispositivo de seguridad de la
pistola está desbloqueado y apriete el accionador
hasta que salga aire y se genere un caudal de agua
constante desde la boquilla (Fig.8-pág. 8).
6. Pulse el botón ON. Recuerde que el motor se
encenderá momentáneamente y, a continuación,
se detendrá (Fig. 9 - pág. 8).
7. Apriete el accionador para poner en marcha el
motor y el caudal de agua.
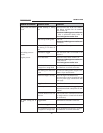
ATENCIÓN
IMPORTANTE: Cuando se hace arrancar
la hidrolimpiadora, verifiquen que el lan-
zador esté dirigido hacia una dirección no
peligrosa. No dirigirlo hacia el rostro o los
pies, para evitar posibles daños.
ATENCIÓN
ATENCIÓN
NOTA: Asegúrense de que el bloqueo de seguridad
esté cerrado (Fig. 5 - pág. 7).


