10 - English
OPERATION
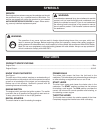
If the machine stays and digs in one spot, try rocking the unit
from side to side to start it moving forward again.
If the soil is very hard, water a few days before cultivating.
Avoid working the soil when soggy or wet. Wait a day or two
after heavy rain for the ground to dry.
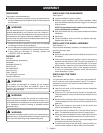
GENERAL CULTIVATING
See Figures 13 - 14.
Shallow cultivating less than 2 in. deep can be used to disrupt
weeds and aerate soil, without injuring nearby plant roots. It
should be done often so that weeds do not grow large and
cause tangling in the tines of the unit.
The two outer tine blades can be removed from the unit to
allow a more narrow cultivating width.
ADJUSTMENTS
WARNING:
To prevent accidental starting that could cause serious
personal injury, always disconnect the spark plug wire
when making adjustments.
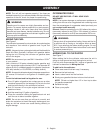
ADJUSTING WHEEL POSITION
See Figures 14 - 16.
The wheel position of the unit is adjustable. Holes on the
wheel support rod offer different heights to choose from in
both the A and B positions.
Install the wheel assembly accessory in position A to
transport the cultivator to and from the work area.
For general cultivating, remove the wheel assembly to al-
low deep penetration of the tine blades into the cultivating
surface.
The wheel assembly accessory may be installed in posi-
tion B to allow use of the drag bar during cultivating.
ADJUSTING DRAG BAR POSITION
The drag bar may be used to help control the cultivator’s
speed and depth of operation. It is located on the wheel
assembly support. Holes on the wheel support rod offer
different heights to choose from.
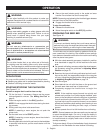
To remove the two outer tines:
Disconnect the spark plug.
Remove the hitch pins from the holes on the ends of the
tine shaft.
Remove the outside tine blades and felt washers from
the tine shaft.
Place hitch pins in the holes that were uncovered when
felt washers were removed.
NOTE: The unit will not operate properly if the tines are in-
stalled incorrectly. If you notice a problem with the cultivating
operation of the unit, check for proper tine positioning.


