


20
•
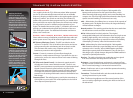
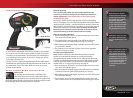
RAPTOR
ADJUSTING YOUR MODEL
Once you become familiar with driving your model, you might
need to make adjustments for better driving performance
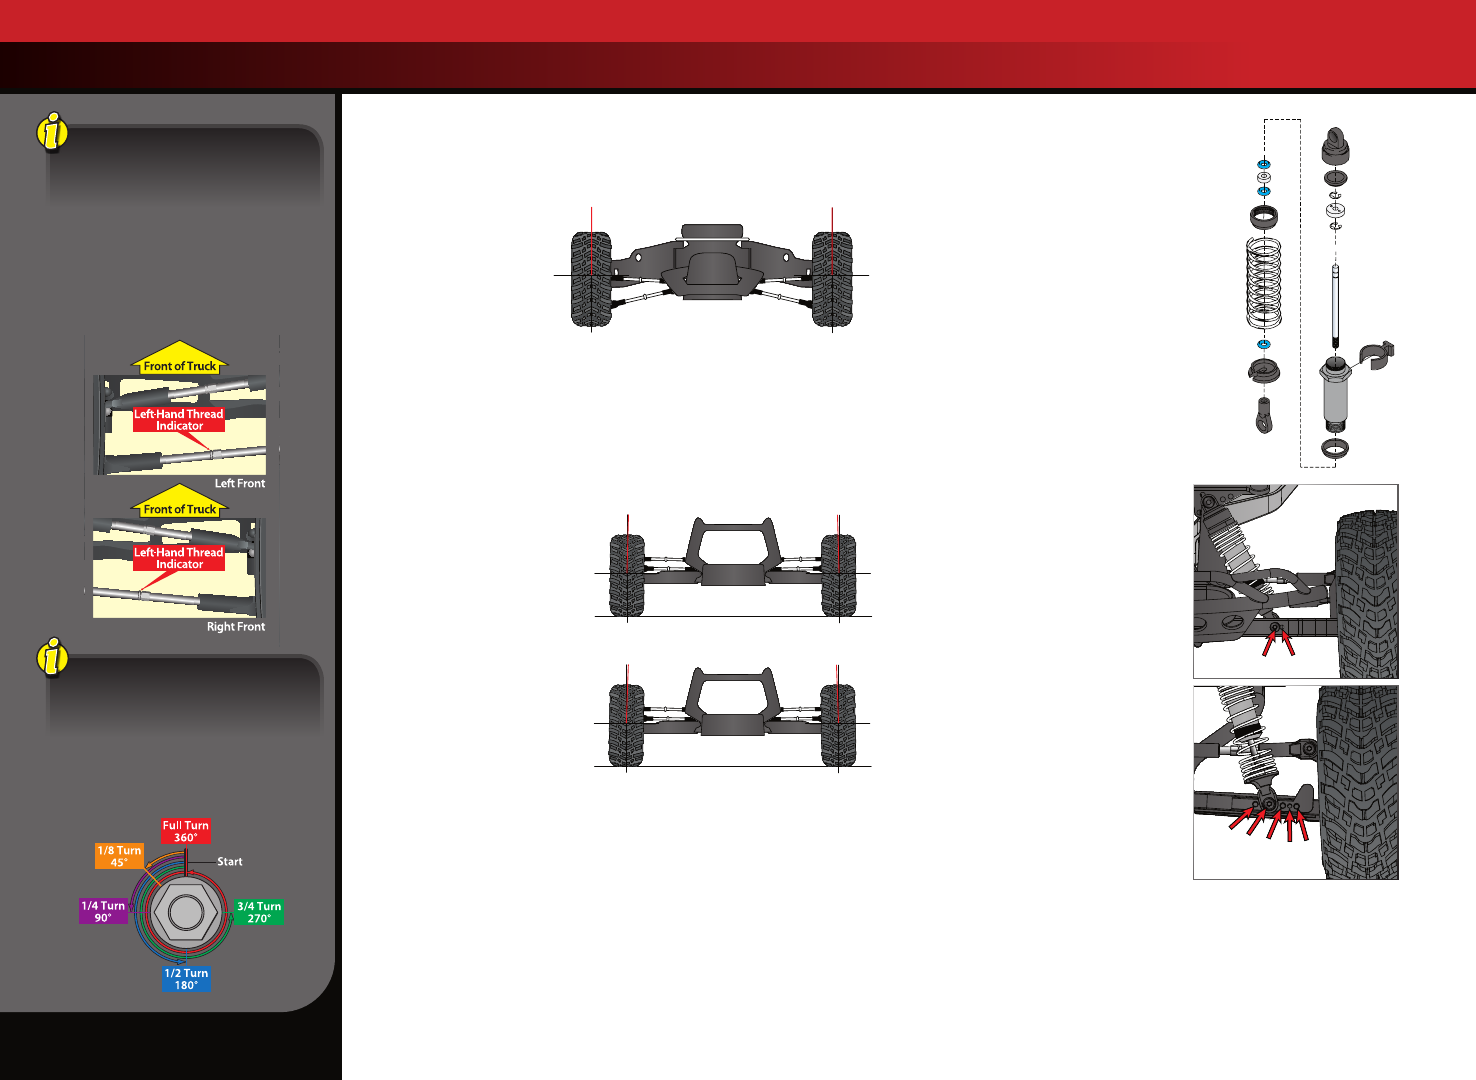
Adjusting the Toe-in
Geometry and
alignment specs play
an important roll in
your model’s handling.
Take the time to set
them correctly. Set the
steering trim on your
transmitter to neutral. Now, adjust your servo and tie rods so that
both wheels are pointing straight ahead and are parallel to each
other (0° toe-in). This will ensure the same amount of steering in
both directions. For increased stability add 1° to 2° of toe-in to each
front wheel. Use the turnbuckles to adjust the alignment.
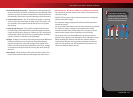
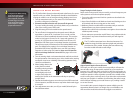
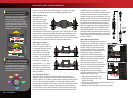
Adjusting the Camber
The camber angle of both
the front and rear wheels can
be adjusted with the camber
rods (upper turnbuckles).
Use a square or right-angle
triangle to set the camber
accurately. The stock camber
of the front wheels is -1°
of camber. In the rear, the
stock camber is -1.5°. These
adjustments should be set
with the truck positioned at
its normal ride height with a
battery installed.
Fine Tuning the Shocks
The four shocks on the model greatly influence its handling.
Whenever you rebuild your shocks or make adjustments to the
pistons, springs, or oil, always make changes to them in pairs (front
or rear). Piston selection depends on the range of oil viscosities
that you have available. For example, using a two-hole piston with
a lightweight oil will, at one point, give you the same damping
as a three-hole piston with heavier oil. We recommend using the
two-hole pistons with a range of oil viscosities from 10W to 50W
(available from your hobby shop). The
thinner viscosity oils (30W or less) flow more
smoothly and are more consistent, while
thicker oils provide more damping. Use only
100% pure silicone shock oil to prolong seal
life. The model’s ride height can be adjusted
by adding or removing the clip-on, spring
pre-load spacers. Adjust the ride height so
that the suspension arms are slightly above
being parallel to the ground. Observe how
the model handles in turns. Proper set-up
will add stability and help prevent spin outs.
Experiment with different springs and shock
oils to find what works best for your current
track conditions.
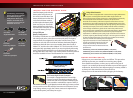
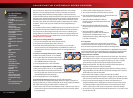
Shock Mounting Positions
Big bumps and rough terrain require a
softer suspension with the maximum
possible suspension travel and ride
height. Racing on a prepared track
or on-road use requires a lower ride
height and firmer, more progressive
suspension settings. The more
progressive suspension settings
help reduce body roll (increased roll
stiffness), dive during braking, and
squat during acceleration.
The suspension of your model has
been set up for off-road performance
(position 1 on the front suspension
arms and position 2 on the rear
suspension arms). If you plan on
driving on hard surfaces, the following
changes should be made:
1. Move the front shocks to the
outermost position (2) on the
suspension arms.
2. Move the rear shocks to the middle position (3)
on the suspension arms.
3. Add a 4mm preload spacer to the front shock.
Pre-load
Spacer
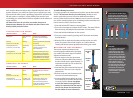
0°0°
-1.5
°
-1.5
°
-1
°
-1
°
0
°
0
°
Rear Camber
0°0°
-1.5
°
-1.5
°
-1
°
-1
°
0
°
0
°
Front Camber
0°0°
-1.5
°
-1.5
°
-1
°
-1
°
0
°
0
°
Toe-in
1
1
Front
Rear
2
2
3
4
5
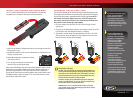
All of the toe links are installed on
the truck so the left-hand thread
indicators point to the same direction.
This makes it easier to remember
which way to turn the wrench to
increase or decrease toe link length
(the direction is the same at all four
corners). Note that the groove in the
hex indicates the side of the toe link
with the left-hand threads.
To achieve a good starting point for
the slipper clutch, tighten the slipper
clutch adjusting nut clockwise until
the slipper clutch adjusting spring
fully collapses (do not over tighten),
and then turn the slipper clutch nut
counterclockwise one full turn.