9
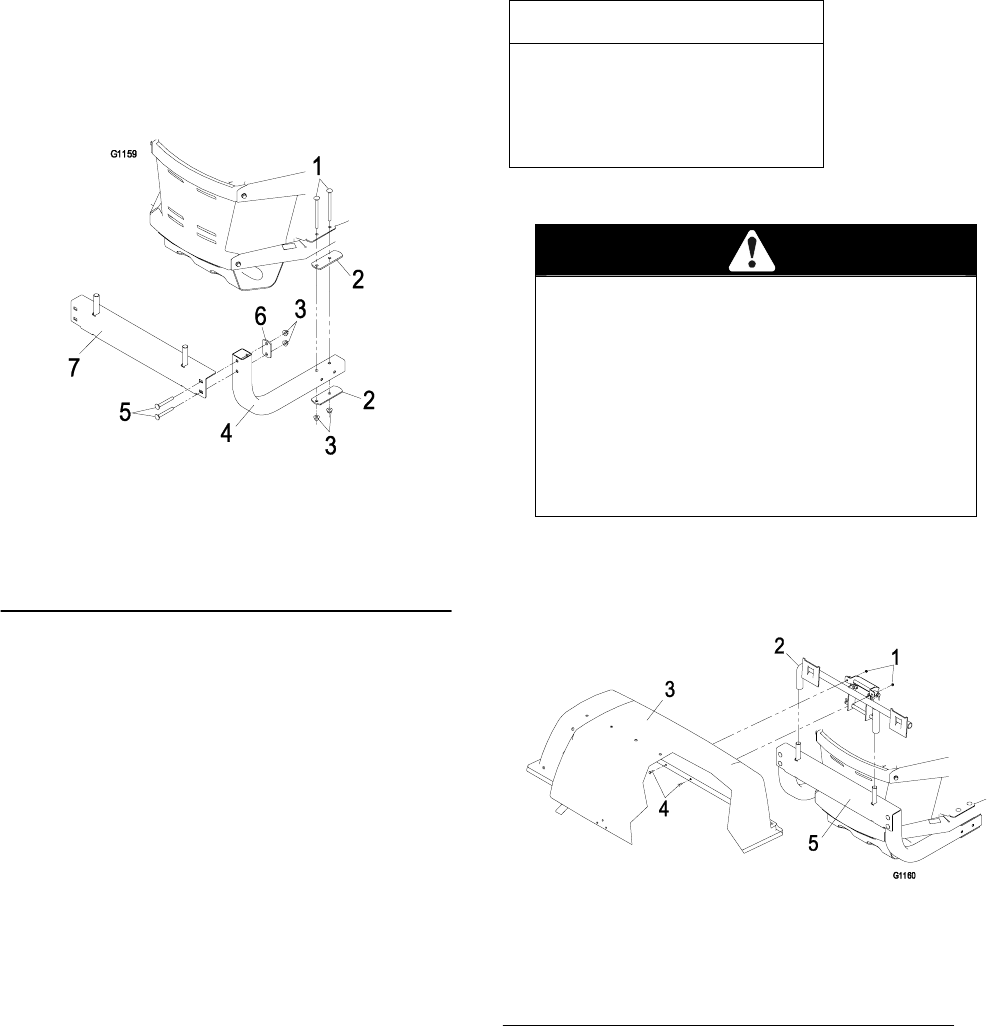
2. Install the two 3/8-16 x 5 carriage bolts
(item 1) through the holes on the frame as
shown in Figure 5. Place two stiffeners
(item 2) on the top and bottom of the
bagger tube (item 4) and install on
carriage bolts. Fasten with two nyloc nuts
(item 3); leave loose to aid installation.
Repeat procedure for other side.
Figure 5
1. Bolts 2. Stiffener
3. Nuts 4. Bagger tube
5. Screws 6. Stiffener
7. Bagger hitch
3. Align the holes in the bagger tube
(item 4) with the bagger hitch (item 7).
Fasten with hardware and stiffener as
shown in Figure 5; leave loose to aid in
installation.
4. Tighten all hardware.
Installing the Hood and Bags
Parts needed for this step:
Description
Qty.
Screw, PPH 1/4-20 x 3/4 ..................
2
Asm, Bagger Mount..........................
1
Nut, Nyloc 1/4-20 Flg........................
2
Asm, Hood Bagger...........................
1
Bags.................................................
2
Procedure:
Operating the mower with the bagger
installed and the front weight removed
may cause loss of traction and
steering control or an unstable
condition which could result in injury
or death.
Install the bagger only when the front
weight is installed.
1. Install the bagger mount assembly (item 2)
onto to the hood assembly (item 3) using two
1/4-20 x 3/4 screws (item 1) and nyloc nuts
(item 4) as shown in Figure 6.
Figure 6
1. Screws 2. Bagger mount assembly
3. Hood assembly 4. Nuts
5. Bagger hitch
2. Install the mount assembly onto the hitch.


