


11
+
Installing the Discharge Baffle –
52” Deck Only
Parts needed for this step:
Description
Qty.
Baffle, Discharge 52”......................... 1
Bolt, Carriage 5/16-18 x 3/4............... 2
Nut, Nyloc 5/16-18 Flg....................... 2
Procedure:
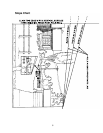
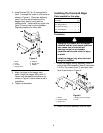
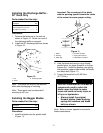
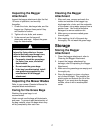
1. Remove the fasteners in the deck as
shown in Figure 10. Retain for reuse if
the discharge baffle is removed.
2. Install the 52” discharge baffle as shown
in Figure 10.
Figure 10
1. Nut 2. Discharge baffle
3. Screw
Note: This baffle can stay on the machine
while side discharging or mulching.
Note: These parts may be discarded if
mounting to 48” unit.
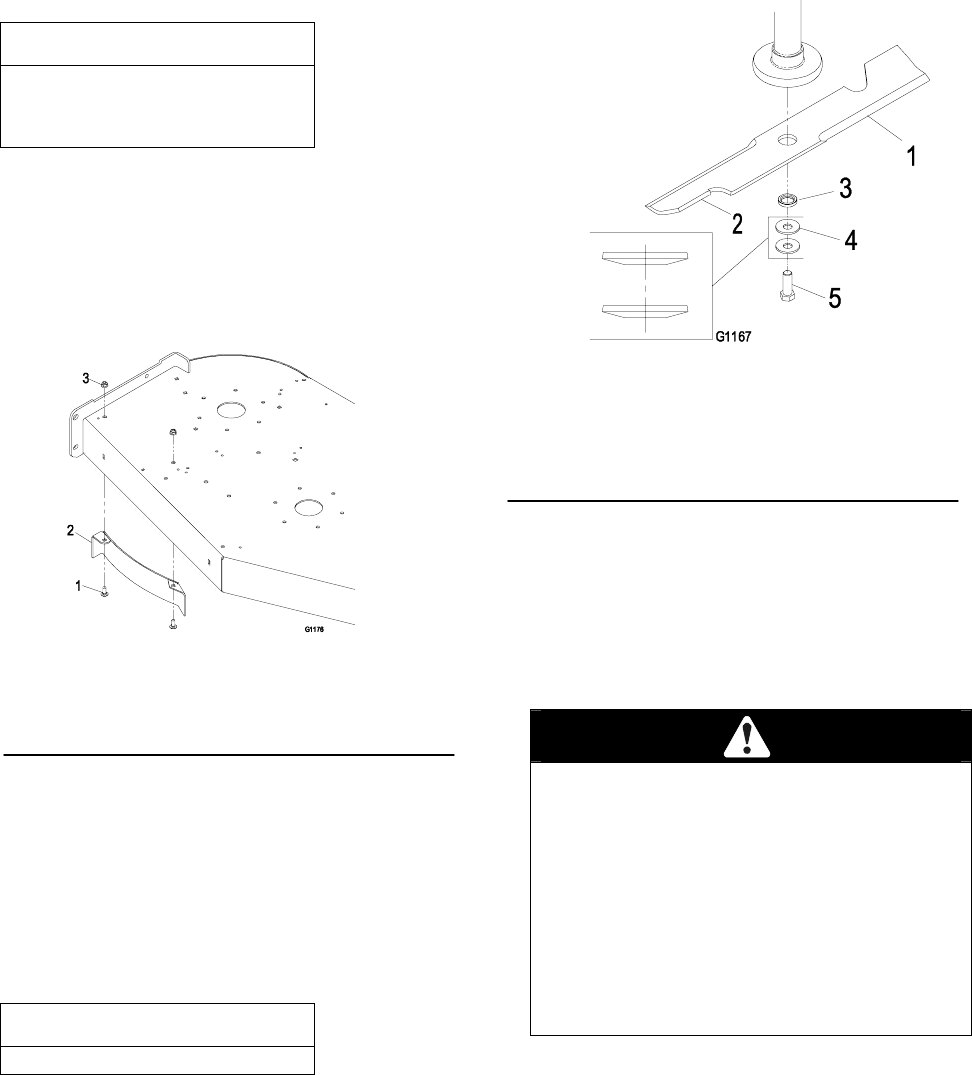
Installing the Bagger Blades
Parts needed for this step:
Description
Qty.
Blades, 48” or 52”.............................. 3
Procedure:
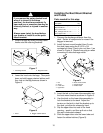
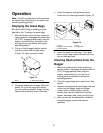
1. Install the blade onto the spindle shaft
(Figure 11).
Important: The curved part of the blade
must be pointing upward toward the inside
of the mower to ensure proper cutting.
Figure 11
1. Blade 2. Sail area of blade
3. Bushing 4. Spring disk washers
5. Blade bolt + Orientation of washers
2. Hold the blade end using a rag or thickly-
padded glove (or place a wrench on the top
sheave nut). Install the bushing, two spring
disk washers (cupped side toward the blade)
and blade bolt (Figure 11).
3. Torque the blade bolt to 45-55 ft-lbs
(61-75 N-m).
Incorrect installation of the blade or
components used to retain the
blade cause the blade to come
loose and could seriously injure or
kill you or bystanders.
• Always install the original
Exmark blades, blade bushing,
spring disk washers and blade
bolts as shown.
Note: Refer to mower operator’s manual for
blade maintenance.