


5
A&E CATALINA 2500
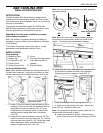
17. Using wand, check to see if awning opens and closes
correctly by pulling awning open about 3 feet (1 meter)
(FIG. 17).
Note: For installation on some curved sided vehicles Step
18 does no apply.
18. When awning is at proper setting and operates cor
rectly, mark location of arm setting on inner arm assem-
bly with supplied arrow labels (FIG. 18).
Repeat for other side.
OPERATION INSTRUCTIONS
TO OPEN
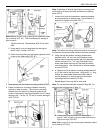
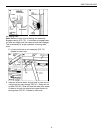
1. Using wand, open awning case by inserting pin on end
of wand into hole in arm assembly indicated by arrows
on bottom of case (FIG. 1).
2. Lower arm assembly out of awning case (FIG. 2).
Note: For curved sided vehicles proceed to Step 3. For
straight sided vehicles skip to Step 4.
3. A. Slide outer arm down to ground. With foot still on
ground, raise inner arm as high as it will go and
tighten lock knob (FIG. 3A).
Note: Make sure lock in top of awning arm assembly clears
top of case lip (FIG. 3B). This is necessary for awning to
open properly.
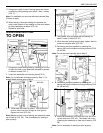
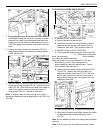
B. Using wand, hook pull-strap and pull awning out
about 1 meter (3 feet) (FIG. 3C).
C. While securely holding the pull-strap, tighten the lock
knobs on the rafter arms (FIG. 3D).
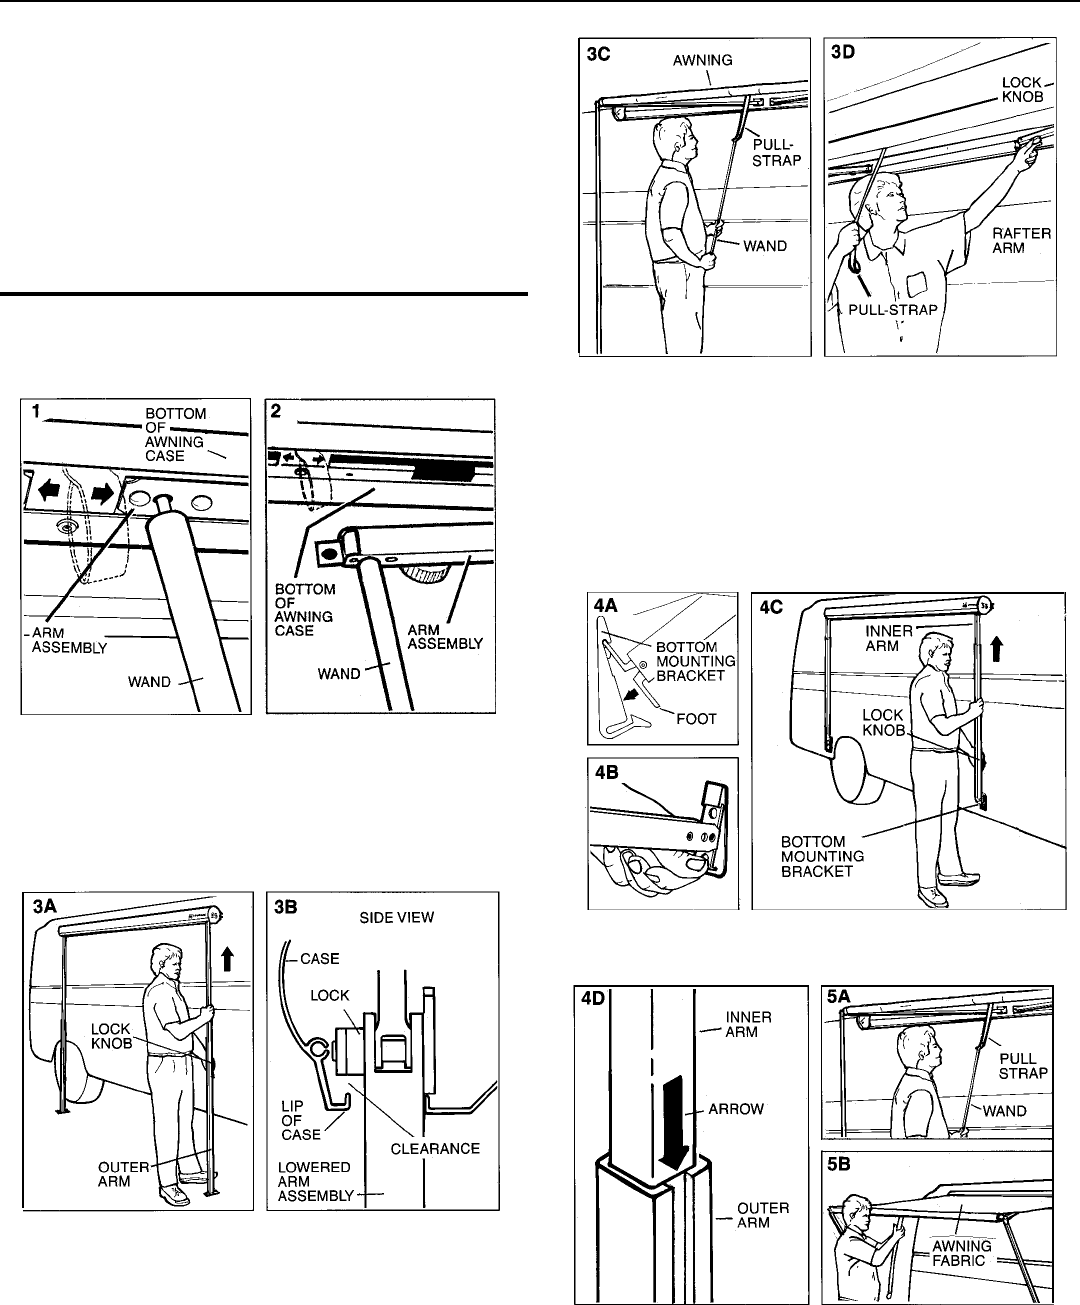
D. Set awning into pivot position by inserting the
awning foot into the bottom mounting bracket (FIGS.
4A and 4B).
Note: For curved sided vehicles skip to Step 5.
4. A. Set awning into pivot position by inserting the
awning foot into the bottom mounting bracket (FIGS.
4A, 4B and 4C).
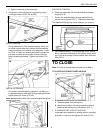
B. Extend arm assembly until arrow on inner arm lines
up with outer arm (FIG. 4D). This allows lock in top
of awning arm assembly to clear top of case lip (FIG.
3B).
Note: This is necessary for awning to open properly.