


3
A&E CATALINA 2500
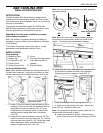
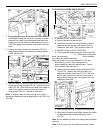
Note: Make sure lock in top of awning arm assembly clears
top of case lip (FIG. 4C). This is necessary for awning to
open properly.
Tighten lock knob. Repeat steps 4B & 4C for other
side.
C. Using wand, hook pull-strap and pull awning out
about 3 feet (1 meter) (FIG. 4D).
D. While securely holding the pull-strap, tighten the lock
knobs on the rafter arms (FIG. 4E).
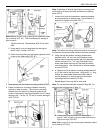
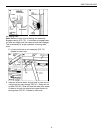
5. Snap awning foot into bottom mounting bracket (FIG.5).
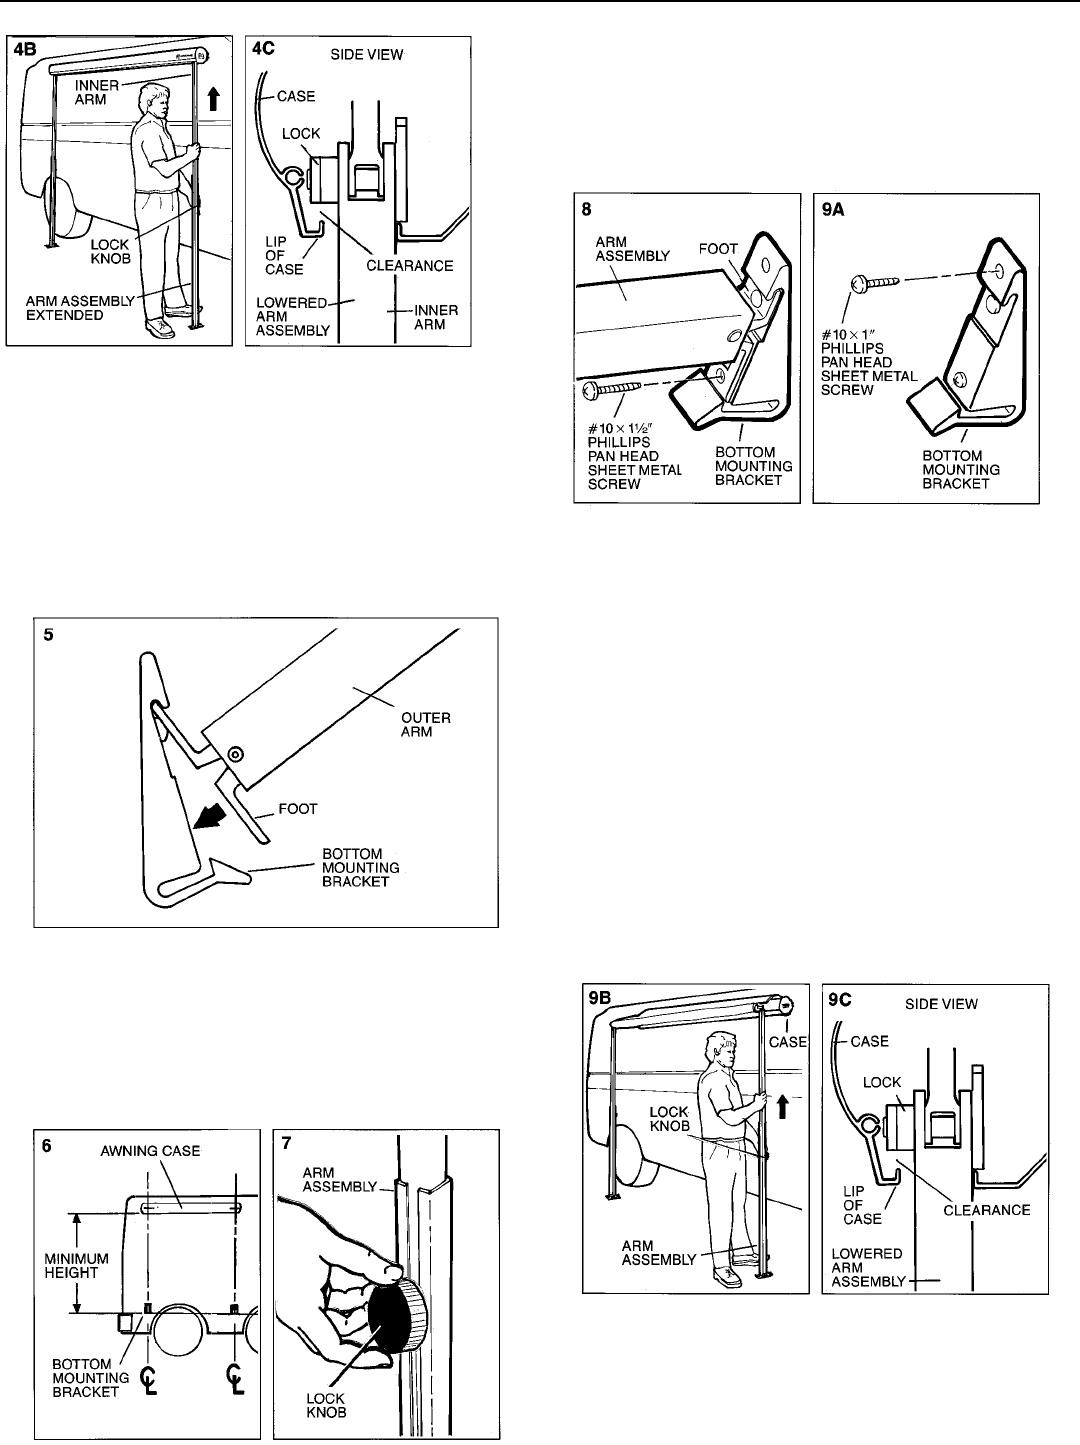
6. Select a location for mounting of bottom mounting
bracket on side of vehicle. The minimum mounting
distance from the bottom of the awning case to the
bottom of the bottom mounting bracket for the 2.5 meter
awning is 48. For the 3.0, 3.5 and 4.0 meter awnings it
is 58 (FIG. 6).
Note: Positioning of left and right bottom mounting brack-
ets should be at same level and centered to the awning
arms (FIG. 6).
7. Loosen lock knob and extend arm assembly keeping
arm perpendicular to awning case. Once location is
determined, tighten lock knob (FIG. 7).
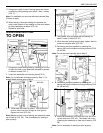
Note: The bottom mounting brackets should be mounted to
the floorline of solid structural member whenever possible.
8. Using the foot and bottom mounting bracket as a
template, drill a 1/8 dia. hole for the bottom screw.
Secure bottom mounting bracket with foot attached to
vehicle using a #10 x 1-1/2 long Phillips pan head
sheet metal screw thorough the foot and the bottom
mounting bracket. Use a small dab of silicone sealant
on screw (FIG. 8)
9. A. Release foot from bottom mounting bracket and drill
a 1/8 dia. hole for the top screw. Using a #10 x 1 long
Phillips pan head sheet metal screw with a dab of
silicone sealant on it, secure the top of the bottom
mounting bracket to vehicle (FIG. 9A).
Repeat Steps 5 thorough 9A for other side.
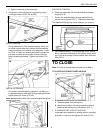
Note: For curved sided vehicles proceed to Step 9B. For
straight sided vehicles skip to Step 10.
B. Loosen lock knob and lower arm assembly to
ground. With foot still on ground raise inner arm as
high as it will go (FIG. 9B).
Note: Make sure lock in top of awning arm assembly clears
top of case lip (FIG. 9C).