


4
A&E CATALINA 2500
Tighten lock knob.
Repeat Step 9B for other side.
Note: For curved sided vehicles skip to Step 13.
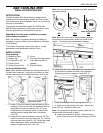
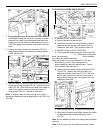
10. Reattach foot to bottom mounting bracket. Loosen
lock knob on arm assembly. Raise inner arm as high
as it will go. Then tighten lock knob (FIG. 10).
Note: Make sure lock in top of awning arm assembly clears
top of case lip (FIG 9C). This is necessary for awning to
open properly.
Repeat for other side.
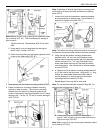
11. Using wand, hook pull-strap and pull awning out about
3 feet (1 meter) (FIG. 11).
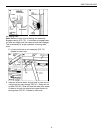
12. While securely holding the pull-strap, tighten the lock
knobs on the rafter arms (FIG. 12).
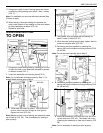
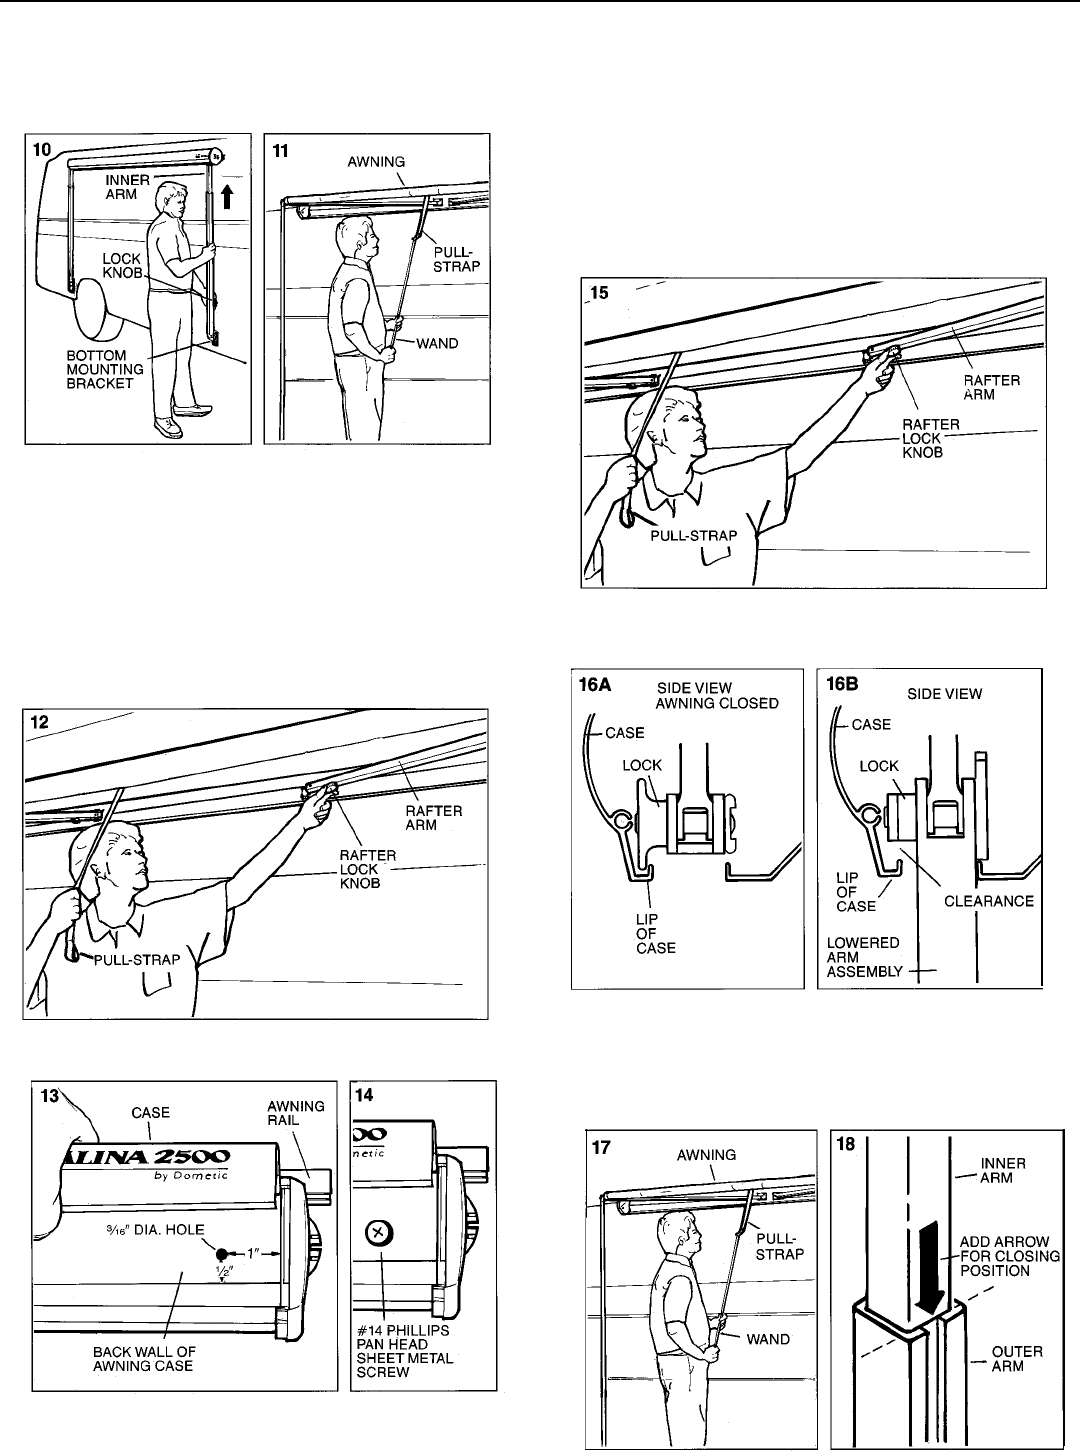
13. A. On the back wall inside the awning case, measure in
from edge of end cap 1 inch (2.54 cm) and up 1/2
inch (1.27 cm) from bottom edge of back wall as
shown in FIG. 13 and mark this location.
B. Drill a 3/16 dia. hole through the back of the awning
case and into the vehicle. Repeat for other side.
14. Secure case to vehicle using the two #14 Phillips pan
head sheet metal screws provided with a small dab of
silicone sealant on each screw (FIG. 14).
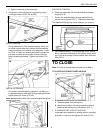
15. While holding pull-strap firmly, release lock knobs on
rafter arms and allow awning to roll up (FIG. 15).
Awning case should close tightly.
16. For correct installation, lock in top of awning arm
assembly must engage case lip (FIGS. 16A and 16B).
Note: For proper operation it is very important for lock to
clear top of case lip when opening and for lock to engage
case lip when awning is closed.
AND LOCKED
AWNING
UNLOCKED