


Rev: 8/2008
9 of 21
36B, 36BX, 36H, 36HX, 52H, 52HX
DEK
®
is exclusively distributed by GXi International, LLC
Heavy Duty Power Equipment
Assembly Instructions
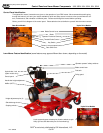
Step 2(b): Assembly Instructions for Mowers with Belt Drive System
(36B, 36BX)
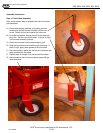
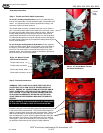
1) Attach the handle bars using 2 bolts on each side of the fuel
tank bracket. Select the desired hole locations to adjust for
the handle bar height. For lower handle bars, use the top
hole location as shown in the diagram. For higher handle
bars, use the lower hole location
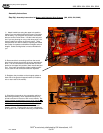
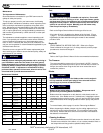
2) Attach the clutch / brake control rods to the clutch brake as-
sembly on each side of the mower. Adjust for desired level of
sensitivity by turning the threaded lug on the rod. The adjust-
ment may take a few attempts to achieve: equal balance be-
tween the two break handles so they feel the same; easy
disengagement from the parking break detent built into the
pistol grip handle; and full contact with the brake when the
handle is retracted (see page 17 for more adjustment details).
Hole location for higher handle bar positioning
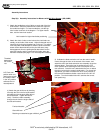
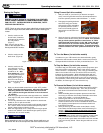
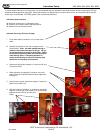
3) Unfasten the blade activation rod from the control handle,
insert it through the hole on the chassis of the mower, and
attach the rod to the blade activation cam assembly as per the
adjacent photo. Ensure the cam is positioned in the “9 O’
clock” position when attaching the rod to accomplish the cor-
rect rod travel. Once the rod is attached to the cam, re-attach
the other rod end to the control handle again. For correct rod
adjustment, you want to maintain the “9 O’ clock” position of
the cam with the blade activation control knob in the full “off”
position. Turn the threaded rod until it achieves the correct
cam positioning.
Threaded
blade activa-
tion control
rod.
9 O’ Clock cam
position when con-
necting the rod with
the control handle
in the “off” position
achieves the cor-
rect adjustment
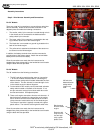
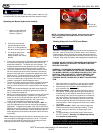
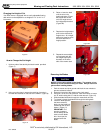
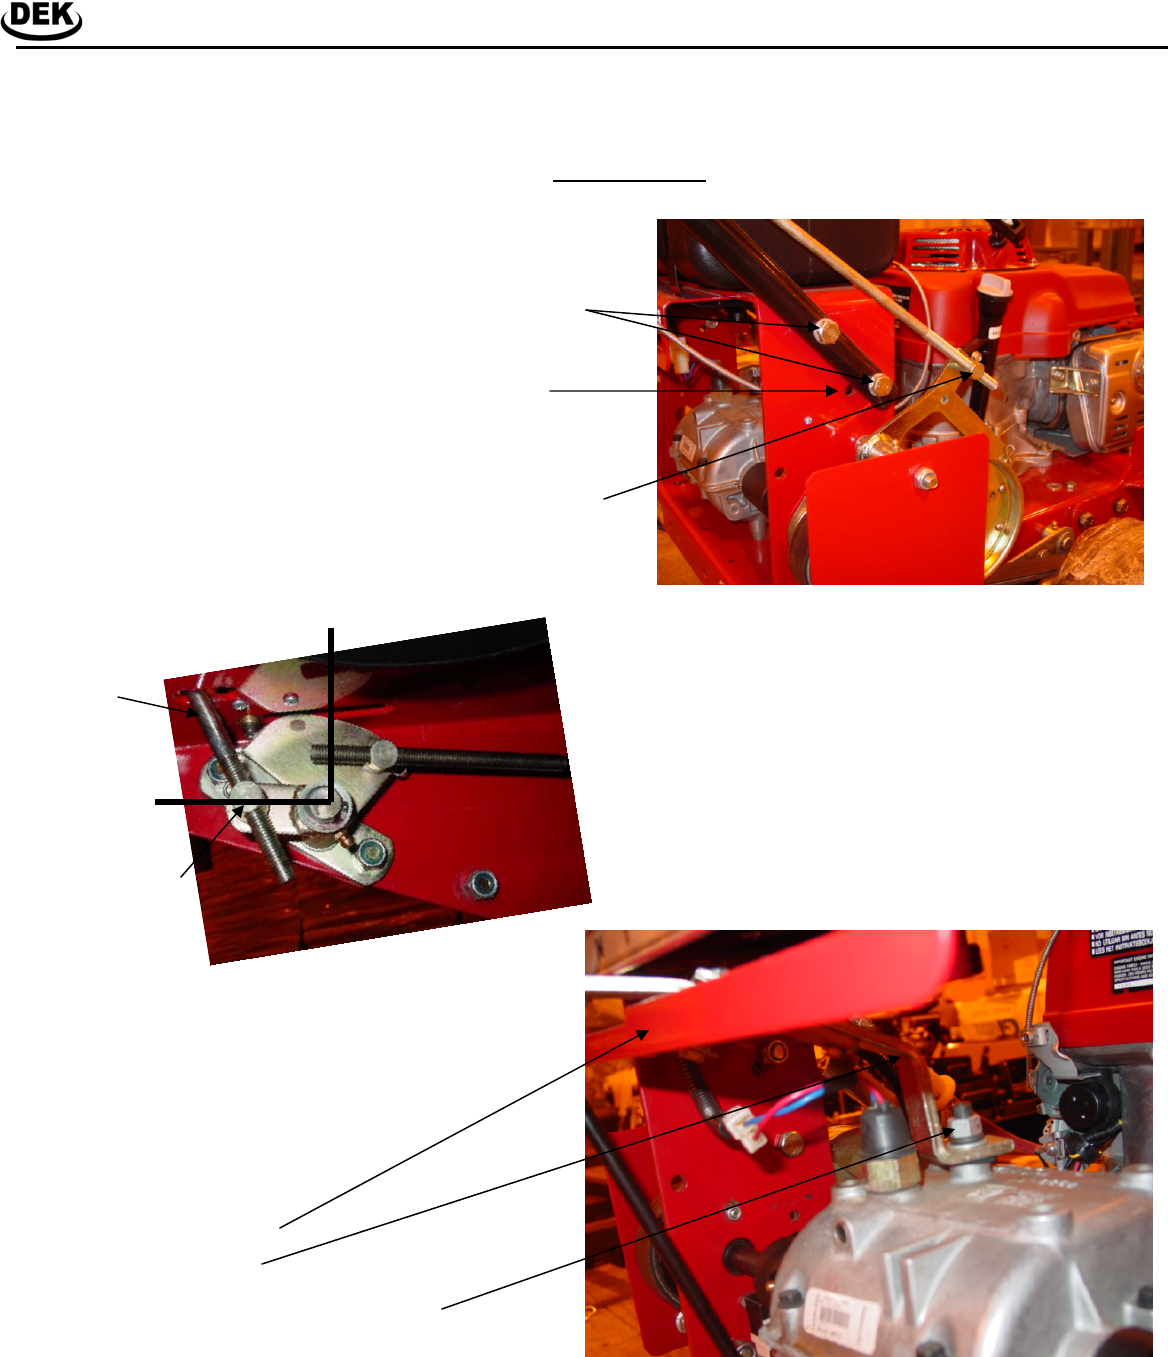
4) Attach the gear shift lever by inserting
it through the slot in the fuel tank bracket
and attaching it to the gear shifter bolt on
the transmission. Tighten the bolt se-
curely. Feed the handle assembly
through the slot from the engine side of
the fuel tank bracket.
Fuel tank bracket
Gear shift lever
Retaining nut attached to gear shift bolt