


4
E
N
G
L
I
S
H
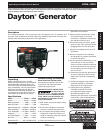
Dayton Operating Instructions and Parts Manual
Dayton
®
Generator
2ZRP8, 2ZRP9
generator. Or, use a heavy duty,
outdoor-rated extension cord that is
rated (in watts or amps) at least equal
to the sum of the connected appliance
loads. Check that the entire cord is free
of cuts or tears and that the plug has
all three prongs, especially a grounding
pin.
NEVER try to power the house wiring
by plugging the generator into a
wall outlet, a practice known as
“back feeding”. This is an extremely
dangerous practice that presents an
electrocution risk to utility workers and
neighbors served by the same utility
transformer. It also bypasses some of
the built-in household circuit protection
devices.
If you must connect the generator to
the house wiring to power appliances,
have a qualified electrician install the
appropriate equipment in accordance
with local electrical codes. Or, check
with your utility company to see if
it can install an appropriate power
transfer switch.
For power outages, permanently
installed stationary generators are
better suited for providing backup
power to the home. Even a properly
connected portable generator can
become overloaded. This may result in
overheating or stressing the generator
components, possibly leading to a
generator failure.
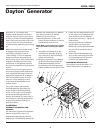
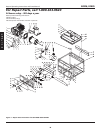
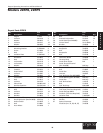
Installation
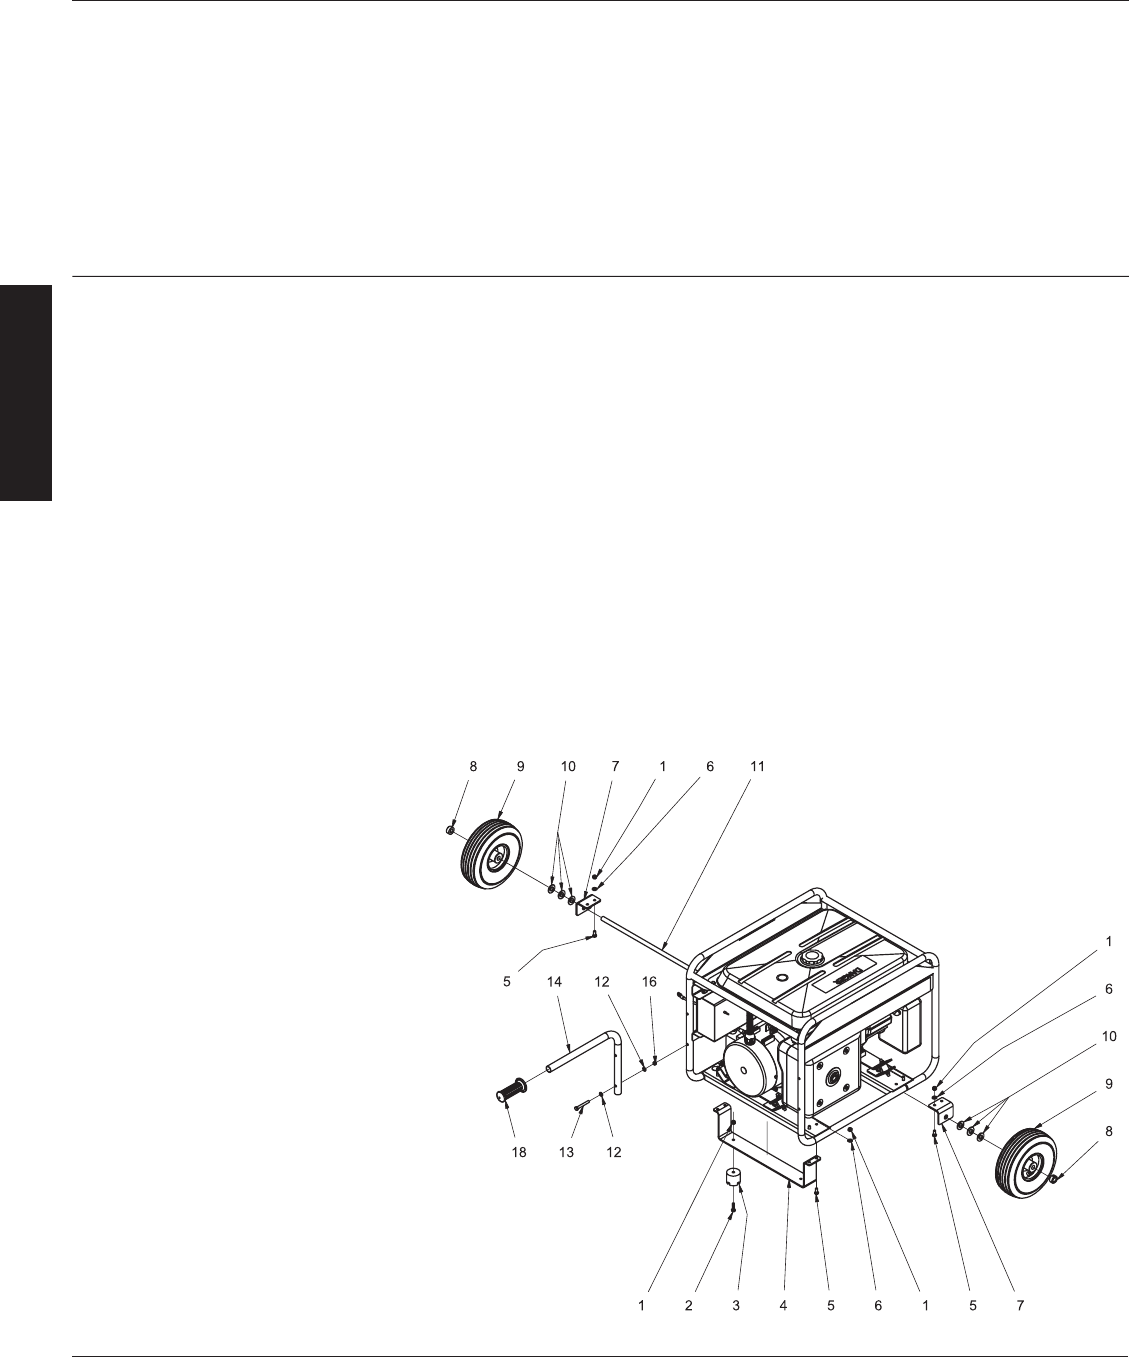
ASSEMBLY FOR WHEELS AND
HANDLES:
Use the following items for installation:
Isolator (3), Bolts (2), Locknut (1),
Underbracket Assembly (4), Bolts (5),
Washers (6), Collar/Shaft (8), Wheels (9),
Washers (10), Axle Bracket (7), Washers
(12), Axle (11), Bolts (13), Handle
Assembly (14), Locknut (15).
1. Raise the generator off the work
surface to allow clearance to mount
the Wheel Kit onto the unit.
NOTE: Make sure the generator is stable
and secure before installing the Wheel
Kit.
2. Assemble the Isolators (3) to the
Underbracket Assembly (4) using
two Locknuts (1) and two Bolts (2),
tighten bolts securely.
3. Using four Locknuts (1), four Washers
(6), and four Bolts (5) assemble the
Underbracket Assembly (4) onto
the alternator end of the generator.
Tighten all bolts securely inside of rail.
4. Fasten the Axle Support Brackets (7)
to the engine end of the generator
using four Bolts (5), four Washers
(6) and four Locknuts (1). Tighten all
bolts securely.
5. Using two Collars (8), six Washers
(10) and Axle (11) mount both
Wheels (9) onto the generator.Make
sure the axle is centered with the
generator.
6. Attach the Handle Assemblies (14
& 15) to the frame using four Bolts
(13), eight Washers (12), and four
Locknuts (16), tighten bolts.
GROUNDING INSTRUCTIONS
This product must be grounded. If it
should malfunction or breakdown,