


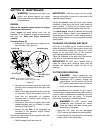

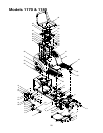

19
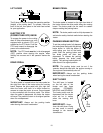
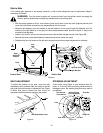
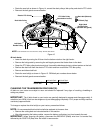
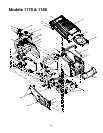
• Route the new belt as shown in Figure 14, around the deck pulleys, idler pulley and electric PTO clutch.
• Remount the belt guards removed earlier.
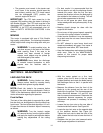
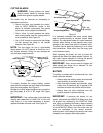
Figure 15
46-inch decks
• Lower the deck by moving the lift lever into the bottom notch on the right fender.
• Remove the belt guards by removing the self-tapping screws that fasten them to the deck.
• Grasp the PTO idler pulley bracket and pivot it toward the discharge chute to relieve tension on the belt.
• Remove the deck belt from the electric PTO clutch and from around the PTO idler pulley.
• Remove and discard old belt.
• Route the new belt(s) as shown in Figure 15. OEM belt part numbers shown below.
• Remount the belt guards removed earlier.
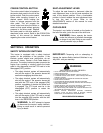
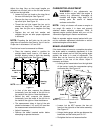
CHANGING THE TRANSMISSION DRIVE BELT(S)
All belts on your tractor are subject to wear and should be replaced if any signs of cracking, shredding or
rotting are present.
IMPORTANT: The V-belts found on your tractor are specially designed to engage and disengage safely. A
substitute (non-OEM) V-belt can be dangerous by not disengaging completely. For a proper working machine,
use factory approved belts.
To change or replace the drive belt(s) on your tractor, proceed as follows:
NOTE: It’s recommended that both drive belts be replaced at the same time.
• Remove the cutting deck as instructed earlier in this section.
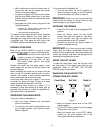
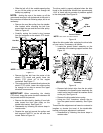
• After disconnecting the battery cables, remove the battery and battery tray from beneath the seat.
IMPORTANT: When removing the battery, disconnect the NEGATIVE (Black) wire from it’s terminal first,
followed by the POSITIVE (Red) wire. Re-install in reverse order.
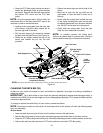
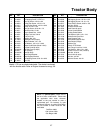
42-Inch Deck 46-Inch Deck
PTO (Top) Belt 754-0472 754-0474
Bottom Belt N/A 754-0349
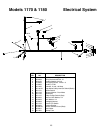
Electric PTO Clutch
PTO Idler Pulley
Left Hand
Double Pulley
Right Hand
Double Pulley
Center Pulley
Deck Idler Pulley
Deck belt (Bottom)
PTO belt (Top)
NOTE: Left hand belt cover not shown for clarity. 46-inch deck shown.
Self-Tapping Screws
(beneath belt guard)
(mounted on tractor)