


14
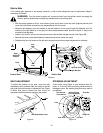
• The operator must remain in the tractor seat
at all times. If the operator should leave the
seat without pushing the PTO knob inward
into the disengaged (OFF) position, the
tractor’s engine will shut off.
IMPORTANT: The PTO knob cannot be in the
engaged (ON) position when the tractor is driving in
the reverse direction. The PTO knob must be in the
disengaged (OFF) position when the shift lever is in
REVERSE or the PTO will automatically shut off.
Refer to SAFETY INTERLOCK SWITCHES in this
section.
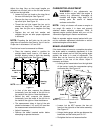
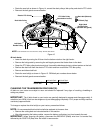
MOWING
This tractor is equipped with one of Cub Cadet’s
high quality cutting decks. The following information
will be helpful when using the cutting deck with your
tractor.
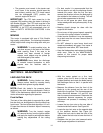
WARNING: To avoid possible injury, do
not allow anyone in the area of the tractor
while mowing. Even if the area to be
mowed has been cleared of foreign
objects, small objects may be picked up
and discharged by the mower.
WARNING: Never direct the discharge
of material toward bystanders or allow
anyone near the machine while in
operation.
• For best results it is recommended that the
first two laps be cut with the discharge thrown
towards the center. After the first two laps,
reverse the direction to throw the discharge to
the outside for the balance of cutting. This will
give a better appearance to the lawn.
• Do not cut the grass too short. Short grass
invites weed growth and yellows quickly in dry
weather.
• Mowing should always be done with the
engine at full throttle.
• Do not mow at high ground speed, especially
if a mulch kit or grass collector is installed.
• Under heavier conditions it may be necessary
to go back over the cut area a second time to
get a clean cut.
• Do NOT attempt to mow heavy brush and
weeds and extremely tall grass. Your tractor is
designed to mow lawns, NOT clear brush.
• Keep the blades sharp and replace the blades
when worn. Refer to the MAINTENANCE
section of this manual for proper blade
sharpening instructions.
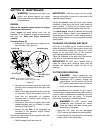
SECTION 9: ADJUSTMENTS
LEVELING THE DECK
WARNING: Cutting blades are sharp.
Always protect hands by wearing heavy
leather work gloves to grasp blades.
NOTE: Check the tractor’s tire pressure before
performing any deck leveling adjustments. Refer to
TIRES in the maintenance section of this manual for
further information regarding tire pressure.
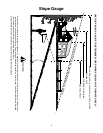
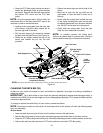
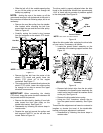
Front to Rear
The front of the cutting deck is supported by a stabi-
lizer bar that can be adjusted to level the deck from
front to rear. The front of the deck should be 1/4" to 3/
8" lower than the rear of the deck. Adjust if necessary
as follows:
WARNING: Turn the tractor’s engine
off, remove the key from the ignition switch
and apply the tractor’s parking brake before
making any adjustments to the cutting
deck.
• With the tractor parked on a firm, level
surface, place the lift lever in the top notch
(highest position) and rotate the blade nearest
the discharge chute so that it is parallel with
the tractor.
• Measure the distance from the front of the
blade tip to the ground and the rear of the
blade tip to the ground. The first measurement
taken should be between 1/4" and 3/8" less
than the second measurement. Determine the
approximate distance necessary for proper
adjustment and proceed, if necessary, to the
next step.
• Loosen the two jam nuts on the rear side of
the deck stabilizer bracket. See Figure 8A.
• Locate the two lock nuts on the opposite side
of the stabilizer bracket. See Figure 8A.
Tighten the lock nuts to raise the front of the
deck; loosen the lock nuts to lower the front of
the deck.
• Retighten the two jam nuts loosened earlier
when proper adjustment is achieved.