


MEETSANSI SAFETY STANDARDS
Sears chipper-vacuums conform to the safety standards of the American National Standards InsUtute.
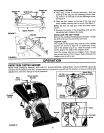
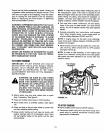
OPERATINGCONTROLS(See figure 9)
SHIFT LEVER--The shift lever determines ground
speed. It may be placed in one of eight positions.
Forward--one of six speeds. Position number one (1)
Esthe slowest. Position number six (6) is the fastest.
Reverse--two reverse (R) speeds. "R" (all the way to
the right) is the faster of the two.
DRIVE CLUTCH HANDLE (BAIL)--Squeezing the
drive clutch handle against the upper handle engages
the wheel drive. Release the drive clutch handle to
stop the forward ddve.
CHOKE LEVER--Used to enrich the fuel mixture in
the carburetor when starting a cold engine.
STARTER HANDLE--Used to manuatty start the
engine.
THROTTLE CONTROL--Controls engine speed and
stops the engine.
BEFORE USING YOUR CHIPPER-VACUUM, AGAIN REFER TO THE "SAFETY RULES" AS SHOWN ON
PAGE 2 OF THIS MANUAL. ALWAYS BE CAREFUL.
The operation of any chipDer-vacuurr can result in foreign objectsbeing thrown into the eyes, which
can result in severe eye damage. Always wear the safety glasses providedwith the chipper-vacuum or
eye shields before chi_pJng, or while _erforming any adjustments er repairs We recommend Wide
Vision SafetyMask for over spectacles or standard glasses availableat Sears Retail er Catalog Stores.
TO STOPENGINE
• Move throttle control lever to STOP position. See
figure 9.
• Disconnect spark plug wire and move away from
spark plug to prevent accidental starting while
equipment is unattended.
HOW TO USE YOUR CHIPPER-VACUUM
_IL WARNING: YOUR CHIPPER-VACUUM iS
EQUIPPED WITH A SAFETY SWITCH ON
THE FRONT OF THE HOUSING, NOZZLE
OR HOSE ATTACHMENT MUST BE IN
PLACE ON THE CHIPPER-VACUUM
BEFORE THE ENGINE CAN BE STARTED.
TO ENGAGE DRIVE
IMPORTANT: Always release the drive clutch
handle before moving the shift lever.
• With the engine running near top speed, move shift
lever into one of the six FORWARD _ositions or
two REVERSE positions. Select a speed appropri-
ate for the conditions that exist. Use the slower
speeas until you ere familiar with the operation of
the chipper-vacuum.
e To engage the wheel drive, hold the drive clutch
handle against the chipper-vacuum handle.
Releasing the drive clutch handle stops the wheels
from driving. Retease the drive clutch handle to
slow down when negotiating an obstacle making a
turn or stopping. Engage slowly to prevent front
wheels from lifting up.
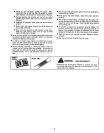
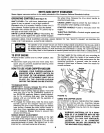
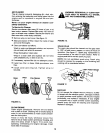
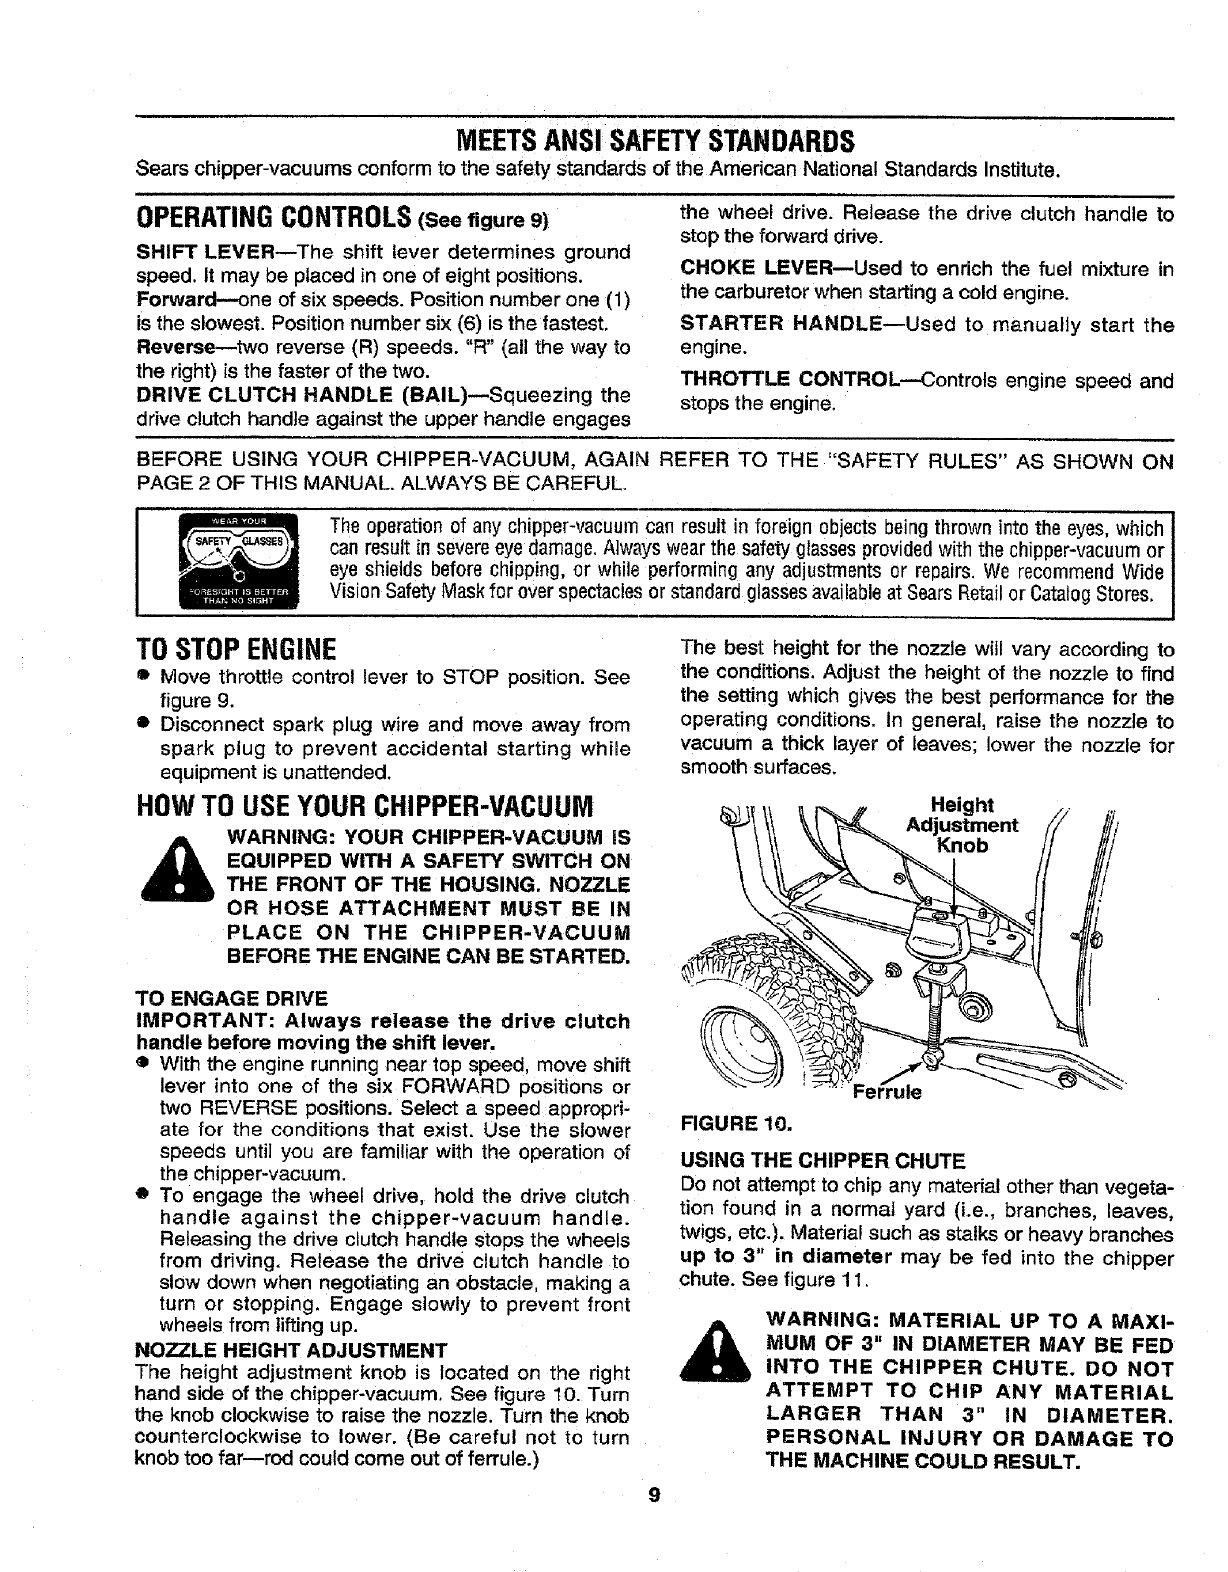
NOZZLE HEIGHT ADJUSTMENT
The height adjustment knob is located on the right
hand side of the chipper-vacuum. See figure 10. Tun-
the knob clockwise to raise the nozzle. Turn the knob
counterclockwise to lower. (Be careful not to turf
knob too far--rod could come out of ferrule.)
9
The best height for the nozzle will vary according to
the conditions. Adjust the height of the nozzle to find
the setting which gives the best performance for the
operating conditions. In general, raise the nozzle to
vacuum a thick layer of leaves; lower the nozzle for
smooth surfaces.
Height
Adjustment
Knob
i!
FIGURE 10.
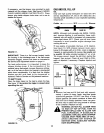
USING THE CHIPPER CHUTE
Do not a_empt to chip any materiel other than vegeta-
tion found in a normal yard (i.e., branches, leaves,
twigs, etc.). Matedal such as stalks or heavy branches
up to 3" in diameter may be fed into the chipper
chute. See figure 11
WARNING: MATERIAL UP TO A MAXI-
MUM OF 3" IN DIAMETER MAY BE FED
INTO THE CHIPPER CHUTE. DO NOT
ATTEMPT TO CHIP ANY MATERIAL
LARGER THAN 3" IN DIAMETER,
PERSONAL INJURY OR DAMAGE TO
THE MACHINE COULD RESULT,