


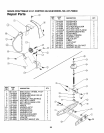

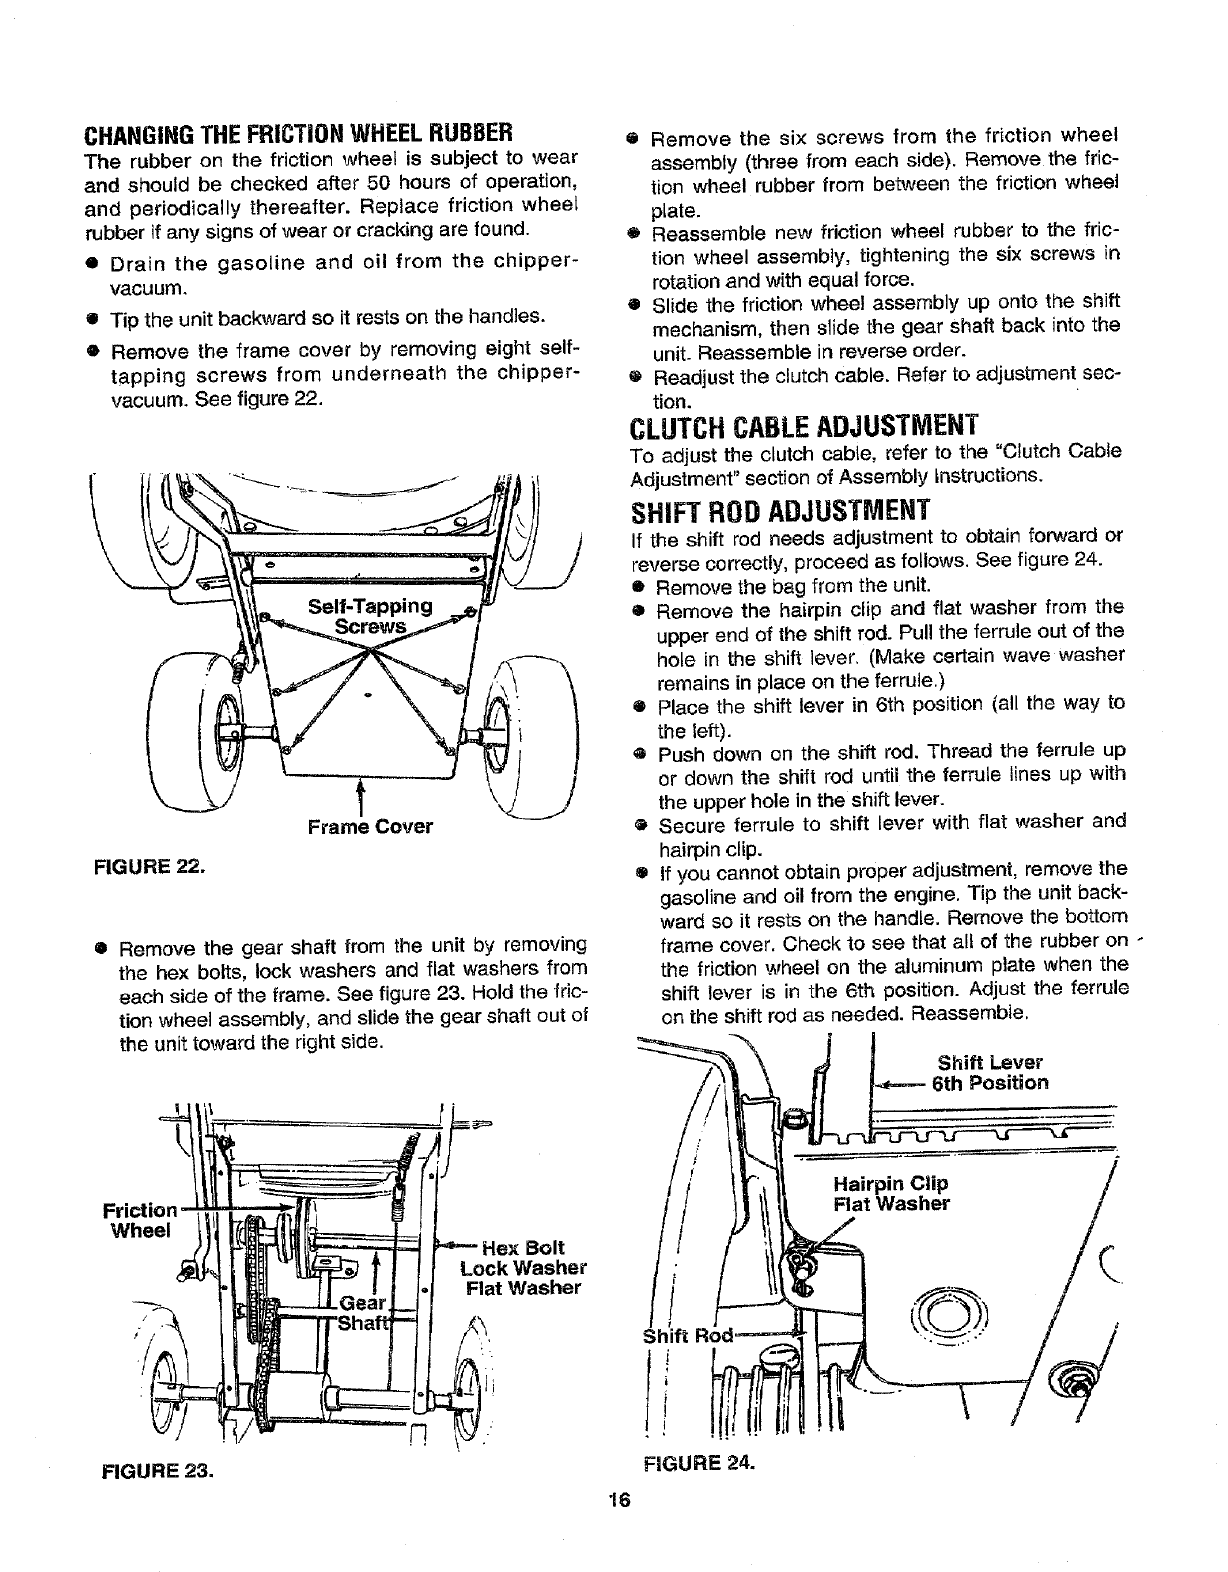
CHAHGIHG THE FRICTION WHEEL RUBBER
The rubber on the friction wheel is subject to wear
and should be checked after 50 hours of operation,
and periodically thereafter. Replace friction wheel
rubber if any signs of wear or cracking are found.
• Drain the gasoline and oil from the chipper-
vacuum.
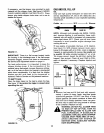
• Tip the unit backward so it rests on the handles.
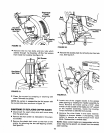
• Remove the frame cover by removing eight self-
tapping screws from underneath the chipper-
vacuum. See figure 22.
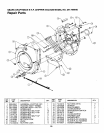
FIGURE 22.
Frame Cover
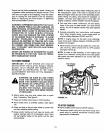
• Remove the gear shaft from the unit by removing
the hex bolts, lock washers and flat washers from
each side of the frame. See figure 23. Hold the fric-
tion wheel assembly, and slide the gear shaft out of
the unit toward the right side.
F_cti I I
FIGURE 23.
• Remove the six screws from the friction wheel
assembly (three from each side). Remove the fric-
tion wheel rubber from between the friction wheel
plate.
• Reassemble new friction wheel rubber to the fric-
tion wheel assembly, tightening the six screws in
rotation and with equal force.
• Slide the friction wheel assembly up onto the shift
mechanism, then slide the gear shaft back into the
unit. Reassemble in reverse order.
• Readjust the clutch cable. Refer to adjustment sec-
tion.
CLUTCH CABLEADJUSTMENT
To adjust the clutch cable, refer to the "Crutch Cable
Adjustment" section of Assembly instructions.
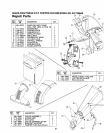
SHIFT ROD ADJUSTMENT
If the shift rod needs adjustment to obtain forward or
reverse correctly, proceed as follows. See figure 24.
• Remove the bag from the unit.
• Remove the hairpin clip and flat washer from the
upper end of the shift rod. Pull the ferrule out of the
hole in the shift lever. (Make certain wave washer
remains in place on the ferrule.)
• Place the shift lever in 6th position (all the way to
the left).
o Push down on the shift rod, Thread the ferrule up
or down the shift rod until the ferrule lines up with
the upper hole in the shift lever.
• Secure ferrule to shift lever with flat washer and
hairpin clip.
• If you cannot obtain proper adjustment, remove the
gasoline and oil from the engine. Tip the unit back-
ward so it rests on the handle. Remove the bottom
frame cover. Check to see that nit of the rubber on -
the friction wheel on the aluminum plate when the
shift lever is in the 6th position. Adjust the ferrule
on the shift rod as needed. Reassemble,
Shift Lever
6th Position
Shift