8
ASSEMBLY OF HOPPER BAG
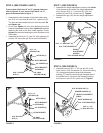
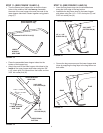
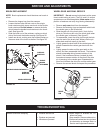
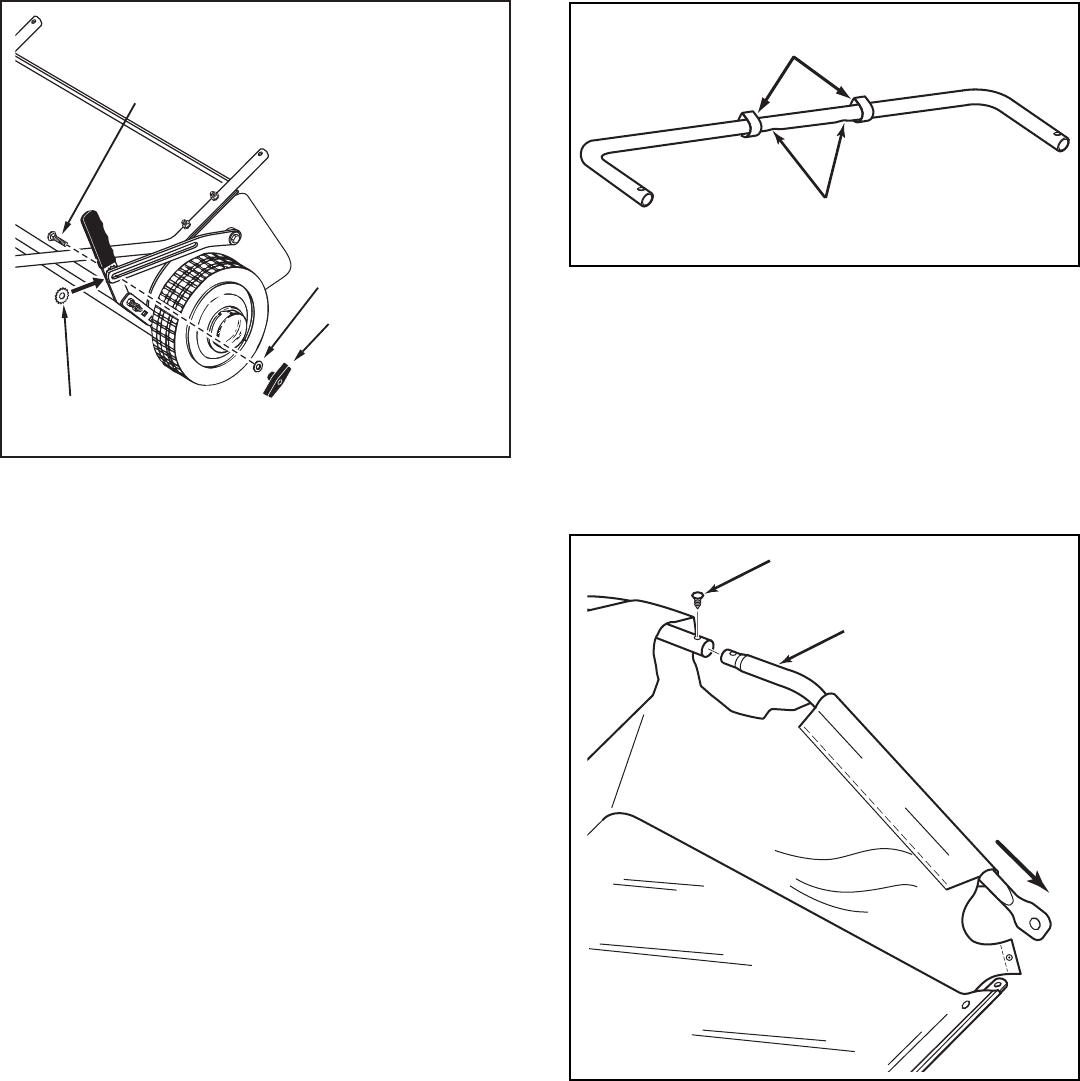
STEP 10: (SEE FIGURE 11 AND 12)
• Turnarearhoppertubesothatthebraceholesinthe
middleofthetubeface down.Slidethetubethrough
the two loops sewn to the top rear seam inside the
hopperbag.
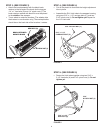
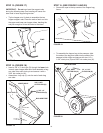
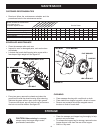
STEP 9: (SEE FIGURE 10)
• Placethestarwasher(L)betweentheheight
adjustmenthandleandtheheightadjustmentstrap.
Insertthe5/16"x1"carriagebolt(F)throughthe
heightadjustmenthandle,thestarwasherandthe
heightadjustmentstrap.Assemblea5/16"atwasher
(K)andtheplasticknob(X)ontotheendofthebolt.
5/16" FLAT
WASHER (K)
5/16" x 1"
CARRIAGE BOLT (F)
PLASTIC KNOB (X)
STAR WASHER (L)
(between strap and handle)
REAR HOPPER TUBE
(brace holes on bottom)
INNER BAG LOOPS
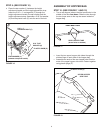
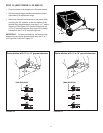
• Insertthetwoupperhoppersidetubesthroughthe
stitchedapsoneachsideofthehopperbag.
• Assembletheendsoftherearhoppertubeontothe
endsoftheupperhoppersidetubes.Fastentogether
usingplasticplugs(Z).
UPPER HOPPER
SIDE TUBE
PLASTIC PLUG (Z)
FIGURE 10
FIGURE 11
FIGURE 12


