


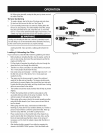
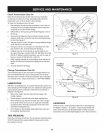
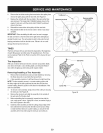

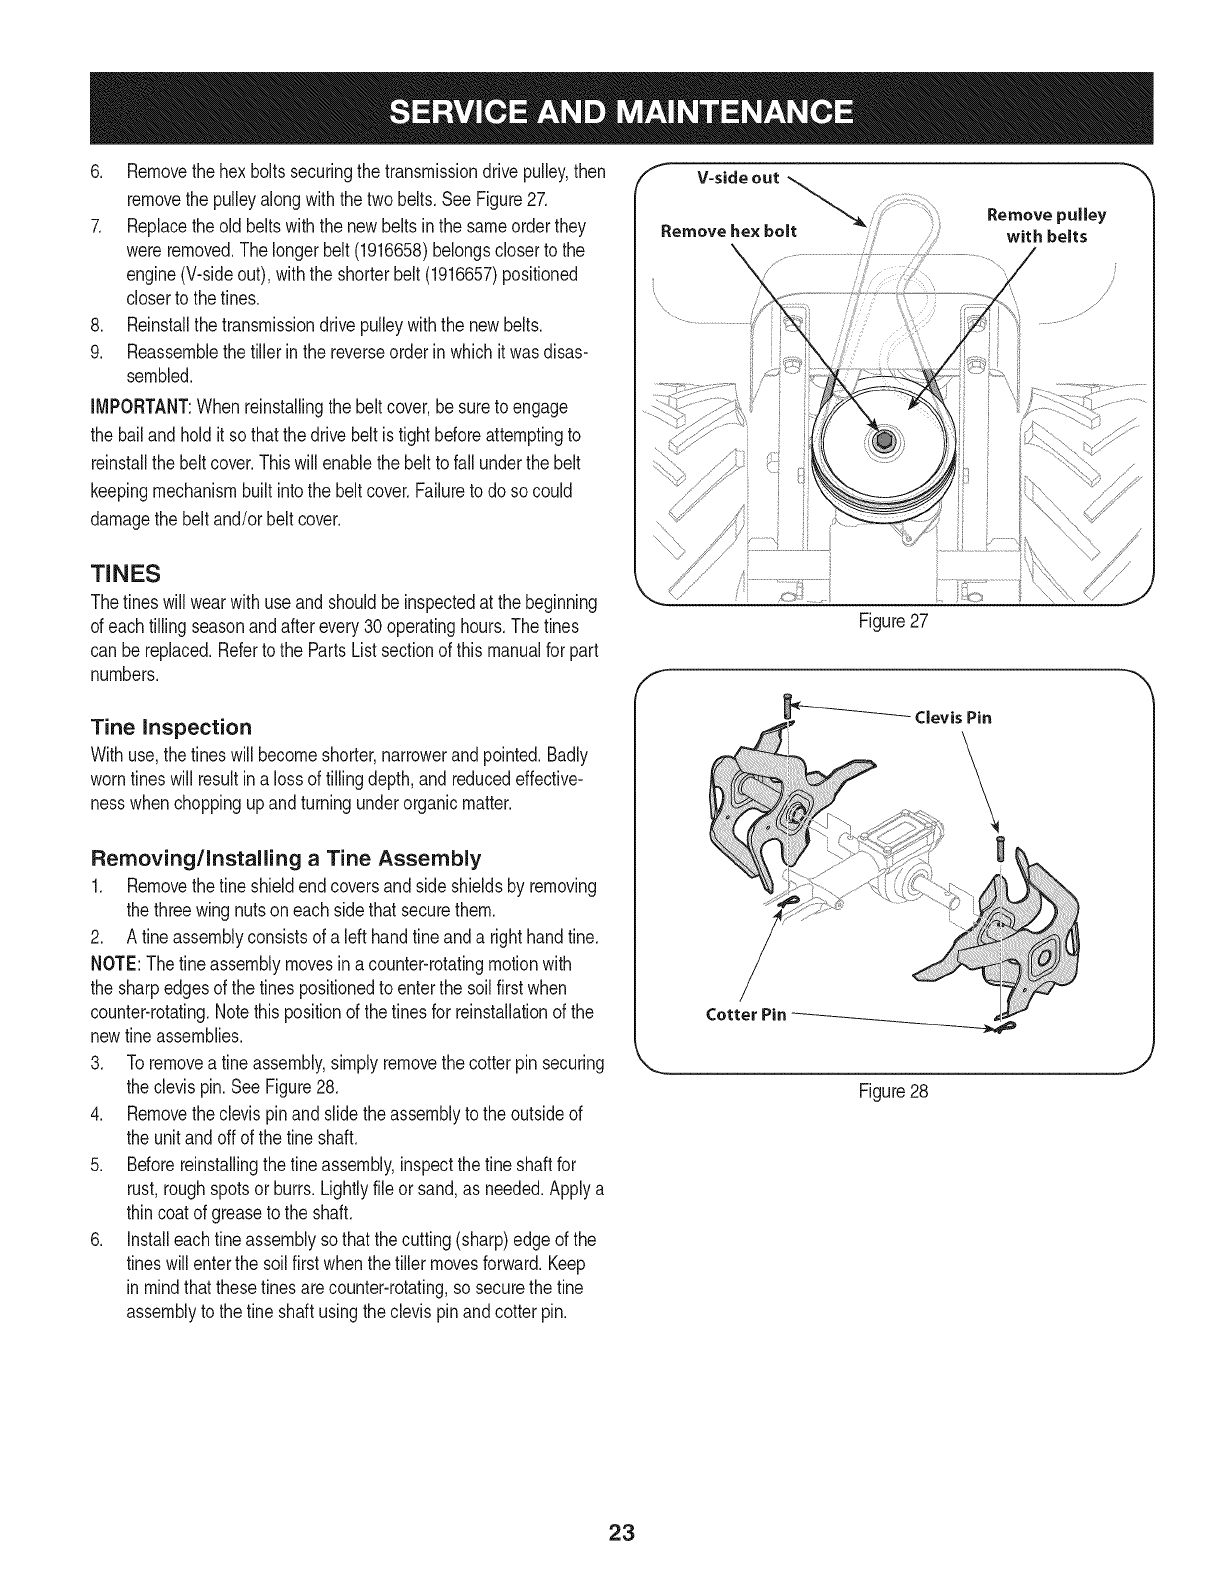
6. Removethehexboltssecuringthetransmissiondrivepulley,then
removethepulleyalongwiththetwobelts.SeeFigure27.
7. Replacetheoldbeltswiththenewbeltsinthesameorderthey
wereremoved.Thelongerbelt (1916658)belongscloserto the
engine(V-sideout), withtheshorterbelt(1916657)positioned
closertothe tines.
8. Reinstallthetransmissiondrivepulleywiththenew belts.
9. Reassemblethetillerinthe reverseorderinwhichitwasdisas-
sembled.
iMPORTANT:Whenreinstallingthe beltcover,be suretoengage
thebailandholditsothatthe drivebelt istightbeforeattemptingto
reinstallthebeltcover.Thiswill enablethebelttofall underthebelt
keepingmechanismbuiltintothe beltcover.Failuretodo so could
damagethebeltand/orbeltcover.
TINES
Thetineswill wearwithuseand shouldbe inspectedat thebeginning
ofeachtillingseasonandafterevery30 operatinghours.Thetines
canbereplaced.Refertothe PartsListsectionofthismanualforpart
numbers.
Tine inspection
Withuse,thetineswill becomeshorter,narrowerandpointed.Badly
worntineswill resultina lossoftilling depth,and reducedeffective-
nesswhenchoppingupandturningunderorganicmatter.
Removing/Installing a Tine Assembly
1. Removethefineshieldendcoversand sideshieldsbyremoving
thethreewingnutsoneach sidethatsecurethem.
2. A fineassemblyconsistsofa lefthandfineanda righthandtine.
NOTE:Thefineassemblymovesina counter-rotatingmotionwith
thesharpedgesofthetinespositionedto enterthe soilfirstwhen
counter-rotating.Notethis positionof thetinesfor reinstallationofthe
newtineassemblies.
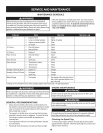
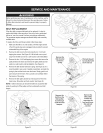
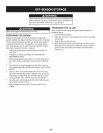
3. Toremovea tineassembly,simplyremovethecotterpin securing
theclevispin.SeeFigure28.
4. Removetheclevispinand slidetheassemblytothe outsideof
theunitandoff ofthe tineshaft.
5. Beforereinstallingthefineassembly,inspectthefine shaftfor
rust,roughspotsor burrs.Lightlyfileor sand,as needed.Applya
thincoatof greaseto theshaft.
6. Installeachfineassemblysothatthecutting(sharp)edgeofthe
tineswillenterthesoil firstwhenthetiller movesforward.Keep
in mindthatthesetinesarecounter-rotating,sosecurethe fine
assemblytothe fineshaftusingtheclevispinandcotterpin.
V-sideout -_
Remove.e*boJt emovepu.ey
............................................;: .......................................be ts
/
Figure27
f
Cotter Pin
Figure28
J
23