


20
Viewing Conditions
Viewing conditions affect what you can see through your
telescope during an observing session. Conditions include
transparency, sky illumination, and seeing. Understanding
viewing conditions and the effect they have on observing will
help you get the most out of your telescope.
Transparency
Transparency is the clarity of the atmosphere which is affected
by clouds, moisture, and other airborne particles. Thick cumu-
lus clouds are completely opaque while cirrus can be thin,
allowing the light from the brightest stars through. Hazy skies
absorb more light than clear skies making fainter objects hard-
er to see and reducing contrast on brighter objects. Aerosols
ejected into the upper atmosphere from volcanic eruptions
also affect transparency. Ideal conditions are when the night
sky is inky black.
Sky Illumination
General sky brightening caused by the Moon, aurorae, nat-
ural airglow, and light pollution greatly affect transparency.
While not a problem for the brighter stars and planets, bright
skies reduce the contrast of extended nebulae making them
difficult, if not impossible, to see. To maximize your observing,
limit deep sky viewing to moonless nights far from the light
polluted skies found around major urban areas. LPR filters
enhance deep sky viewing from light polluted areas by block-
ing unwanted light while transmitting light from certain deep
sky objects. You can, on the other hand, observe planets and
stars from light polluted areas or when the Moon is out.
Seeing
Seeing conditions refers to the stability of the atmosphere
and directly affects the amount of fine detail seen in extend-
ed objects. The air in our atmosphere acts as a lens which
bends and distorts incoming light rays. The amount of bend-
ing depends on air density. Varying temperature layers have
different densities and, therefore, bend light differently. Light
rays from the same object arrive slightly displaced creating
an imperfect or smeared image. These atmospheric distur-
bances vary from time-to-time and place-to-place. The size
of the air parcels compared to your aperture determines the
“seeing” quality. Under good seeing conditions, fine detail is
visible on the brighter planets like Jupiter and Mars, and stars
are pinpoint images. Under poor seeing conditions, images
are blurred and stars appear as blobs.
The conditions described here apply to both visual and photo-
graphic observations.
Telescope Maintenance
While your StarSeeker telescope requires little maintenance,
there are a few things to remember that will ensure your tele-
scope performs at its best.
Care and Cleaning of the Optics
Occasionally, dust and/or moisture may build up on the lenses
of your telescope. Special care should be taken when clean-
ing any instrument so as not to damage the optics.
If dust has built up on a lens surface, remove the dust with a
brush (made of camel’s hair) or a can of pressurized air. Spray
at an angle to the lens for approximately two to four seconds.
Then, use an optical cleaning solution and optical cleaning
tissue to remove any remaining debris. Apply the solution to
the tissue and then apply the tissue paper to the lens. Low
pressure strokes should go from the center of the lens to the
outer portion. Do NOT rub in circles!
You can use a commercially made lens cleaner or mix your
own. A good cleaning solution is isopropyl alcohol mixed with
distilled water. The solution should be 60% isopropyl alcohol
and 40% distilled water. Or, liquid dish soap diluted with water
(a couple of drops per one quart of water) can be used.
To minimize the need to clean your telescope, replace all lens
covers once you have finished using it. This will prevent con-
taminants from entering the optical tube.
Collimation
(For StarSeeker 114mm and 130mm)
The optical performance of your StarSeeker telescope is
directly related to its collimation, which is the alignment of its
optical system. Your StarSeeker was collimated at the factory
after it was completely assembled. However, if the telescope
is dropped or jarred severely during transport, it may have to
be collimated. The StarSeeker 70mm and 80mm are refrac-
tor-type telescopes that have fixed optical systems that
should not come out of collimation. The StarSeeker 114mm
and 130mm, however, have collimation screws that can be
used to adjust the alignment of the primary mirror.
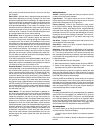
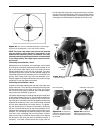
To check if your telescope is in collimation refer to figure 6-1.
If you look into the eyepiece adapter (without an eyepiece) at
the top of the focuser, this is what you should see. If the reflec-
tion of your eye is off center, then collimating is necessary.
The StarSeeker 114mm and 130mm reflectors come with a
collimating cap. This is a simple cap that fits on the focuser
drawtube like a dust cap, but has a hole in the center and a
silver bottom. This helps center your eye so that collimating is
easy to perform.
In addition to the collimating cap, you’ll notice a small ring
label on the exact center of the primary mirror. This “center
mark” allows you to achieve a very precise alignment of the
primary mirror; you don’t have to guess where the center of
the mirror is. You simply adjust the primary mirror position
(described below) until the reflection of the hole in the col-
limating cap (the “dot”) is centered inside the ring.
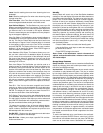
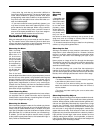
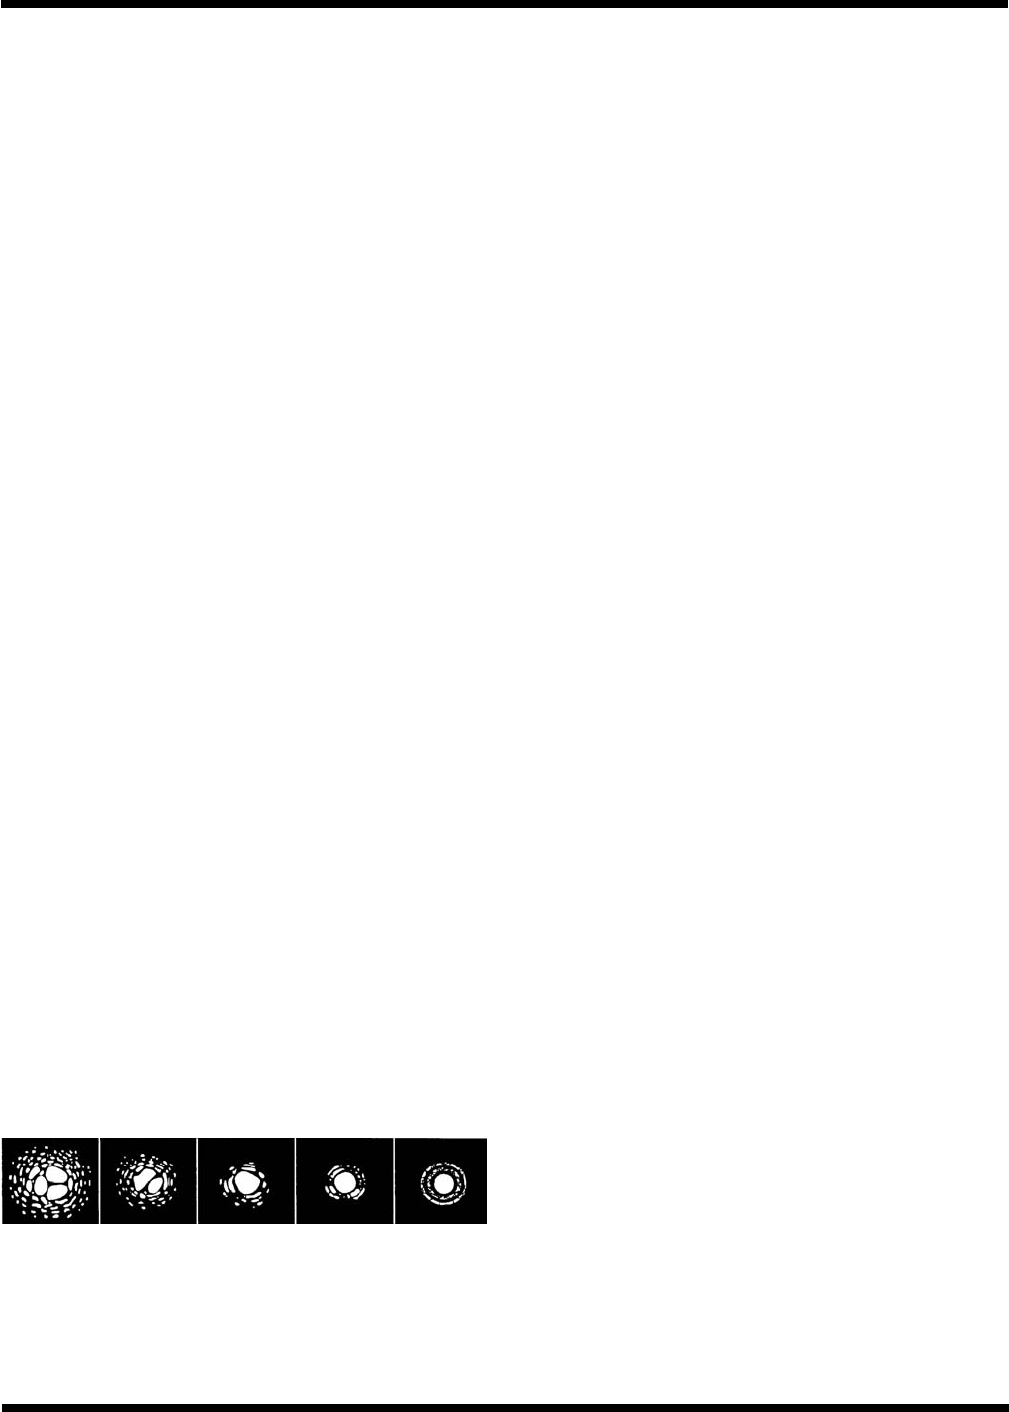
Figure 5-1. Seeing conditions directly affect quality. These
drawings represent a point source (i.e., star) under bad seeing
conditions (right). Most often, seeing conditions produce images that
lie some where between these two extremes.