16
these values and use them each time it is turned on until they
are changed.
Slew Limits - Sets the limits in altitude that the telescope can
slew without displaying a warning message. The slew limits
prevent the telescope tube from slewing to an object below the
horizon or slewing to an object that is high enough that the tube
might hit one of the tripod legs. However, the slew limits can
be customized depending on your needs. For example, if you
would like to slew to an object that is close to the zenith and are
certain that the tube will not hit the tripod legs, you can set the
slew limits to 90° in altitude. This will allow the telescope to slew
to any object above the horizon without warning.
Filter Limits - When an alignment is complete, the StarSeeker
automatically knows which celestial objects are above the
horizon. As a result, when scrolling through the database lists
(or selecting the Tour function), the StarSeeker hand control
will display only those objects that are known to be above the
horizon when you are observing. You can customize the object
database by selecting altitude limits that are appropriate for
your location and situation. For example, if you are observ-
ing from a mountainous location where the horizon is partially
obscured, you can set your minimum altitude limit to read +20°.
This will make sure that the hand control only displays objects
that are higher in altitude than 20°.
If you want to explore the entire object database, set the maxi-
mum altitude limit to 90° and the minimum limit to -90°. This will
display every object in the database lists regardless of whether
it is visible in the sky from your location or not.
Direction Buttons -The direction a star moves in the eyepiece
varies depending on the accessories being used. This can cre-
ate confusion when guiding on a star using an off-axis guider
versus a straight through guide scope. To compensate for this,
the direction of the drive control keys can be changed. To
reverse the button logic of the hand control, press the MENU
button and select Direction Buttons from the Utilities menu. Use
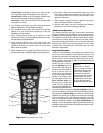
the Up/Down arrow keys (10) to select either the Azimuth but-
tons (left and right) or Altitude buttons (up and down) and press
ENTER. Pressing ENTER again will reverse the direction of the
hand control buttons from their current state. Direction Buttons
will only change the eyepiece rates (rate 1-6) and will not affect
the slew rates (rate 7-9).
Select Model - The first time the StarSeeker is powered on,
the hand control display allows you to select your StarSeeker
from a list of different models. If for some reason the incorrect
model was selected or you wish to use your hand control on
a different StarSeeker model, the Select Model utility feature
allows you to re-select the proper StarSeeker model from the
displayed list. Once the correct StarSeeker model has been
selected the power needs to be restarted before beginning the
alignment procedure. The Select Model feature will return the
hand control to its original factory settings. Parameters such
as backlash compensation values along with slew and filter
limits will be reset. However, stored parameters such as user
defined objects will remain saved even after the model has
been changed.
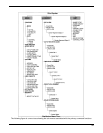
Utility Features
Version - Selecting this option will allow you to see the version
number of the hand control software.
Light Control - This feature allows you to turn off both the
red key pad light and LCD display for daytime use to conserve
power and to help preserve your night vision.
Factory Setting - Returns the StarSeeker hand control
to its original factory setting. Parameters such as backlash
compensation values, initial date and time, longitude/latitude
along with slew and filter limits will be reset. However, stored
parameters such as PEC and user defined objects will remain
saved even when Factory Settings is selected. The hand con-
trol will ask you to press the “0” key before returning to the
factory default setting.
Get Alt-Az - Displays the relative altitude and azimuth for the
current position of the telescope.
Goto Alt-Az - Allows you to enter a specific altitude and azi-
muth position and slew to it.
Hibernate - Hibernate allows the StarSeeker to be completely
powered down and still retain its alignment when turned back
on. This not only saves power, but is ideal for those that have
their telescopes permanently mounted or leave their telescope
in one location for long periods of time. To place your telescope
in Hibernate mode:
1. Select Hibernate from the Utility Menu.
2. Move the telescope to a desire position and press ENTER.
3. Power off the telescope. Remember to never move your
telescope manually while in Hibernate mode.
Once the telescope is powered on again the display will read
Wake Up. After pressing Enter you have the option of scrolling
through the time/site information to confirm the current setting.
Press ENTER to wake up the telescope.
Pressing UNDO at the Wake Up screen allows you to explore
many of the features of the hand control without waking the
telescope up from hibernate mode. To wake up the telescope
after UNDO has been pressed, select Hibernate from the Utility
menu and press ENTER. Do not use the direction buttons to
move the telescope while in hibernate mode.
Sun Menu
For safety purposes the Sun will not be displayed as a database
object unless it is first enabled. The enable the Sun, go to the
Sun Menu and press ENTER. The Sun will now be displayed
in the Planets catalog as can be used as an alignment object
when using the Solar System Alignment method. To remove
the Sun from displaying on the hand control, once again select
the Sun Menu from the Utilities Menu and press ENTER.
Scrolling Menu
This menus allows you to change the rate of speed that the text
scrolls across the hand control display.
• Press the Up (number 6) button to increase the speed of
the text.
Press the Down (number 9) button to decrease the speed of
the text.


