


12
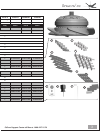
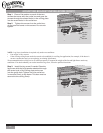
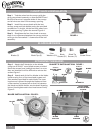
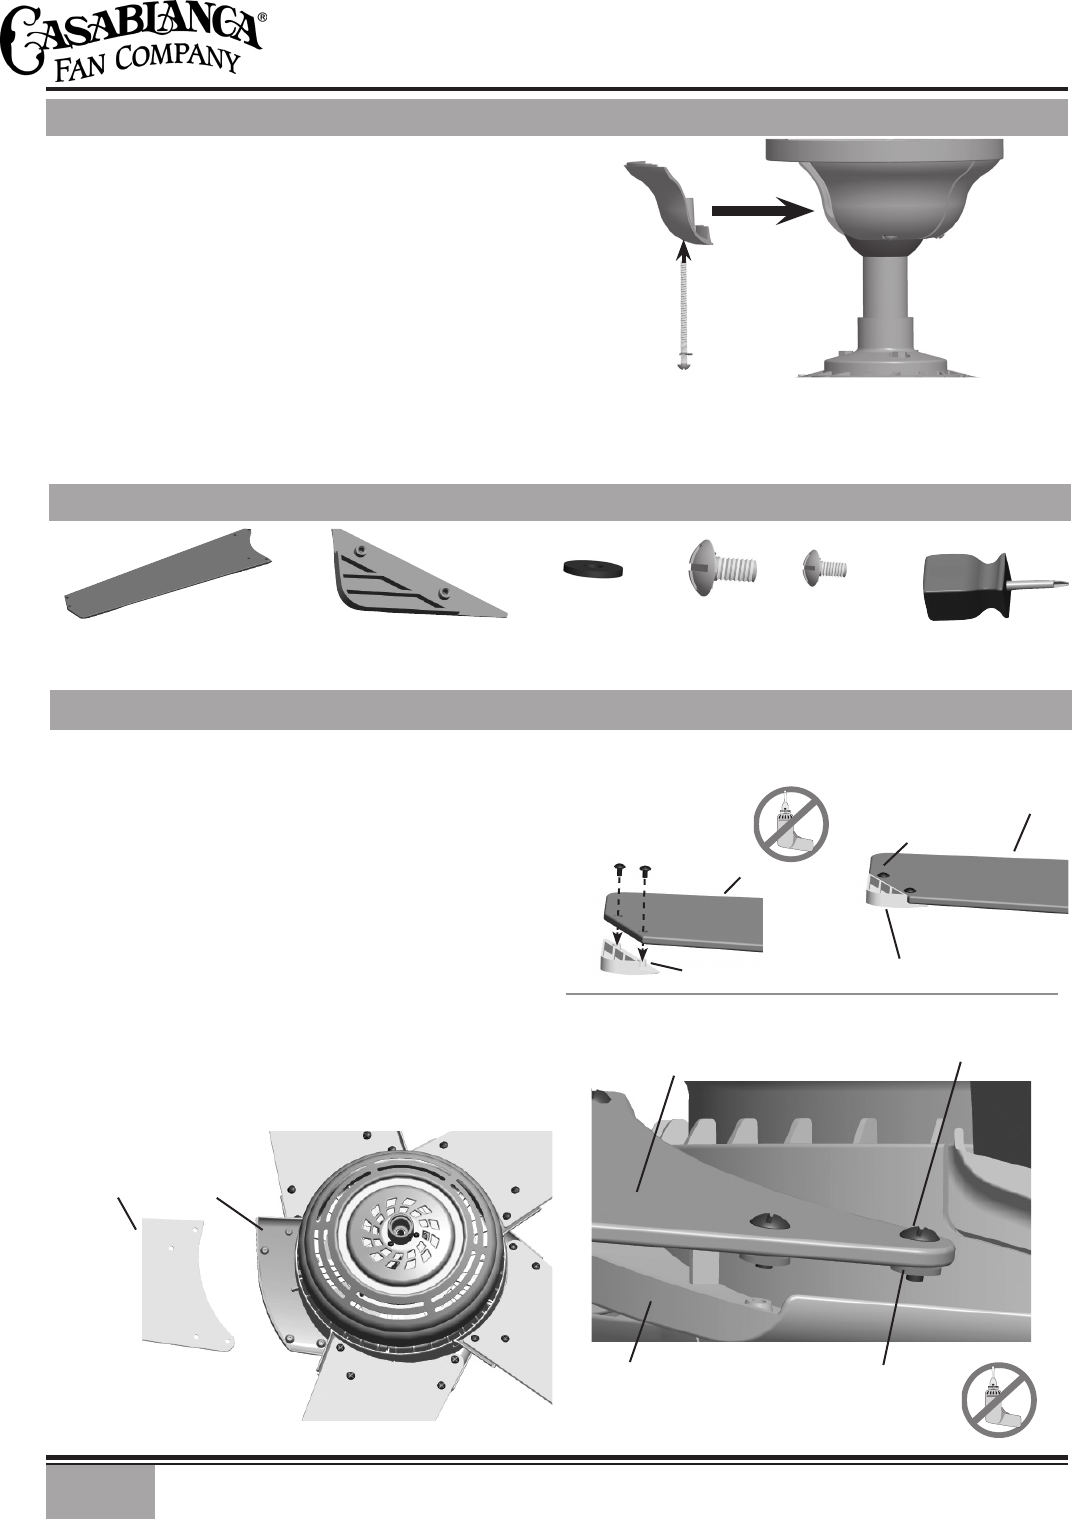
BLADE HARDWARE
Screw Driver
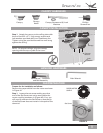
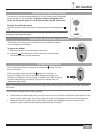
Step 1. Tuck the wires into the canopy with the
wire nuts pointed upwards, so that the WHITE and
BLACK wires are on opposite sides of the canopy
and all wires are clear of the canopy opening.
Step 2. Install the canopy hatch with the last
canopy screw and lock washer using the provided
screwdriver. To do this, tilt the fan body away from
the hatch opening. Tighten the screws Figure 4.
Step 3. Straighten the fan, then check to ensure
there is no movement between the canopy and the
ceiling or the Perma•Lock™ downrod and the ball
assembly.
Blades (5)
Blade Tips (5)
Blade
Screws (21)
Blade Tip
Screws (11)
Fiber
Washers (21)
CANOPY HATCH INSTALLATION
FIGURE 4.
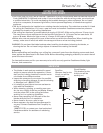
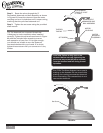
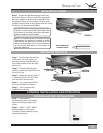
FIGURE 1
BLADE
HOLDER
BLADE
ATTACHING THE BLADES
Step 1. Attach the 5 blade tips to the blades
using two 6-32x1⁄8” round head screws provided.
Note: the screws have locktight on them, so once
they are installed it will be difcult to remove the
screws Figure 1.
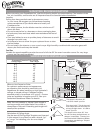
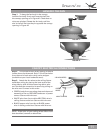
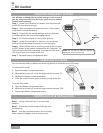
Step 2. Attach each of the ve blades to the blade
holders using four of the truss head screws and
ber washers provided for each blade. The truss
head screw is placed through the blade and then
a ber washer is pressed on so that it is between
the blade and blade holder; see the detail drawing
below. Hand tighten each truss head screw rmly.
Figure 2.
BLADE INSTALLATION:
BLADE
BLADE TIP
6‑32x
1
⁄
8
”
ROUND HEAD
SCREW
BLADE TIP INSTALLATION:
TRUSS HEAD
BLADEHOLDER
SCREW
BLADE
BLADE
HOLDER
FIBER
WASHER
BLADE
BLADE TIP
6‑32x
1
⁄
8
”
ROUND
HEAD
SCREW
FIGURE 2.