


4
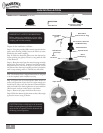
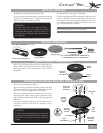
FAN PREPARATION
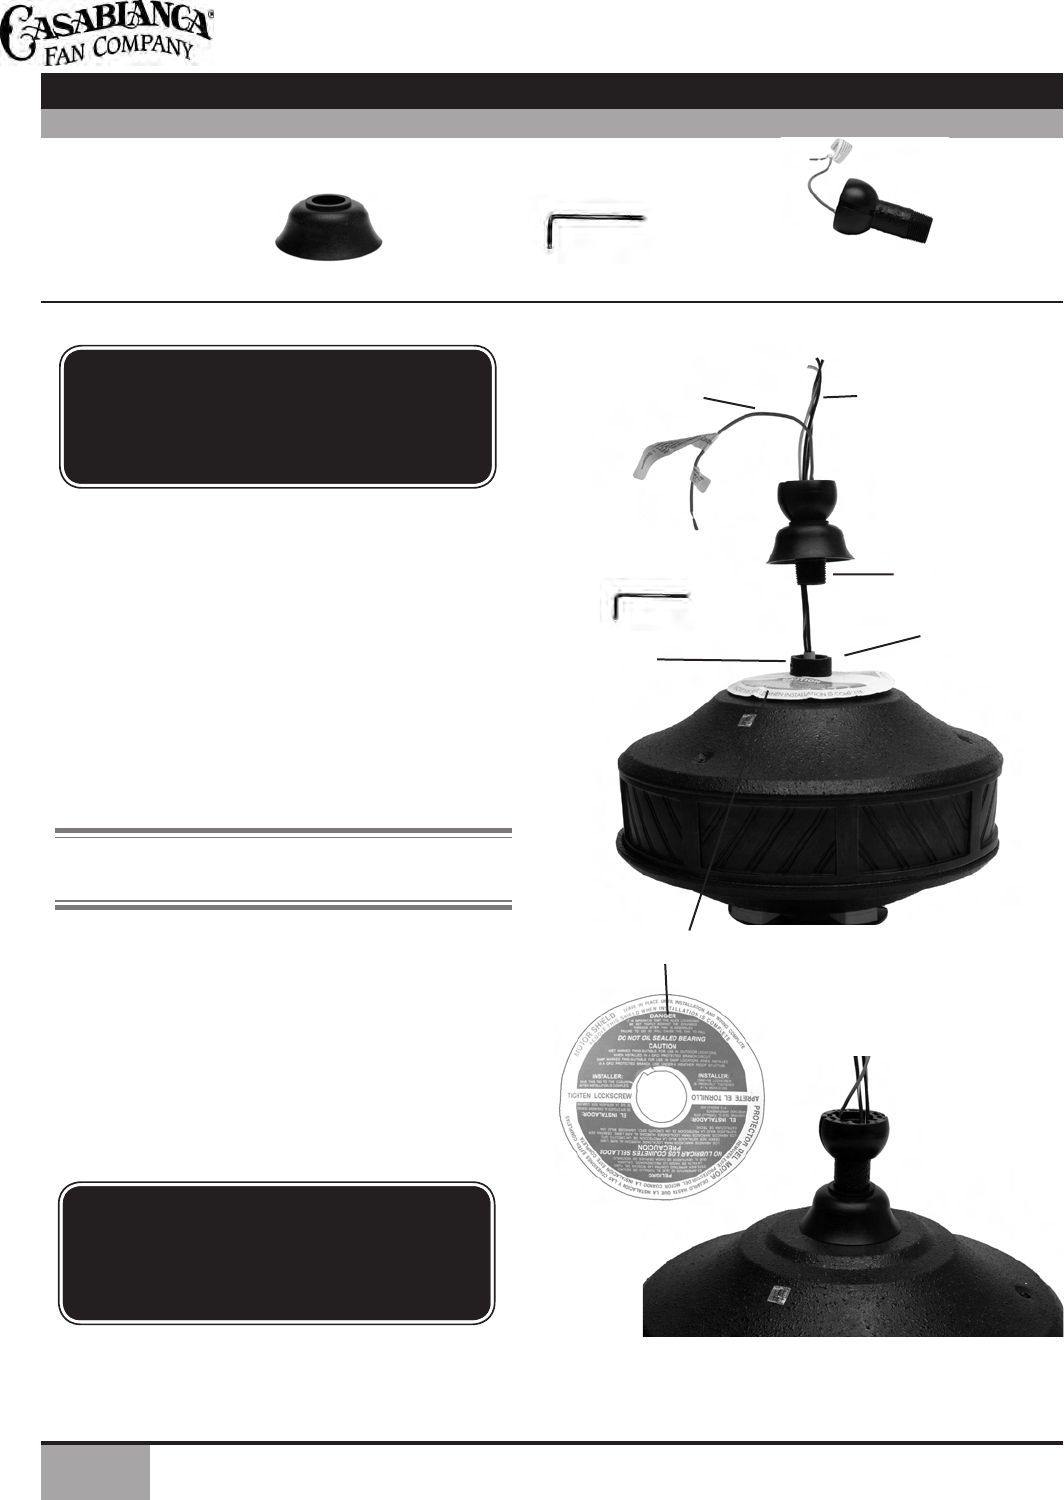
(not to scale)
Prepare for fan installation as follows:
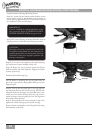
Step 1a. Using the provided Allen wrench (attached to the
paper motor warning shield), loosen the Allen set screw
attached to the motor coupling.
Step 1b. Slide the downrod gasket onto the downrod as
shown, pushing the gasket so that it is snug with the ball
of the downrod.
Step 1c. Route the wires from the motor housing assembly
through the Perma•Lock
™
downrod and ball assembly.
Keep all wires on one side of the pin in the ball. Insert
the downrod into the motor coupling and turn it clockwise
until it stops turning and 2 to 3 threads are still visible.
TIP: e downrod has a tapered thread that is designed
to lock completely when installed correctly.
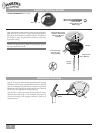
Step 1d. Tighten the set screw with the Allen wrench to
ensure safe operation of your fan. If it is tight enough, you
should not be able to turn the downrod counterclockwise
with your hands. If in doubt, tighten the set screw with the
Allen wrench until you cannot turn it any further.
Step 1e. Remove the paper shield from the motor.
Step 1f. Slide the downrod gasket down so that it fits snugly
against the motor casing as shown.
(leave at least 6” long)
(green)
and Ball Assembly
Tapered thread
Allen
Set Screw
Motor Housing
Assembly
Motor
Coupling
IMPORTANT SAFETY INFORMATION:
Before starting the installation of your ceiling
fan, install the threaded downrod into the motor
coupling and lock the assembly.
CAUTION: Failure to fully lock in the downrod
before securely tightening the Allen set screw may
cause the fan to separate from the downrod and
fall during normal operation.
and Ball Assembly
Paper Shield
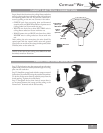
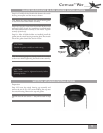
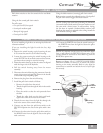
FAN INSTALLATION
Downrod Gasket
Downrod Gasket
↑ ↑