


Document: - page 4 (Black)
Screen angle and frequency: 45.0000, 150.0000
GB
4
GEAR CASE
OIL RECOMMENDATION
• The gear case is shipped from factory WIT H oil.
• Use a high qu ality 80WĆ90W gear oil.
• DO NOT use special ad d itive s.
Gear Case Lubrica tion
Drain and fill the gear case with fresh oil every 50 hours and at
the end of the boating season.
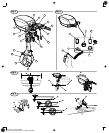
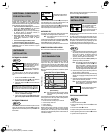
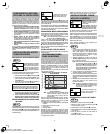
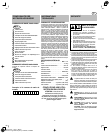
OUTBOARD CONTROLS
Fig. 7
Fig. 8
TILLER MODEL SEE...
REMOTE MODEL SEE..
ON / OFF/ BATTERY TEST SWITCH
The outboard switch is used for the following:
| Ć Turns motor on. Ê
m Ć Turns motor off. Ë
BATTERY - PressĆtoĆtest battery switch Ì
that works in conjunction with the battery gauge.
Once the power harness is connected to the outboard
receptacle, the voltage may be tested. Press and hold the
battery test Ì of the ON/OFF/BATTERY TEST switch. Allow
the battery gauge to read the state of charge of the battery
pack.
BATTERY GAUGE
When the needle moves fully to the right Í, the battery pack is
fully charged to 48 volts or higher. As the battery pack is
discharged, the needle will only rise to the level of charge
remaining in the battery pack.
When the battery gauge needle reaches the far left Î, or red
circle, the battery pack is discharged to 45 volts or less. Head
to shore and recharge the battery pack.
LOW VOLTAGE WARNING SOUND
A beeper will sound when the battery pack voltage drops to 32
volts. This will indicate that the battery pack has been
discharged to a level which may not power the outboard. Upon
beeper activation, it is recommended to reduce power (if
applicable), head immediately to shore, and charge the battery
pack.
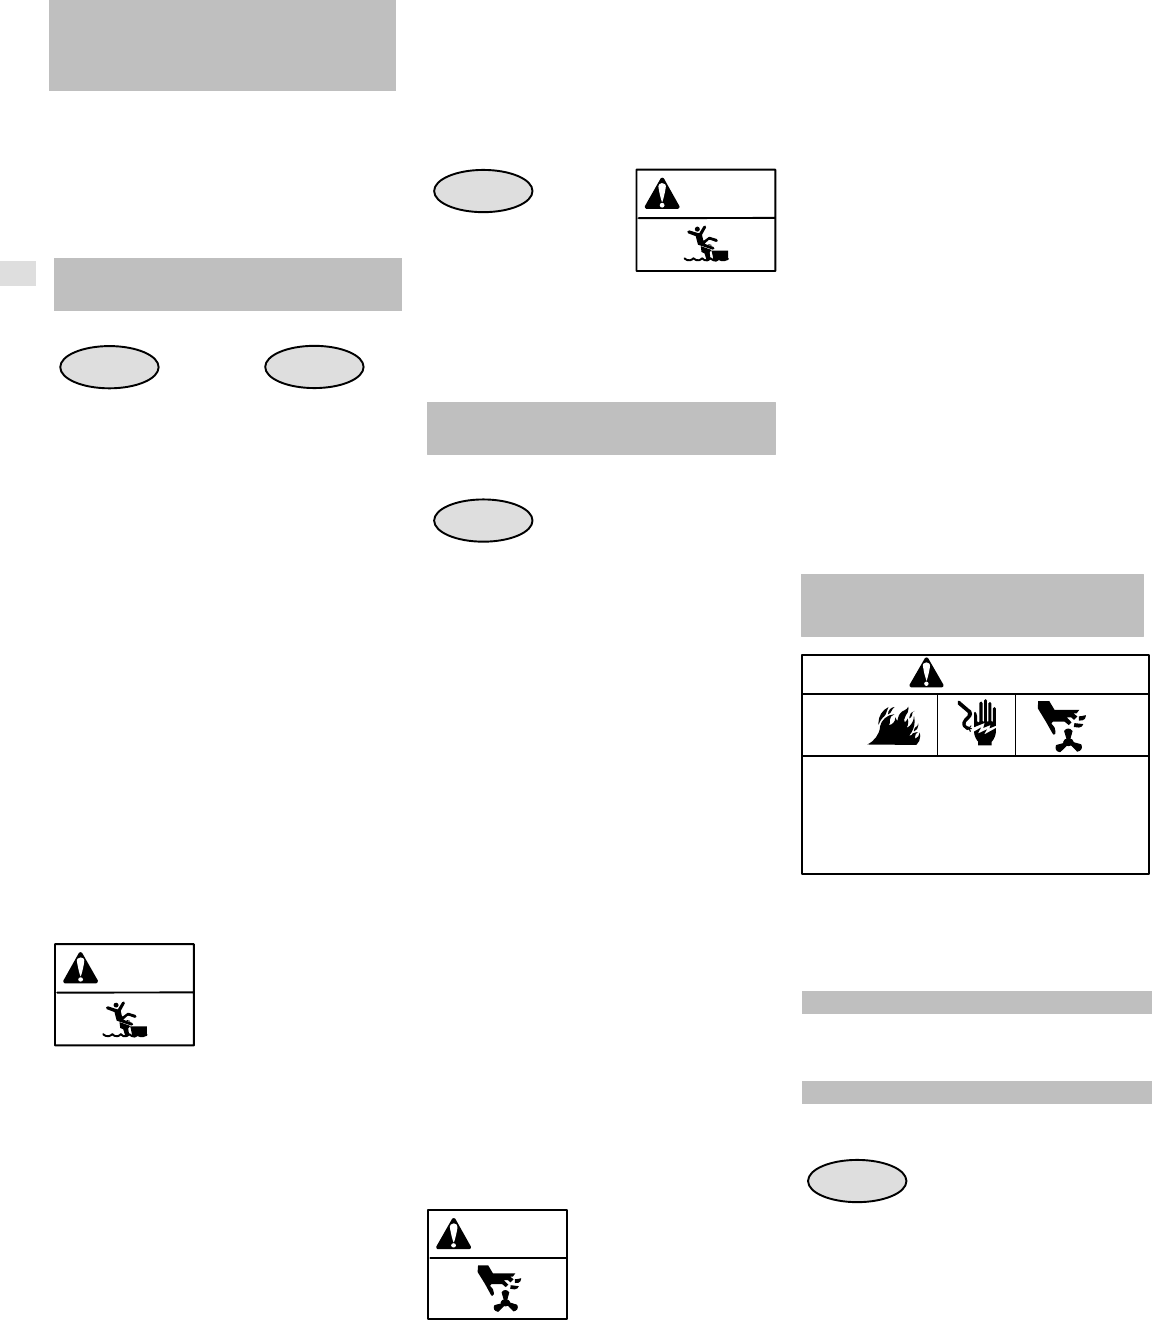
FORWARD / REVERSE SWITCH
WARNING
ALWAYS use the slowest practiĆ
cal speed when operating the
boat in reverse. Using high powĆ
er in REVERSE may force water
over the transom into the boat.
FORWARD (FWD) - To move the boat forward, press the
switch to the FORWARD Ï position.
REVERSE (REV) - To move the boat in reverse, press the
switch to the REVERSE ¼ position.
SPEED CONTROL
The speed control has various positions:
STOP / RESET - Ñ
CRUISE - Ò
MAX POWER - ¿
Twist SPEED CONTROL (or, turn dial on remote applications)
smoothly to increase speed.
The MAX POWER setting generally benefits the boater by
offering high thrust at low speeds and is not intended for
cruising. On average, operation at MAX POWER for long
periods of time will only increase boat speed by about 1 mph,
while greatly reducing run time and range.
SPEED CONTROL FRICTION ADJUSTMENT
On tiller equipped outboards only, this allows adjustment of the
speed control friction.
Rotate toward the + to increase friction. Rotate toward the - to
decrease friction.
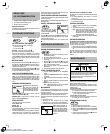
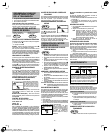
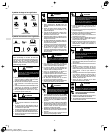
SAFETY / MOTOR STOP SWITCH
Fig. 9
WARNING
The outboard motor will stop
when the stop switch clip Ê is
pulled from the SAFETY/MOTOR
STOP switch
Ë.
The snap
Ì of the safety lanyard MUST be attached to the
operator of the boat to reduce the possibility of injury in case
the operator falls overboard.
The lanyard is approximately 33 cm. (13 in.) long when coiled
Í.
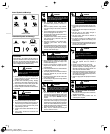
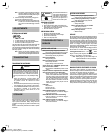
OUTBOARD OPERATION
BEFORE STARTING OUTBOARD
Fig. 10
1. Completely read instructions and understand controls
and outboard operation.
2. Be certain outboard is secure to boat.
3. Verify that all guards and shields are in place and
functioning.
4. Before attaching the power harness Ê to the power
receptacle Ë on the outboard, place the ON/OFF/
BATT. switch is in the OFF position
5. Attach the safety lanyard to the SAFETY/MOTOR
STOP switch.
6. Attach the safety lanyard snap to the operator.
START / OPERATE THE MOTOR
1. Twist the SPEED CONTROL to the STOP/RESET
position.
2. Toggle the FORWARD/REVERSE switch to the direcĆ
tion desired.
3. Toggle the ON/OFF switch to the ON position. Motor will
start.
4. Rotate the SPEED CONTROL until desired speed is
reached.
To Restart: the motor must be reset.
Note: SPEED CONTROL must be in the STOP/REĆ
SET position for the motor to start.
MOTOR RESET
If the propeller stops rotating during normal use, twist the
SPEED CONTROL to the STOP/RESET position. Then return
to operation as normal.
If this fails to reset the outboard, cycle the ON/OFF/BATTERY
TEST switch from OFF to ON, then operate as normal.
Situations that will cause a reset condition include, but are not
limited to:
• Obstru cte d propeller.
• Attem p ting the start procedure with the SPEED
CONTROL in any positio n other than STOP/RESET.
• Automatic return to OFF due to lack of use for 30 seconds.
WARNING
Before clearing obstructed proĆ
peller, disconnect the battery harĆ
ness from the power receptacle,
and the safety lanyard from the
SAFETY / MOTOR STOP switch
to prevent unintentional sparking
or start up.
Automatic return to OFF will occur when:
The safety lanyard is clipped to the SAFETY/MOTOR STOP
switch, and...
• The ON/OFF/BATTERY TEST switch is in the ON
position, and...
• The SPEED CONTROL is in the STOP/RESET position
for 30 seconds or longer.
STOPPING THE MOTOR
1. Twist the SPEED CONTROL to the STOP/RESET
position.
2. Toggle the ON/OFF switch to the OFF position.
Note: After the last use of the day, press and hold the
battery test switch. Visually check the battery
gauge to determine the battery state of charge.
Disconnect the power harness from the outĆ
board, then charge batteries as
needed.
3. Remove the safety lanyard from the SAFETY/MOTOR
STOP switch.
SALTWATER OPERATION
The Briggs & Stratton Outboard is designed for freshwaĆ
ter use. Operation in saltwater will result in accumulation of
corrosive deposits on exposed outboard parts. To inhibit
corrosion, take the following steps:
1. Remove the lower unit from the saltwater immediately.
2. Rinse the outboard thoroughly with fresh water and wipe
dry.
Saltwater is extremely corrosive even when these steps are
taken. Any component failure due to saltwater corrosion is
NOT covered under Briggs & Stratton Power Products
warranty.
MAINTENANCE
WARNING
Before performing any maintenance on the outboard,
disconnect the battery harness from the power receptacle,
and the safety lanyard from the SAFETY / MOTOR STOP
switch to prevent unintentional sparking or start up.
Unintentional startĆup can result in entanglement, traumatĆ
ic amputation or laceration.
Regular maintenance will improve the performance and
extend the life of the outboard. See an Authorized Briggs &
Stratton Service Dealer for service.
Follow the hourly or calendar intervals, whichever occur first.
More frequent service is required when operating in adverse
conditions noted.
Every 8 hours or daily
D Check speed control for freedom of movement.
D Check outboard installation, and operation of proĆ
peller, steering handle, and starter.
Every 50 hours or every season
D Change gear case oil of lower unit.
CHANGING GEAR CASE OIL
Fig. 11
1. Place the outboard in vertical position.
2. Place a container under the gear case to collect the oil.
3. Remove Vent Plug Ê and Gear Oil Drain/Fill Plug Ë.
4. Drain the gear oil. Allow the oil to drain for a minimum of
15 minutes.
5. Insert the nozzle of the new gear oil bottle Ì into the oil
fill hole. Fill gear case with gear oil.