


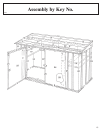

Step 9
BJ22
22
STEP
1
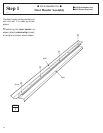
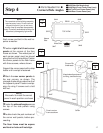
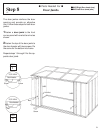
Each screw and bolt in the roof re-
quire a washer.
NOTE
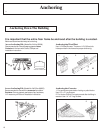
Measure the building diagonally
again and make adjustments to
make sure the building is square.
This will make the roof panel fit
better, and holes will align.
1Position roof panel on top and fas-
ten to rear header, roof rafters and
gables using screws.
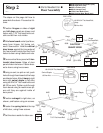
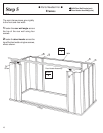
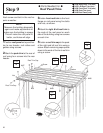
2Attach the peak trim to the rear of
roof using four screws into the rear
header.
● Parts Needed For ●
Roof Panel/Trim
●●
●●
● 9436 Right Roof Trim (one)
●●
●●
● 9437 Left Roof Trim (one)
●●
●●
● 9438 Front Roof Trim (one)
●●
●●
● 9439 Peak Trim (one)
●●
●●
● 9443 Roof Panel (one)
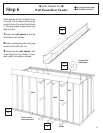
3Fasten front roof trim to the front
flange on roof panel using five bolts
and nuts, as shown.
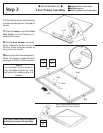
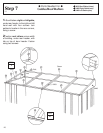
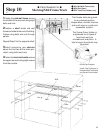
4Attach the right & left roof trim to
the ends of the roof panel on each
side of the building using two screws
on each trim.
5Fasten a roof trim cap to the peak
of the right and left roof trim using a
screw. Attach remaining caps upside
down to the ends of the front roof trim
using a screw.
STEP
2
STEP
3
Screw
STEP
4
9439
Washer
Roof Trim Cap
9437
Nut
Bolt
Roof Trim Cap
9438
9436
STEP
5
FRONT
9443