


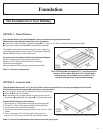
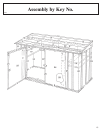
17
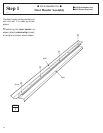
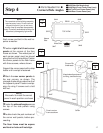
Step 4
BK17
NOTE
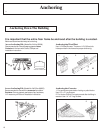
The remainder of the building assembly
requires many hours. Do not continue
beyond this point if you do not have
enough time to complete the assembly
today. A partially assembled building can
be severely damaged by light winds.
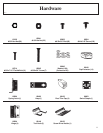
Each screw and bolt in the wall re-
quires a washer.
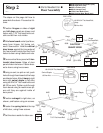
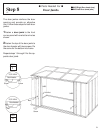
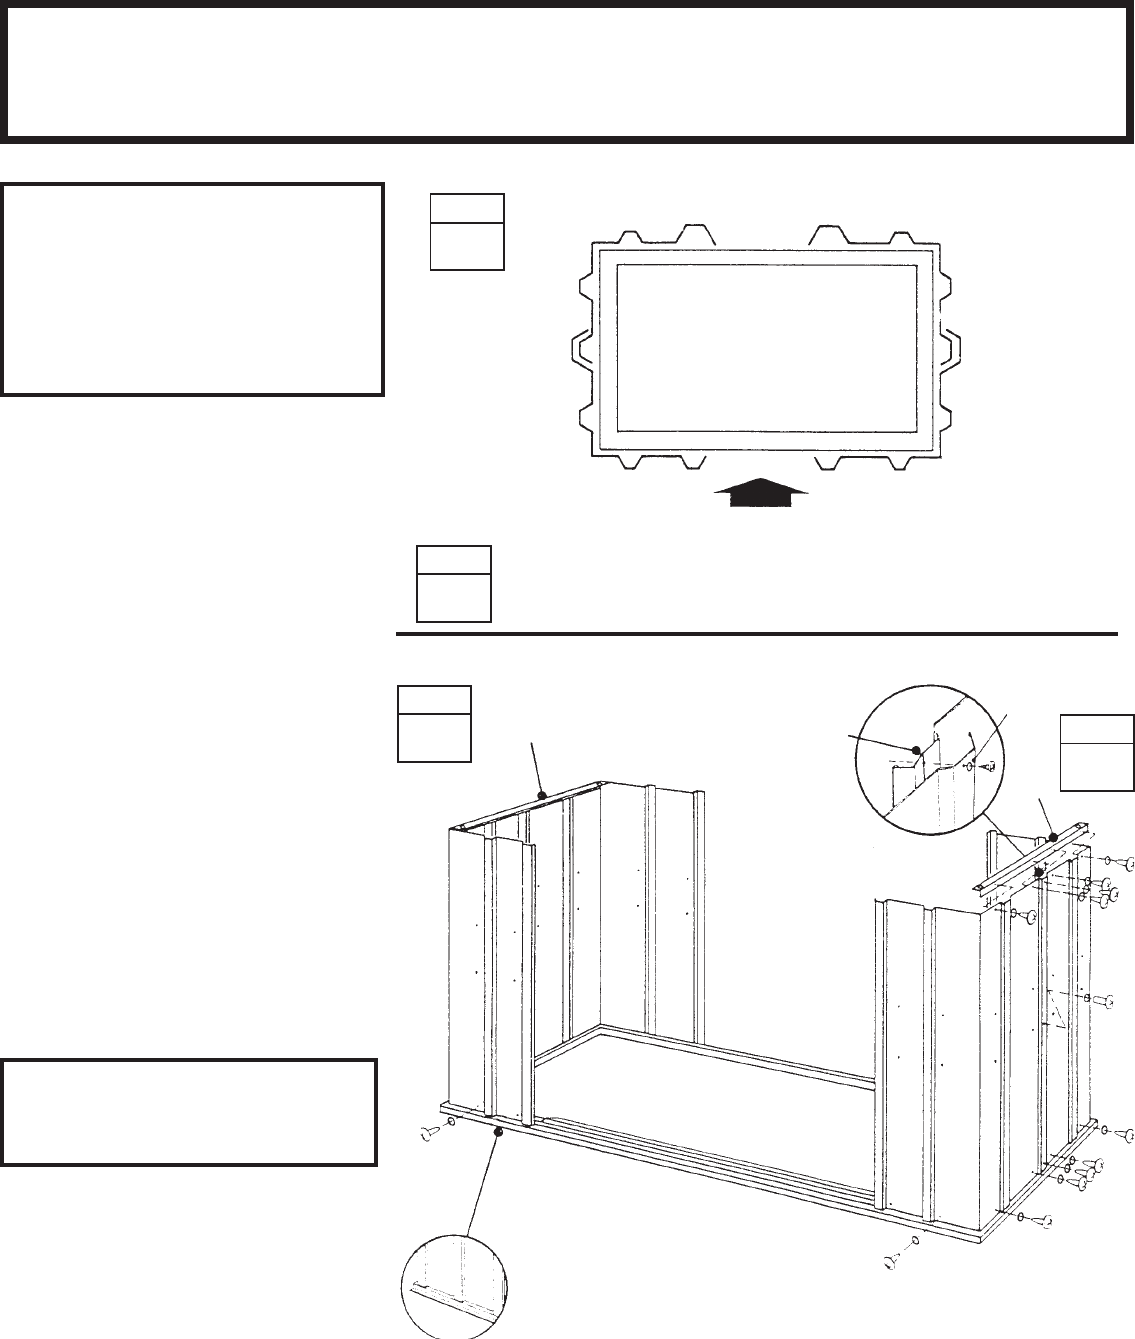
1Position right & left front corner
panels at the corners of the floor
frame as shown. The widest part of
each corner panel must be placed
along the front of the building. Fasten
the corner panels to the floor frame
with three screws, where shown.
Support the corner panel with a step
ladder until overlap is fastened.
2Attach the rear corner panels to
the rear corners, as shown. The
crimped rib should go under the rib of
the adjacent panel. Fasten overlap-
ping rib using 2 screws and a bolt
with nut.
NOTE
Be careful to install the correct
panel in each position as shown
3Fasten the side wall angles across
the top of the side panels using
screws.
4Double-check the part numbers of
the corner wall panels, before pro-
ceeding.
The floor frame must be square
and level or holes will not align.
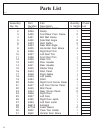
● Parts Needed For ●
Corners/Side Angles
●●
●●
● 9432 Side Wall Angle (two)
●●
●●
● 9446 Right Front Corner Panel (one)
●●
●●
● 9447 Left Front Corner Panel (one)
●●
●●
● 9444 Rear Corner Panel (two)
STEP
1
Narrow
Side
SIDE
SIDE
9444
REAR
Wide Side
9444
9447
9446
FRONT
Washer
Crimper Rib
Underneath
9432
9444
Keep holes aligned around
building, towards the top
9447
9432
9444
Screw
9446
Panels rest on
frame as shown
STEP
4
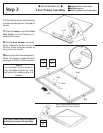
STEP
3
STEP
2
TOP VIEW