


GB - 18
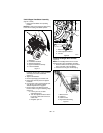
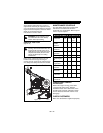
3. Remove the snow clean-out tool (1) from
the auger housing and use it to remove
the clog from the discharge chute.
4. Replace the snow clean-out tool on the
auger housing.
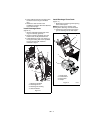
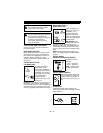
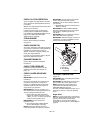
Discharge Chute Deflector
ALWAYS position discharge chute deflector
at a safe angle before starting engine.
DO NOT throw snow any higher than
necessary.
Push deflector handle forward or down to
throw snow lower. Pull deflector handle up or
to the rear to throw snow higher.
IMPORTANT: If Chute Deflector does not
stay in set position, adjust as directed in
SERVICE AND ADJUSTMENTS on page 25,
or repair before operation.
Remote Discharge Chute
Deflector Control (920014)
Place deflector into position before operation.
DO NOT throw snow any higher than
necessary.
Place deflector remote in a forward notch to
throw snow lower. Place deflector remote in a
rearward notch to throw snow higher.
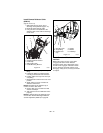
Discharge Chute
Discharge chute rotates 205°.
ALWAYS position discharge chute in safe
direction and angle, away from operator and
bystanders, before starting engine.
Discharge Chute Crank
IMPORTANT: If chute does not stay in set
position, adjust as directed in SERVICE AND
ADJUSTMENTS on page 25, or repair before
operation.
Rotate the chute with the discharge chute
crank handle.
IMPORTANT: DO NOT force frozen chute
controls. If frozen, take to warm place until
controls are free.
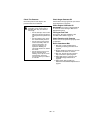
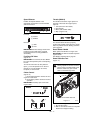
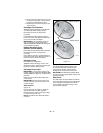
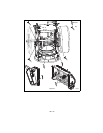
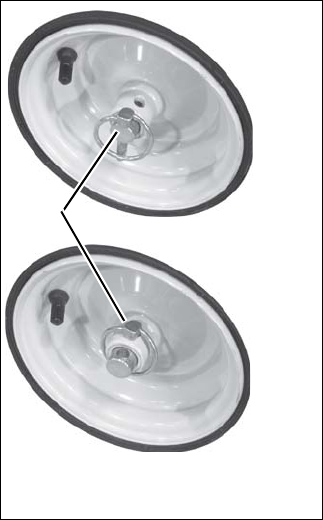
Axle Lock Pin
(Figure 18)
Use the axle lock pin to lock or unlock the
right or left wheel. Lock both wheels to
increase traction; unlock one wheel to allow
for easier turning of the unit.
NOTE: Unit will not drive with both wheels
unlocked.
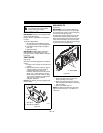
Scraper Blade
The scraper blade allows the back of the
housing to keep better contact with the
surface being cleared. It also prevents
damage to the housing from normal use.
IMPORTANT: DO NOT allow Scraper Blade
to wear too far or Auger/Impeller housing will
become damaged.
Skid Shoes
The skid shoes control the distance between
the scraper blade and the ground. Adjust skid
shoes equally to keep blade level with the
ground. Refer to Pre-Start on page 19 for
recommended settings.
Figure 18
Wheel Unlocked
Wheel Locked
1. Axle Lock Pin
OS8185
1