


GB - 17
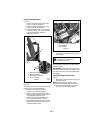
2. Check Dual Handle Interlock
Without the drive motor running, press down
(engage) both clutch levers. Release
attachment clutch lever. Attachment clutch
should remain engaged until traction clutch
lever is released, then both clutches must
disengage.
If clutches do not engage or disengage
properly, adjust or repair before operation
(see Attachment Clutch/Brake Adjustment on
page 25 and Traction Drive Clutch
Adjustment on page 27).
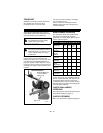
3. Check Axle Lock Pins
Use the axle lock pins to lock or unlock the
wheels. Lock both wheels to increase
traction; unlock one wheel to allow for easier
turning of the unit.
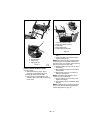
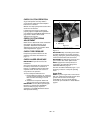
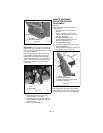
4. Check Skid Shoes
Check and adjust skid shoes (Skid Shoes on
page 20). Allow 1/8 in. (3 mm) between
scraper blade and hard, smooth surface(s).
Allow 1-1/4 in. (30 mm) between scraper
blade and uneven or gravel surfaces.
TO STOP IN AN EMERGENCY
Immediately release both control levers to
stop unit in an emergency. Disengage PTO
switch, remove key and wait for all rotating
parts to stop before leaving operator’s
position.
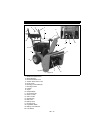
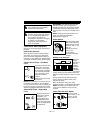
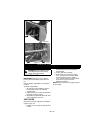
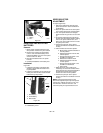
STARTING AND SHUT OFF
See Figure 10 for all Controls and Features.
Starting
IMPORTANT: Disengage PTO and release
both controls before turning power switch to
ON position.
1. Insert key and turn power switch to the
ON position. LED in battery level
indicator will glow. Drive motor will not
yet run.
2. Engage PTO switch. Drive motor will
run.
Stopping
1. Release traction drive clutch lever and
allow unit to come to a complete stop.
2. Run impeller a few minutes after use to
prevent freeze-up of Impeller.
3. Release attachment clutch lever and
wait for all moving parts to come to a
complete stop.
4. Disengage PTO switch. Drive motor will
stop.
5. Turn power switch to OFF position and
remove key.
6. Attach unit to battery charger.
NOTE: Try out each control without the drive
motor running to see how it works and what it
does.
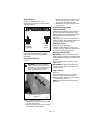
SNOW REMOVAL
NOTE: Attachment clutch should be engaged
before wheel drive clutch when throwing
snow.
1. Select speed control position and
direction.
2. Engage attachment clutch (right-hand
lever).
3. Engage traction drive clutch (left-hand
lever).
IMPORTANT: DO NOT overload unit capacity
by attempting to clear snow at too fast a rate.
Use slow speed to clear deep or hard packed
snow.
Low Battery Voltage
If unit is run to the point of shutting down due
to low battery voltage:
1. Disengage PTO switch and turn power
switch to OFF position.
2. Manually move unit to a safe location.
3. Wait 2 – 5 minutes and move power and
PTO switches to the ON position. Do not
engage attachment clutch.
Batteries will regenerate enough power to
drive unit back to charging area. Immediately
attach battery charger to unit and charge fully.
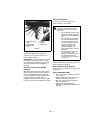
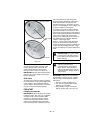
Tips for Operation
Snow is best removed as soon as possible
after snow fall.
To clear an area, run unit in an overlapping
series of paths. For large areas, start in the
middle and throw snow to each side, so snow
is not cleared more than once.
ALWAYS direct snow away from area to be
cleared and with direction of the wind.
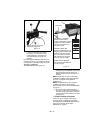
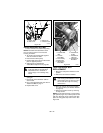
TRAVELING
To travel from one work area to another:
1. Press down on handlebars enough to
raise front of unit slightly off surface.
2. Engage traction drive clutch without
engaging attachment drive clutch.
WARNING: FAILURE TO FOLLOW
INSTRUCTIONS could result in
personal injury and/or damage to
unit. DO NOT attempt to start your
unit at this time. Read entire
Owner/Operator Manual first.