


4
TOOLS REQUIRED FOR ASSEMBLY
(1) Pliers
(2) 7/16" Open End or Box Wrenches
(2) 9/16" Open End or Box Wrenches
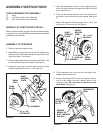
ASSEMBLY INSTRUCTIONS
REMOVAL OF PARTS FROM CARTON
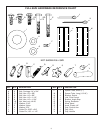
Refer to carton contents on page 2 and to the hardware chart
on page 3 to lay out and identify parts and hardware needed
to assemble the spreader.
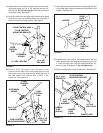
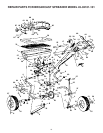
5. Place the short spacer tube and a 3/4" washer onto the
end of the axle that has the large drilled hole (left hand
side). See figure 2.
6. Place the drive wheel onto the axle. The notched hub
and the air valve should face to the outside. See figure
2.
7. Fasten the wheel to the axle using a 1/4" x 1-3/4" hex
bolt and a 1/4" hex lock nut. See figure 2.
REMOVE
MIDDLE 3/8"
BOLT, WASHER
AND NUT
SHAFT
SUPPORT
PLATE
CROSSOVER
TUBE
FIGURE 3
FIGURE 2
8. Tip the spreader over to rest on the front edge of the
hopper and on the wheels.
9. Remove the middle 3/8" hex bolt, flat washer and hex
lock nut that fasten the shaft support plate to the
crossover tube. Do not loosen or remove the two
outer bolts. See figure 3.
1/4" x 1-3/4"
HEX BOLT
DRIVE
WHEEL
SHORT
SPACER
TUBE
3/4" WASHER
1/4" HEX
LOCK NUT
SHAFT
SUPPORT
PLATE
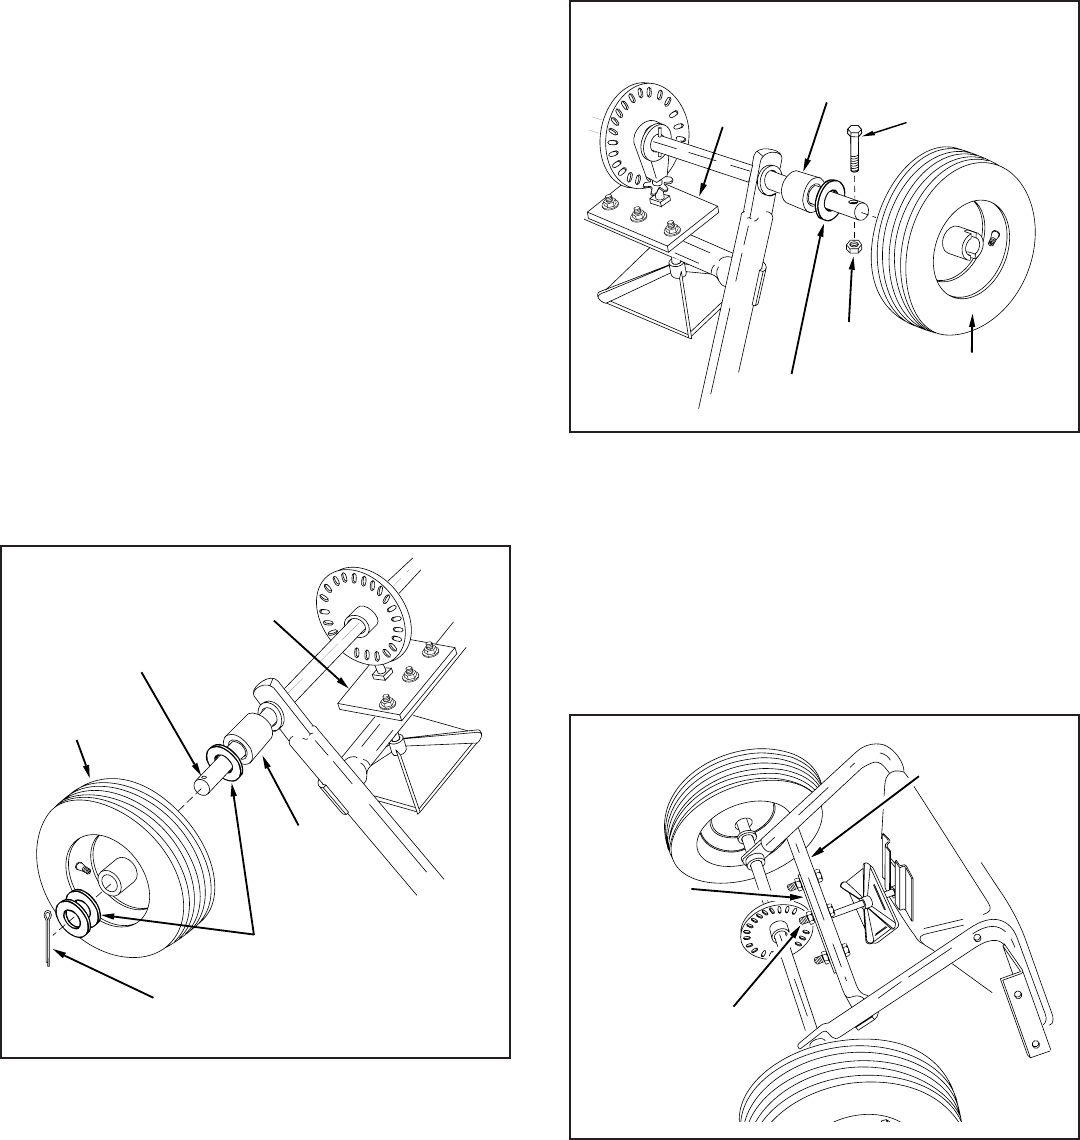
FIGURE 1
3/4" WASHERS
IDLER
WHEEL
SMALL
HOLE
LONG
SPACER
TUBE
1/8" x 1-1/2"
COTTER PIN
SHAFT
SUPPORT
PLATE
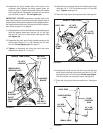
ASSEMBLY OF SPREADER
1. Place the spreader upside down.
2. Assemble the long spacer tube and a 3/4" washer onto
the end of axle of the axle that has the small drilled hole
(right hand side). See figure 1.
3. Place the idler wheel (no notch in hub) onto the axle. The
air valve should face to the outside. See figure 1.
4. Assemble one or two more 3/4" washers onto the axle
and then assemble the 1/8" x 1-1/2" cotter pin.