


13
WHEEL GEAR AND PAWL SERVICE
IMPORTANT: Do not remove both wheels at the same
time to avoid mixing of parts. (The R.H. and L.H. ratchet
gears are not interchangeable.) Make notes on the position
of washers and snap rings during disassembly.
1. Remove only one wheel from the sweeper.
2. Remove the retaining rings and washers which hold the
ratchet gear onto the brush shaft.
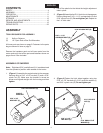
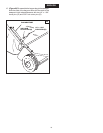
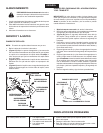
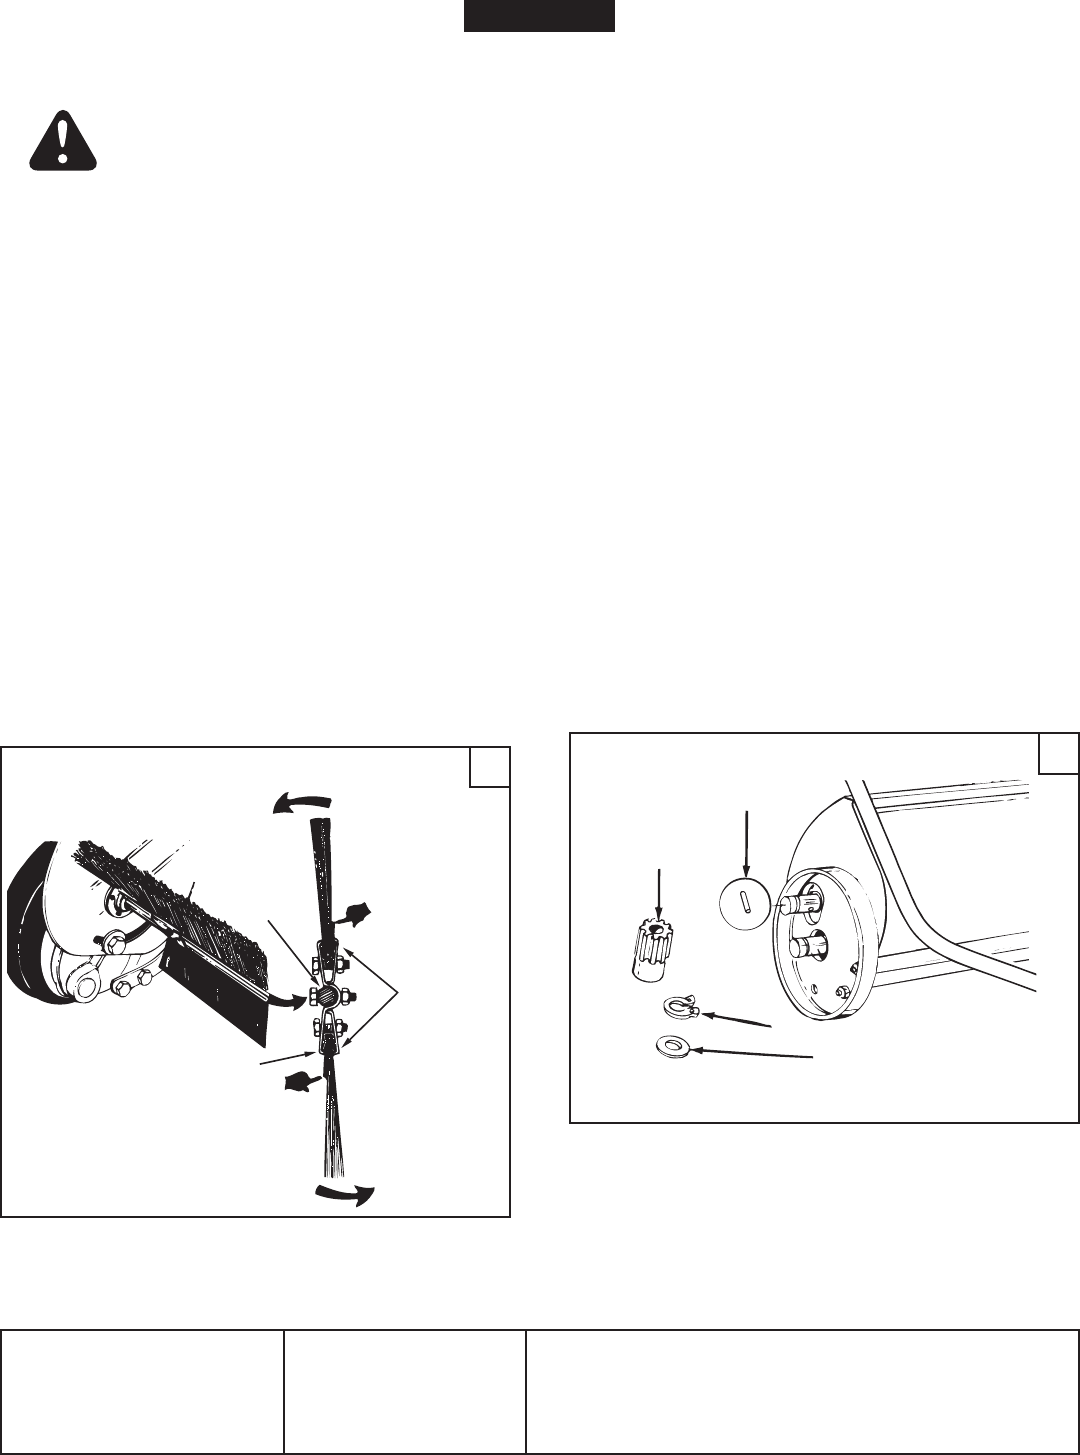
3. (Figure 28) Remove the gear by sliding it off the brush
shaft. (Look for the drive pin, which may fall out of the
brush shaft when the ratchet gear is removed.)
4. To reassemble, insert the drive pin through the hole
near the end of the brush shaft. Make sure the pin slides
back and forth easily in the shaft.
5. Lightly grease the shaft and ll the ratchet gear with
grease. Assemble the ratchet gear back onto the
shaft.
6. Lightly grease the axle and the gear teeth on the wheel,
and then reassemble the wheel. The brushes should
rotate only during forward rotation of the wheel. If the
brushes are driven (rotated) by both forward and reverse
rotation of the wheel, the drive pin is jamming in the
ratchet gear. Disassemble to clean and lubricate the
drive pin and the ratchet gear.
7. Remove the second wheel and repeat the procedure.
BRUSH REPLACEMENT
NOTE: Brush replacement should be done one brush
at a time.
1. Remove the hopper bag from the sweeper.
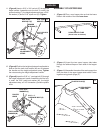
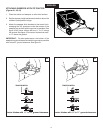
2. (Figure 27) Loosen the hex bolts and lock nuts on two
single brush retainers which clamp one brush to the
double brush retainers. Do Not loosen or remove the
bolts which fasten the double brush retainers to the
brush shaft.
3. (Figure 27) Slide the brush out of the retainers, noting
on which side of the brush the bristles overlap.
4. (Figure 27) Install new brush, making sure the bristles
overlap on the same side of the brush as before.
1. Brushes set too low.
2. Brushes are jammed
3. Wheels are jammed.
Wheels skid when sweeping. 1. Adjust height till brushes are 1/2" down into grass.
2. Stop sweeper. Remove obstruction.
3. Remove one wheel at a time to check for obstruction or
damage. Refer to Service and Adjustments section.
SERVICE AND ADJUSTMENTS
TROUBLESHOOTING
27
28
ENGLISH
1. Clean the sweeper and hopper bag thoroughly to help
prevent rust and mildew.
2. To collapse the hopper bag for storage, remove the two
hopper support rods from the rear of the hopper.
3. Store in a dry area.
CAUTION: Before storing the sweeper,
always empty the hopper bag to avoid
spontaneous combustion.
STORAGE
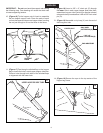
BRUSH ROTATION
BRUSH ROTATION
OVERLAP
BRISTLES
OVERLAP
BRISTLES
SINGLE
BRUSH
RETAINERS
DOUBLE BRUSH RETAINER
BRUSH
SHAFT
DRIVE PIN
RATCHET
GEAR
FLAT WASHER
RETAINING RING