• Using the PF-Pro Disc Printer
14
Changing Print Quality
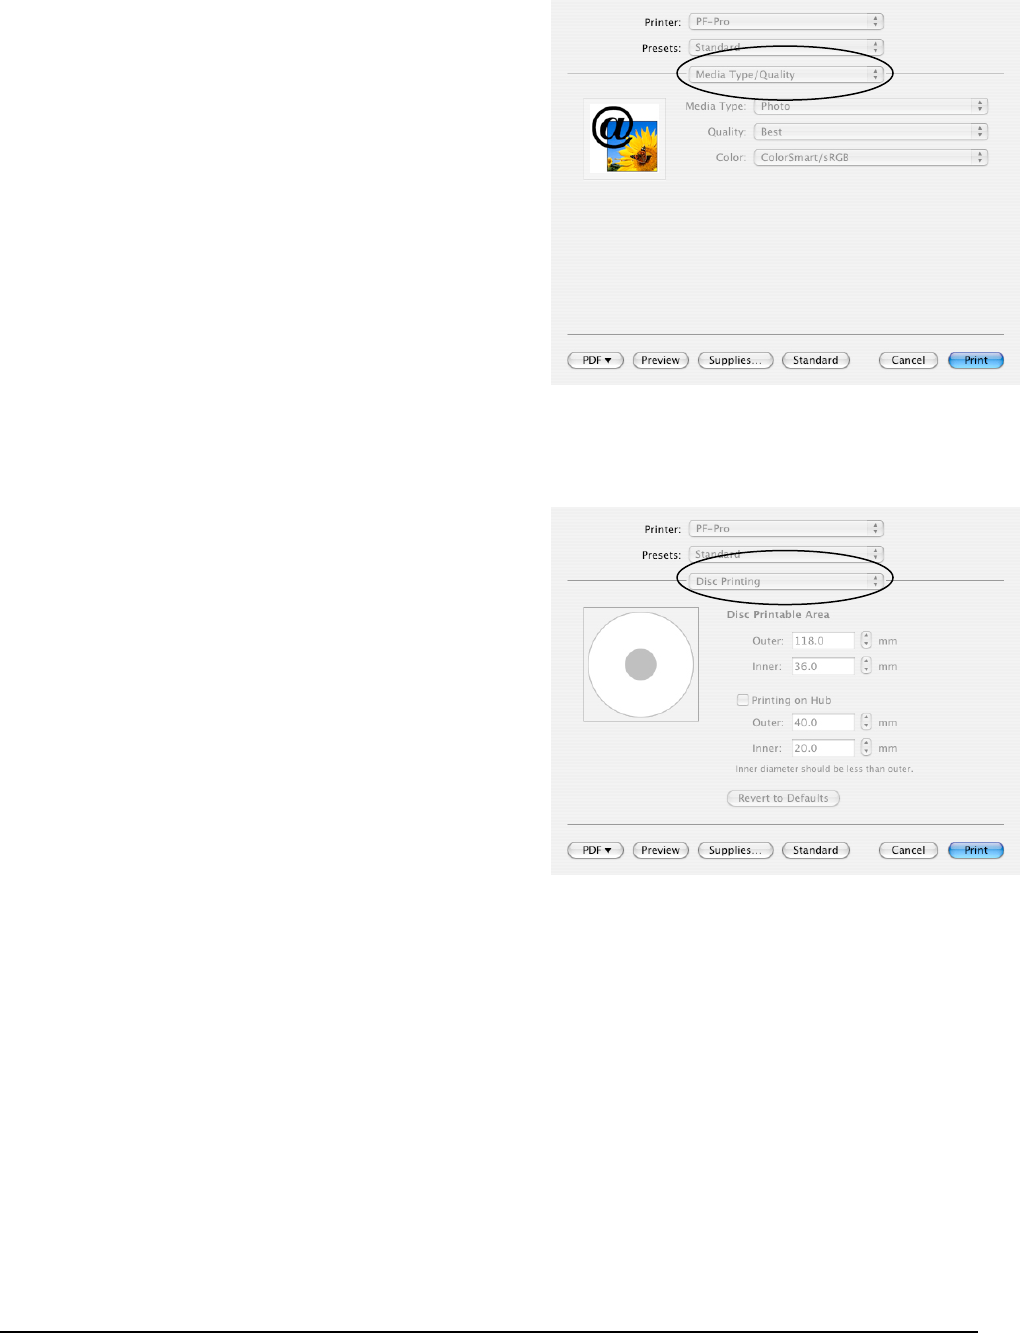
To change the Print Quality, click the Advanced
button on the Print screen. Select the Media
type/Quality option from the list circled to the right.
The settings to the right will appear.
You can select either Photo or Graphics and Text
as the Media Type. Photo will take longer to print
and will use more ink, but the quality will be higher.
Graphics and Text, on the other hand, has a lower
quality but will print in less time with less ink used.
You can also choose between Draft (Graphics and
Text only), Normal, Best, and Maximum dpi
(Photo only) from the Quality list. The choices are
listed in order of lowest to highest quality and ink
usage.
Color can be selected as ColorSmart/sRGB,
ColorSync, or Grayscale.
Changing Print Diameters
Different media types and brands may vary in the
size of the printable surface. When the print
surface changes, you will need to set the printer to
the correct sizes.
Always make sure the images are printing centered
on the disc before changing the diameter settings.
If the image is not centered, please refer to page
10 for infomration on the alignment process.
To change the diameter of the printed area, click
the Advanced button on the Print screen. Select
the Disc Printing option from the list circled to the
right. The settings to the right will appear.
The Outer setting will change how closely to the
edge of the disc the image will print. Increase the
Outer setting to leave less unprinted area at the
outer edge. Decrease the Outer setting to leave
more unprinted area at the outer edge..
The Inner setting will change how closely to the center of the disc the image will print. Decrease the
Inner setting to leave less unprinted area at the center. Increase the Inner setting to leave more
unprinted area at the center.
You should never have the printer attempting to print off the
printable surface. This will leave unabsorbed ink on the disc.
