


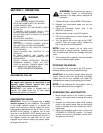
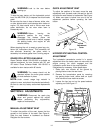

20
12. Remove and replace the belt, reassemble
following the instructions in reverse order.
DECK BELTS (46" DECK)
1. Place the lift lever in the engaged (all the way
forward) position.
2. Disconnect the spring which is attached to a
bracket on the transaxle, inside the right rear
wheel. Use a spring puller or other suitable tool.
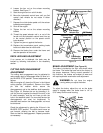
NOTE:
When reassembling, make certain belt
keeper pins are assembled in the same locations
from which they were removed. See Figure 25.
3. Place the lift lever in the BLADES STOP
position.
4. Remove the belt keeper pins from the lower
frame. See Figure 25.
5. Unhook the deck belt from the engine pulley.
6. Place the lift lever in the engaged (all the way
forward) position.
7. Disconnect the stabilizer plate from the
stabilizer shaft assembly by removing the
hairpin clips and flat washers and sliding out the
rod. Refer to Figure 18.
8. Disconnect the six deck links by removing the
hairpin clips and flat washers.
9. Place the lift lever in the BLADES STOP
position.
10. Slide the deck from beneath the lawn tractor.
11. Remove the top deck drive belt by lifting up on
the stabilizer plate, and slipping belt off the
pulley.
12. Remove the belt cover at the two outside deck
pulleys, by removing the self-tapping screws.
13. Release the tension on the spring loaded idler
by pushing the idler toward the rear of the deck.
14. Remove the belt from around the idler pulleys,
and remove from the three deck pulleys.
15. Reassemble new belts, following instructions in
reverse order.
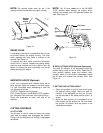
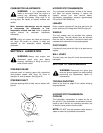
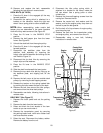
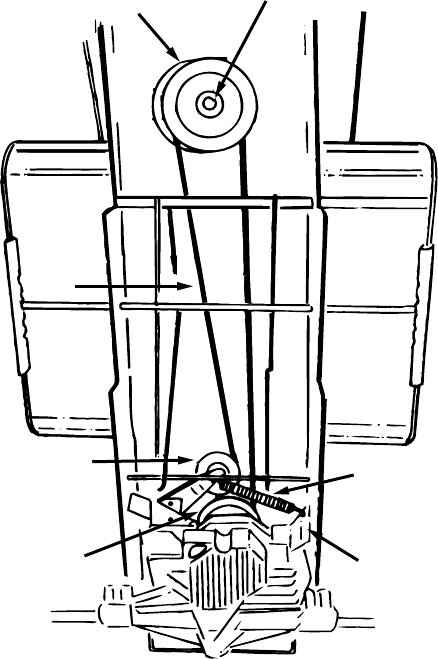
DRIVE BELT (See Figure 27)
1. Depress the clutch pedal and set the parking
brake.
2. Remove the deck from the lawn tractor.
3. Raise and block the front wheels of the lawn
tractor so you can work under it.
4. Remove the transmission panel by removing
the parking brake knob, relief valve rubber boot
and truss machine screws.
5. Raise the seat. Disconnect the battery cables.
Remove the battery from the unit.
6. Disconnect the idler pulley spring which is
attached to a bracket on the frame, inside the
left rear wheel. Use a spring puller or other
suitable tool.
7. Remove the three self-tapping screws from the
cooling fan. Remove the fan.
8. Remove the center bolt, lock washer and flat
washer, and let the engine pulley drop down so
the belt is past the belt guards.
9. Roll the belt off of top sheave of engine pulley,
onto the pulley hub.
10. Remove the belt from the transmission pulley
and engine pulley, and remove from the unit.
11. Reassemble using a new belt, following
instructions in reverse order.
Figure 27
Center Bolt
Lock Washer
Flat Washer
Engine
Pulley
Drive
Belt
Idler
Pulley
Idler
Pulley
Spring
Bracket
Transmission
Pulley