


18
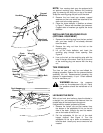
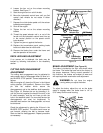
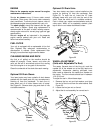
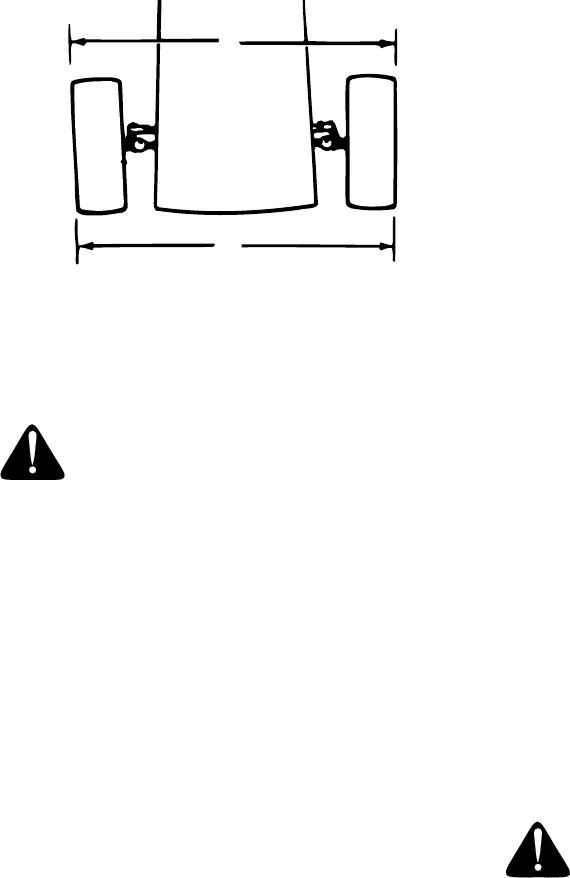
Dimension ‘‘B’’ should be approximately 1/16"-5/16"
less than Dimension ‘‘A.’’ See Figure 24. To
increase Dimension ‘‘B,’’ screw tie rod into tie rod
end. To decrease Dimension ‘‘B,’’ unscrew tie rod
from tie rod end. Reassemble tie rod. Check
dimensions. Readjust if necessary.
Figure 24
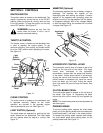
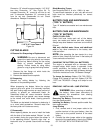
CUTTING BLADES
A. Removal for Sharpening or Replacement
WARNING: Be sure to disconnect and
ground the spark plug wire(s) and remove
ignition key before working on the cutting
blade to prevent accidental engine
starting. Protect hands by using heavy
gloves or a rag to grasp the cutting blades.
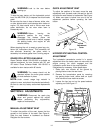
1. Remove the hex flange nut which holds the
blade to the blade spindle.
2. Remove the blade from the spindle.
B. Sharpening
Remove the cutting blades by following the
directions of the preceding section.
When sharpening the blades, follow the original
angle of grind as a guide. It is extremely important
that each cutting edge receives an equal amount of
grinding to prevent an unbalanced blade. An
unbalanced blade will cause excessive vibration
when rotating at high speeds, may cause damage
to the mower and could break, causing personal
injury.
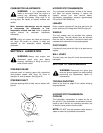
The blade can be tested for balance by balancing it
on a round shaft screwdriver. Remove metal from
the heavy side until it balances evenly.
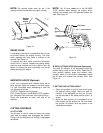
C. Reassembly
When replacing blades, be sure to install the blade
with the side of the blade marked ‘‘Bottom’’ (or with
part number) facing the ground when the mower is
in the operating position. Carefully align “star” on
blade with “star” on spindle. Secure with hex flange
nut.
Blade Mounting Torque
Hex Flange Nut: 840 in. lb. min., 1080 in. lb. max.
To ensure safe operation of your unit, all nuts and
bolts must be checked periodically for correct
tightness.
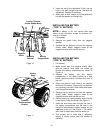
BATTERY CARE AND MAINTENANCE
(TYPE “A” BATTERY)
Type “A” batteries are sealed and are maintenance
free.
BATTERY CARE AND MAINTENANCE
(TYPE “B” BATTERY)
CHECK FLUID LEVEL
Check fluid level inside each cell of the battery
every two weeks and before and after charging.
Always keep level between maximum and minimum
fill level.
Add only distilled water. Never add additional
acid or any other chemicals to the battery after
initial activation.
NOTE:
After operating the lawn tractor for a long
period of time, check the fluid level in the battery as
it can overheat and lose fluid.
CHARGING THE BATTERY (ALL BATTERIES)
The engine is equipped with an alternator which
charges battery when tractor is operated. Under
normal conditions, the battery only needs to be
charged before, during and after off-season storage.
Follow the instructions under “Off-Season Storage.”
To charge the battery: Battery P/N 725-1705C—
Charge at 2-3 amps for one hour. Battery P/N 725-
1707C and 725-0453F—Charge at 6 amps for one
hour.
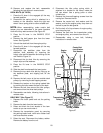
REMOVING / INSTALLING / JUMP STARTING
WARNING: When removing or installing
the battery, follow these instructions to
prevent the screwdriver from shorting
against the frame.
Removing the Battery: Disconnect negative cable
first, then positive cable.
Installing the Battery: Connect positive cable first,
then negative cable.
Jump Starting
1. First, connect end of one jumper cable to the
positive terminal of the good battery, then the
other end to the positive terminal of the dead
battery.
2. Connect the other jumper cable to the negative
terminal of the good battery, then to the FRAME
OF THE UNIT WITH THE DEAD BATTERY.
A
B
1/16"-5/16" Less Than A