


NOTE: ff you have operated the tractor for a long
period, check the fluid level of the battery as it can
overheat and lose fluid.
Chargingthe Battery
The engine is equipped with an alternator which
charges battery when tractor is operated. Under normal
conditions, the battery onlyneeds to be charged b_fore,
during and after oft-season storage. Follow the
instructions under "Off-Season Storage."
• To charge the battery: Battery P/N 725-1705D---
Charge at 2-3 amps for one hour. Battery P/N 725-
1707D, 725-0453G, 725-1750, and 725-1706--
Charge at Gam_s for one hour.
Rem0vlng/ Re-Installingthe Battery
WARNING: When removing or installing
the battery, follow these instructions to
prevent the screwdriver from shorting against
the frame.
• Removing the Battery: Disconnect negative cable
first, then positive cable.
• Installing the Battery: Connect positive cable first,
then negative cable.
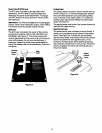
Jump Starting
• First, connect end of one jumper cable to the
positive terminal of the good battery, then the other
end to the positive terminal of the dead battery.
• Connect the otherjumper cable to the negative
terminal of the good battery, then to the frame of
the unit with the dead battery.
WARNING: Failure to use this procedure
could cause sparking, and the gas in either
battery could explode.
Clean the Battery
Clean the battery by removing it from the unit end
washing with a baking soda and water solution. If
necessary, scrape the battery terminals with a wire
brush to remove deposits. Coat terminals and exposed
wiring with grease or petroleum jelly to prevent
corrosion.
Battery Failures
Some common causes for battery failure are: incorrect
initial activation, lack of water, adding chemicals other
than water after initial activation, undercharging,
overcharging, corroded conneCtiOns,freezing. These
failures do not constitute warranty work.
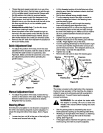
Tires
• Maximum tire pressure under any cimumstances is
30 p.s.i. Equal tire pressure should be maintained
on all tires. Check tire sidewalls for proper inflation.
• When installing a tire to the rim, be certain rim is
(;lean and free of rust. Lubricate boththe tire and
rim generously. Never inflate to over 30 p.s.J,to
seat beads.
WARNING: Excessive pressure (over 30
p,s.i.) when seating beads may cause tire/rirn
assembly to burst with force sufficient to
cause serious injury.
CleaningEngineandDeck
• Any fuel or oil spilled on the machine should be
wiped off promptly. Grass, leaves, and other dirt
must not be allowed to accumulate around the
cooling fins of the engine or on any part ofthe
mechirJe. Clean the underside of the deck after
each mowing.
FuelFilter
Your unit is equipped with a replaceable in-line fuel
filter. Replace filter whenever contamination or
disco|oration is noticed. Order replacement fitter
through an authorized engine service dealer.
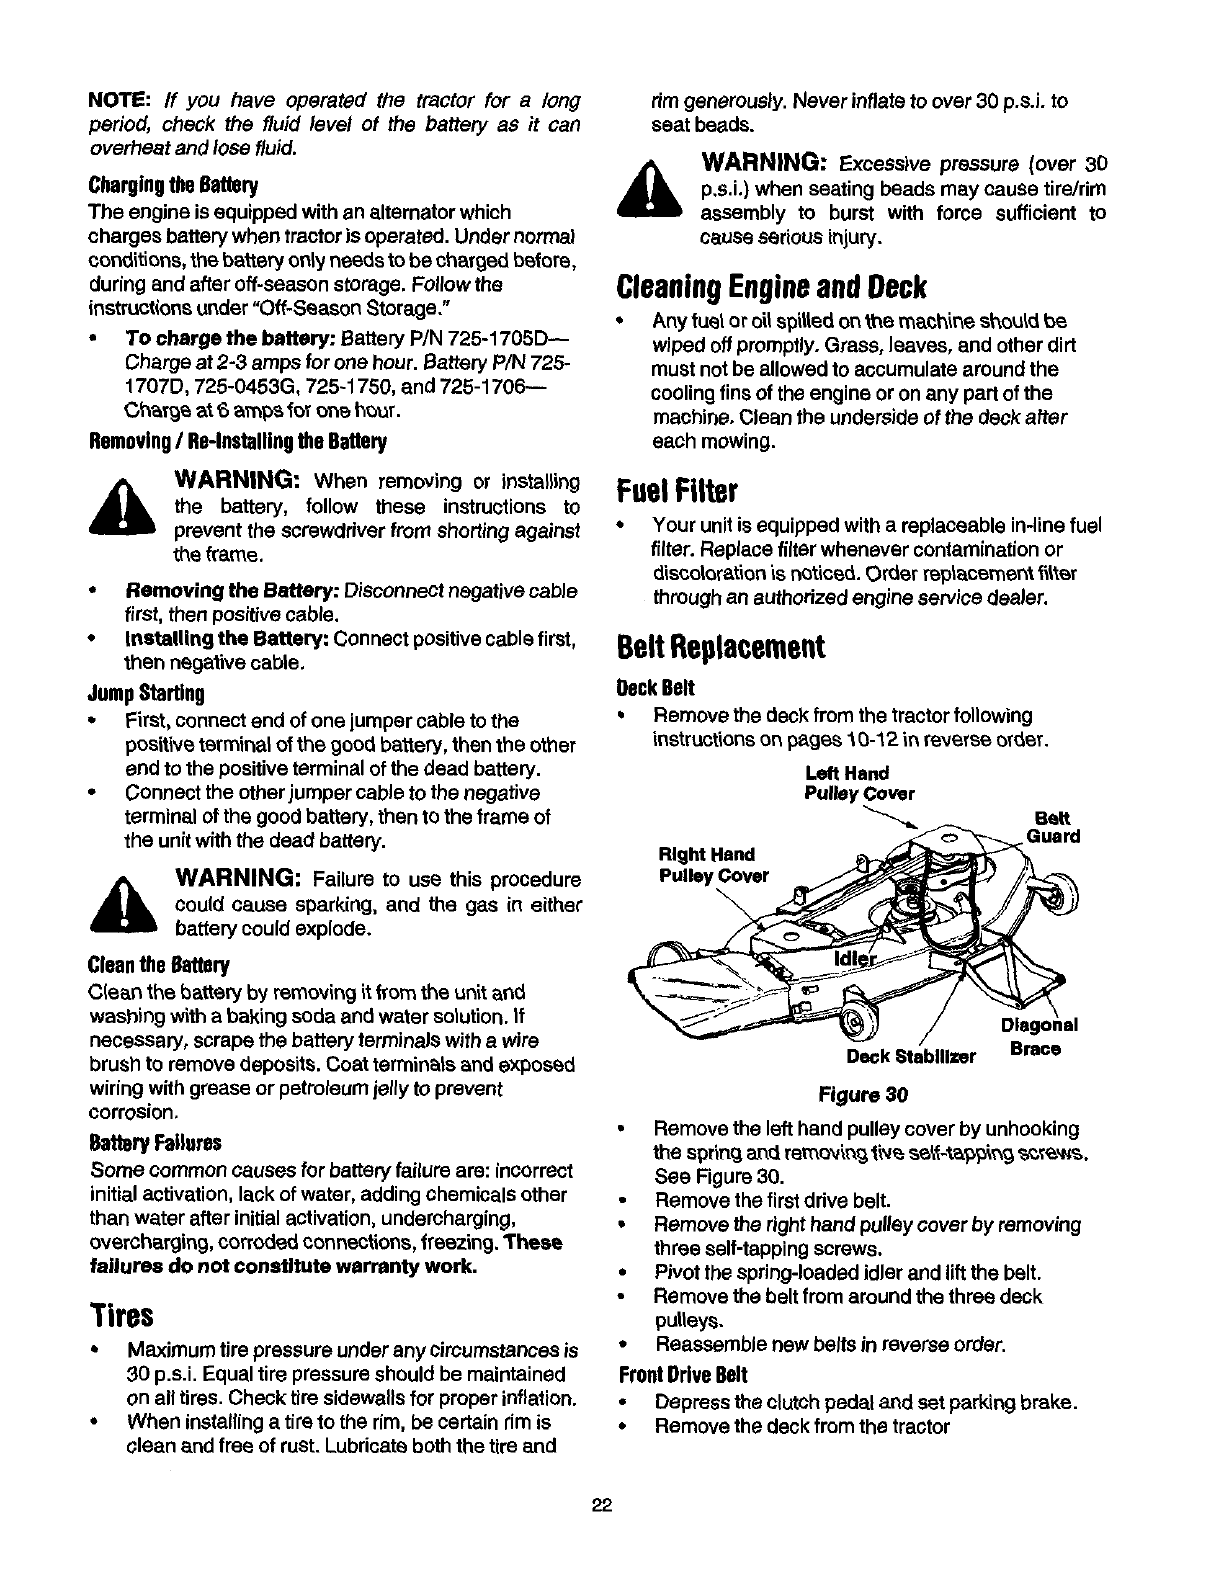
BeltReplacement
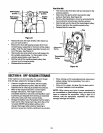
BackBelt
• Remove the deck from the tractor following
instructions on pages 10-12 in reverse order.
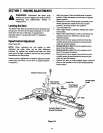
Left Hand
Pulley Cover
Belt
Guard
Rlght Hand
Pulley Cover
\
Dlago\nal
Deck Stabilizer Brace
Figure 30
• Remove the left hand pulley cover by unhooking
the spring and removing ti,4_s_1_,_gj _,_,Ns,
See Figure 30.
• Remove the first drive belt.
• Remove the dght hand pulley cover by removing
three self-tapping screws.
• Pivot the spring-loaded idler and lift the belt.
• Remove the belt from around the three deck
pulleys.
• Reassemble new belts in reverse order.
FrontDriveBelt
• Depress the clutch pedal and set parking brake.
• Removethe deck fromthe tractor
22