


12
NOTE: We do NOT recommend the use of pressure
washers to clean your unit. They may cause damage
to electric components, spindles, pulleys, bearings or
the engine. The use of pressure washers will result in
shortened life and reduced serviceability.
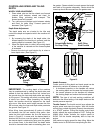
BELT REMOVAL AND REPLACEMENT
Your tiller has been engineered with belts made of
special material (Kevlar Tensile). They should not be
replaced with an off-the-shelf belt. If belt replacement
is required, order belt or belts by part number from
your nearest authorized service dealer.
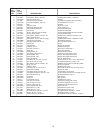
Forward Drive Belt - Part No. 754-0428
Reverse Drive Belt (390 Only) - Part No. 754-0429
Reverse Drive Belt (Model 390 Only)
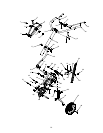
1. Disconnect and ground the spark plug wire against
the engine.
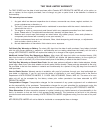
2. Remove the two hex washer screws from the front
of belt cover and remove the hex nut and flat
washer from the side of the belt cover.
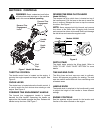
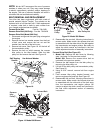
3. Remove belt cover. See Figure 18. Lift the belt off
the transmission pulley.
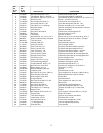
4. Remove the hex nut which secures the reverse
idler pulley to the idler bracket. Slide the idler
pulley out and remove the belt. See Figure 19.
Figure 18
Figure 19 Model 390 Shown
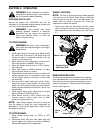
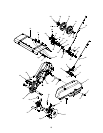
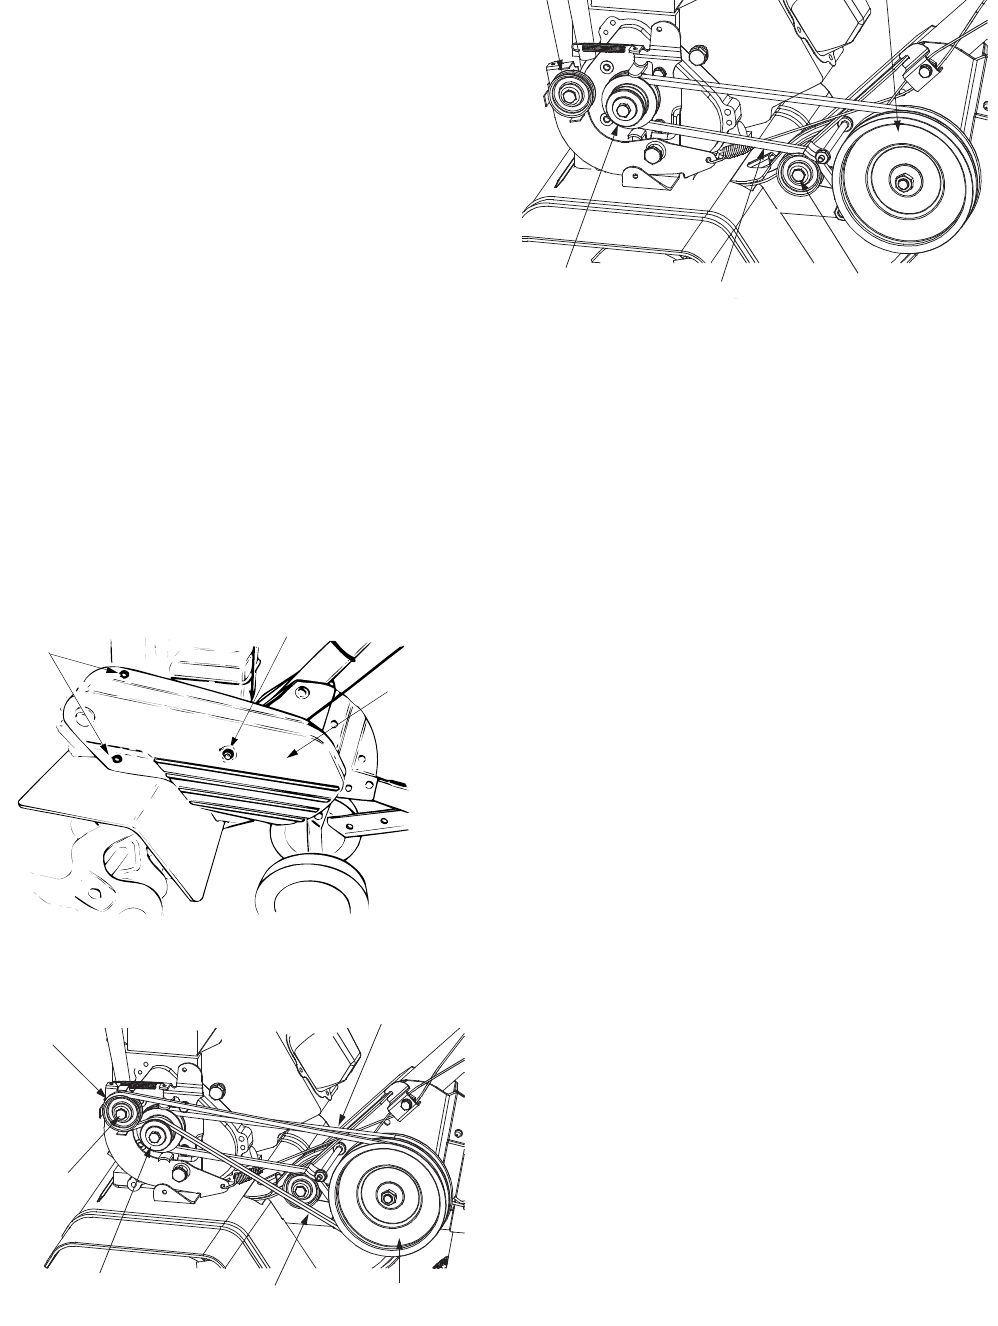
Figure 20 Model 390 Shown
5. Reassemble the new belt, following instructions in
reverse order. Make certain the reverse drive belt
is assembled with the wide side of the belt against
the transmission and engine pulleys. Be certain to
adjust the clutch control as instructed in the final
clutch adjustment section of assembly instructions
Forward Drive Belt (See Figure 20)
1. Model 340: Remove the belt cover by following
step 1 and step 2 of the previous section.
Model 390: Remove the reverse drive belt as
instructed in the previous section.
2. Remove the belt keeper from the idler pulley by
removing the idler pulley nut.
3. Lift belt off the idler pulley and transmission pulley.
See Figure 20.
4. Using a 9/16" wrench, remove bolt from engine
pulley.
5. Push reverse idler pulley bracket forward, and
remove engine pulley and belt. See Figure 20.
6. Reassemble the new belt, following instructions in
reverse order. Make certain the forward drive belt
is assembled with the wide side of the belt away
from the transmission and engine pulleys. Be
certain to adjust the clutch control as instructed in
the final clutch adjustment section of assembly
instructions.
Hex Nut and Washer
Self-Tapping
Screws
Belt
Cover
Reverse
Idler
Pulley
Hex Nut
Reverse Belt
Forward Belt
Transmission
Pulley
Engine Pulley
Engine
Pulley
Forward
Belt
Idler Pulley Nut