Installation
2–10 975-0053-01-01
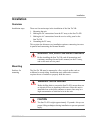
To mount the Sun Tie XR:
1. Locate the area where the Sun Tie XR is to be installed. Installing it
as close to the utility service panel as possible is recommended. The
bottom of the unit must be at least 36 inches from the floor or ground
when mounted.
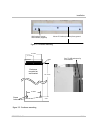
2. Using a level, place the mounting bracket up to the wall (in a
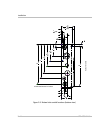
horizontal position) and mark the area for the three screws, as shown
in Figure 2-4. To achieve the 36-inch height from the bottom of the
Sun Tie XR to the ground, mount the bracket 70 inches from the
ground.
3. If required, remove the bracket and drill the holes using a #10 (0.193
"
diameter) drill bit. Drill appropriately sized holes for anchors when
installing on non-wood surfaces.
4. Mount the bracket to the wall using the screws and washers provided.
If mounting to a surface other than wood, use the appropriate screws
and anchors.
5. Place the Sun Tie XR’s rear lip, located on the back top of the
enclosure, over the bracket and ensure it is seated properly, as shown
in Figure 2-5.
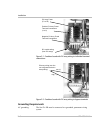
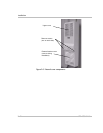
6. Remove the lower external cover to access the internal circuit breaker
panel by removing the screw on each side of the cover with a 3/32
"
hex bit, as shown in Figure 2-6.
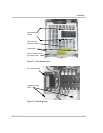
7. Remove the internal breaker panel by removing the screws in the
breakers and the breaker cover grounding screw. Lift the panel until
the lower locking tabs are free, then gently pull the inner cover
outward, as shown in Figure 2-7. Save the screws for reinstallation.
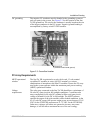
8. After the unit is correctly seated on the upper bracket, locate the two
screw holes in the bottom (back) area of the enclosure and mark these
locations on the wall, as shown in Figure 2-5 and Figure 2-8. Remove
the Sun Tie XR (if required).
9. Drill two pilot holes (as above, if required).
10. Reinstall the Sun Tie XR to the bracket and secure the bottom of the
unit with the wood screws and washers provided (or appropriate
screws and anchors for non-wood surfaces) and tighten.
Note:
Mounting hardware for surfaces other than wood is not
supplied.


